|
|
|
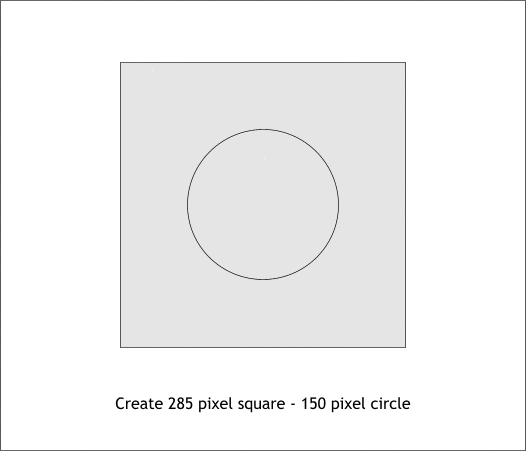
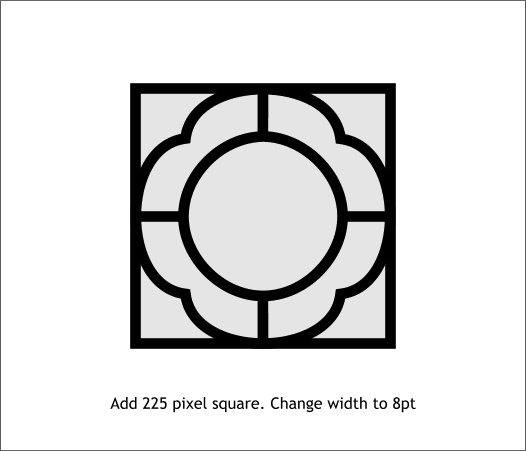
In the past we have looked at various ways of create a stained glass effect, or to be more accurate, a leaded glass effect. In this last mini-tutorial of 2005, we'll use some of the techniques we have seen in this Workbook to create a new stained glass effect. Draw a circle and square to the sizes shown.
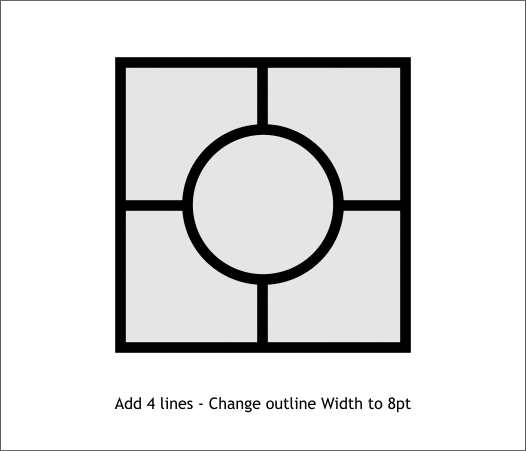
Add 4 lines and change all the line Widths to 8pt.
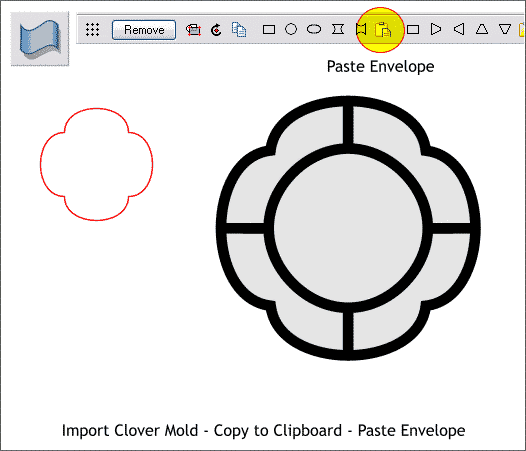
Group the lines, circle and square. Drag the Clover Mold shape from the Clipart Gallery folder you created for the Tony Roberts Molds (see Page 3 if you have not done this already). Copy (Ctrl c) or cut (Ctrl x) the shape to the clipboard. The difference is copy places a copy in the clipboard and leaves the original on the page. Cut places a copy in the clipboard (the computers RAM memory) and deletes the object from the page. Select the group with the Mold Tool (Shift F6), and press the Paste Envelope icon on the Mold Tool Infobar.
Add a 225 pixel square and change the line Width to 8pt.
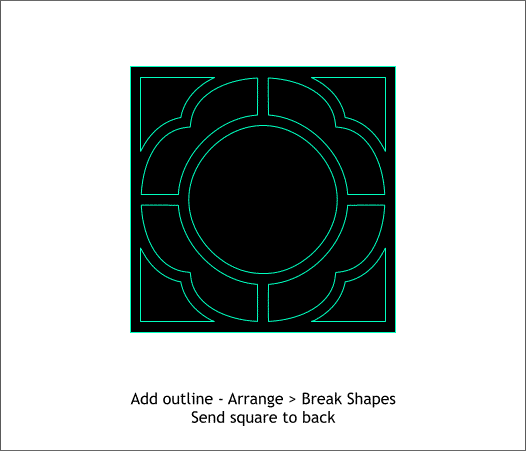
Select all the shapes and Arrange > Convert Line to Shape. Add an outline. Arrange > Combine Shapes > Add Shapes or press Ctrl 1. Now Arrange > Break Shapes. Select the black square in front and send it to the back (Ctrl b). Now you can see why we added the outline.
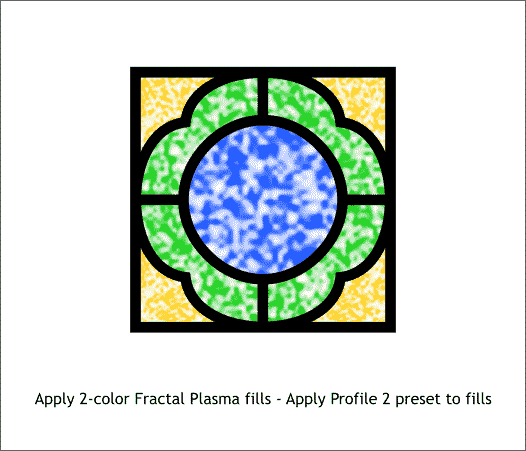
Using the Fill Tool (F5), apply 2-color Plasma fills to the various sections.
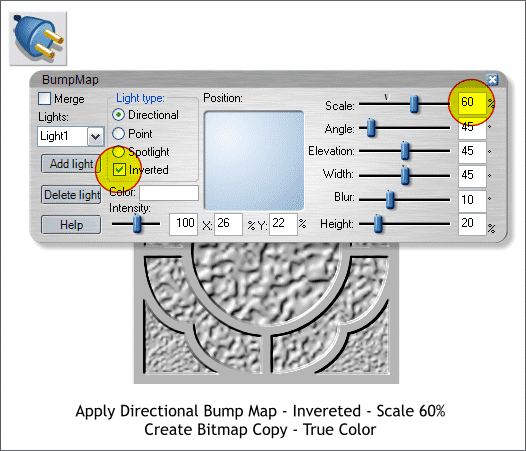
Select all the objects and then switch to the Live Effects Tool (Ctrl F5). From the New... drop down list, select 3D Bump Map. Check Inverted, which makes the shapes come forward, and change the Scale slider setting to 60. Select the shape and Arrange > Create Bitmap Copy. Use the True Color Color Depth setting. Set the bitmap to one side for now.
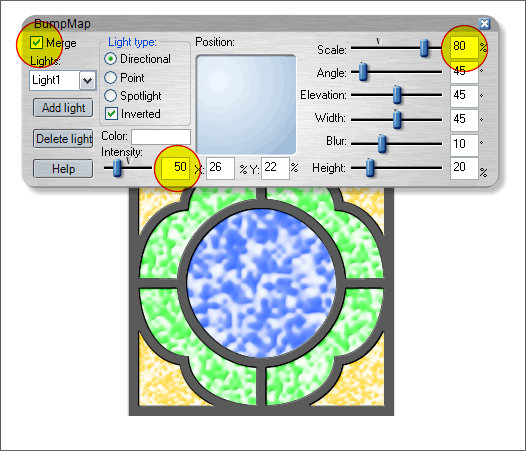
Select the 3D Bump Map with the Live Effects Tool. Press Edit on the Infobar. Change the Intensity setting to 50 and the Scale setting to 80%. Check Merge (in the upper left hand corner of the BumpMap dialog. This applies the 3D depth from the bump map to the colored shapes.
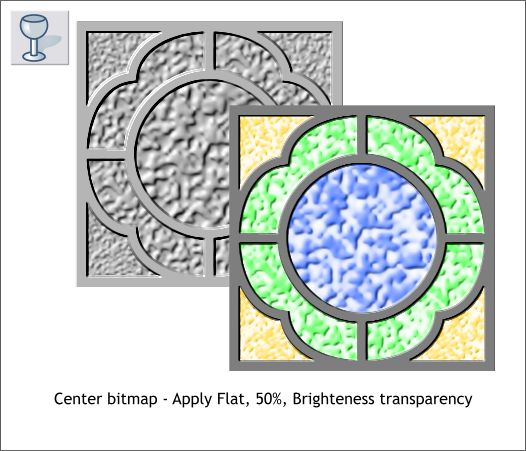
Center the bitmap over the shape and apply a Flat, 50% Brightness transparency to add more depth and texture.
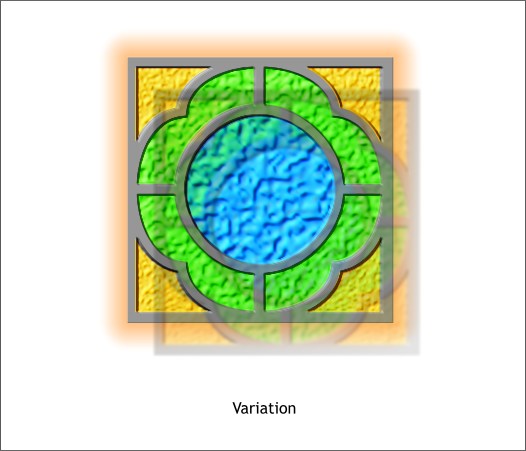
Here's a variation that I think works even better. I made several duplicates of the bitmap of the bump map. Selecting the bitmaps, I clicked on a light and dark color on the screen palette (left click for the light color and right click for the darker color) to create a yellow, blue, and a green version. Using the glass shapes from the break shapes operation, I used Combine Shapes > Intersect Shapes to cut out the appropriate colored parts. These were arranged over a non-colored version of the bitmap. HOW TO: Center the glass shape over the corresponding portion of the colored bitmap. Select both the glass shape and the colored bitmap and Arrange > Combine Shapes... Intersect Shapes or press Ctrl 3. A bitmap of the final stained glass image was made and blurred using the Live Effects Tool > New... > Enhance and moving the Blur/Sharpen slider to the left. The new blurred bitmap was placed on top of the glass image and offset down and to the right. A diagonal top left to bottom right Linear, Stained Glass transparency was applied making the stained glass panel appear to be transparent. This concludes this Workbook and is the last Workbook until February (I'll be taking January off to redecorate the Xara Xone and to grab a breather). I hope you feel you got your money's worth in 2005. Your comments and questions are always welcome. Please use the feedback form on the next page to send me your thoughts and comments. Gary W. Priester
|
||
|
|
