|
|
|
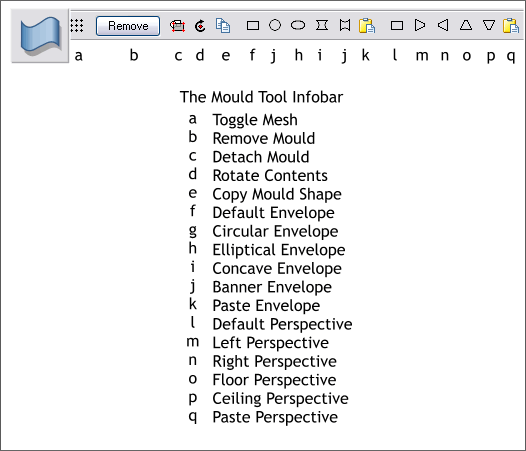
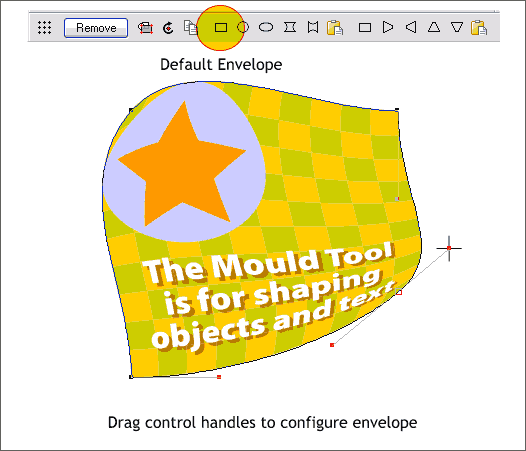
The Mold Tool (also spelled Mould Tool) is used to modify the shape of a selection using Envelopes which can be edited into a myriad of shapes. To apply one of these envelopes, select the object or objects you wish to modify, then select the Mold Tool (Shift F6). A series of envelopes and other options appears on the Mold Tool Infobar shown below. Click any of the envelope icons and the envelope is applied. The two rectangular envelopes do not immediately modify the object but await your edits. Click on any of the 4 corner control points and edit handles appear which you can drag to change the shape of the envelope. Envelopes are live effects and will change instantly as you modify them. In addition, the envelopes remain editable at any time unless you convert the contents to editable shapes ( Arrange > Convert to Editable Shapes). The other envelopes apply a preset effect as soon as you select them. But these too can be edited further if you wish.
Here is a brief explanation of the icons on the Infobar. a. Toggles a mesh (grid) on and off which changes as the envelope is edited. b. Removes the envelope and restores the selection to its original state. c. Detach Mould lets you modify the envelope without the changes taking place in real time. This is useful when working with complex or large selections. Press the icon again and all edits are applied at once. d. Rotates the envelope in 90 degree increments. e. Copy Mould copies the current envelope which you can Paste onto another selection. f. The Default Envelope is a curved sided envelope and lets you round the edges of the selection. g.-j. are preset round sided envelopes. k. Applies (Pastes) the current round sided envelope to another selection. l. Default Perspective is a straight-sided envelope which you can use to create perspective. m-p are preset perspective envelopes which can be edited. q. Paste Perspective applies the current straight sided envelope to a selection.
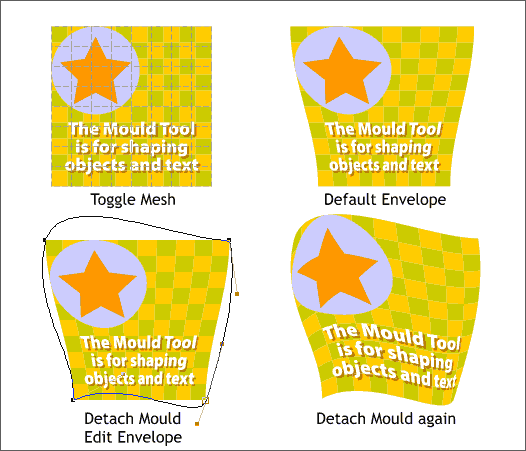
Shown above are some of the actions just covered. Detach Mold (shown above, bottom) lets you edit the envelope shape without the changes constantly being redrawn. When the envelope is how you want it, press the Detach Mold icon again and the changes are applied in one fell swoop.
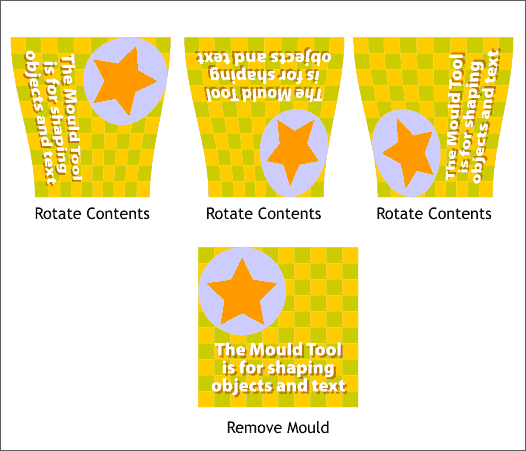
Rotate Contents does just that in 90 degree increments. Remove Mold restores the selection.
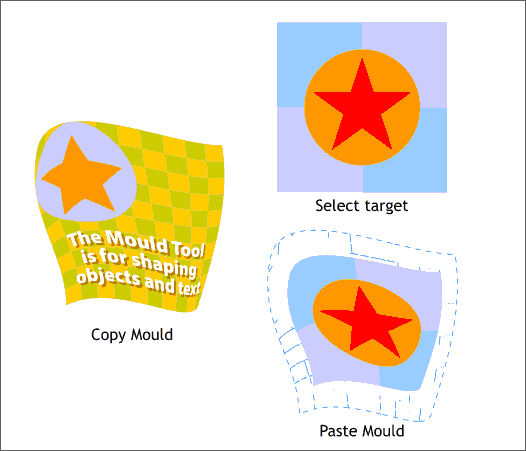
You can copy an envelope and paste it to a target selection as shown above. The pasted envelope is smaller than the original shape however. I do not know why this is.
The Default Envelope is a round sided envelope as opposed to the Perspective Envelope which is straight sided. To edit the envelop shape, click any of the corner control points. You can drag the corner points to a new location as well as drag the control handles to reshape the envelope.
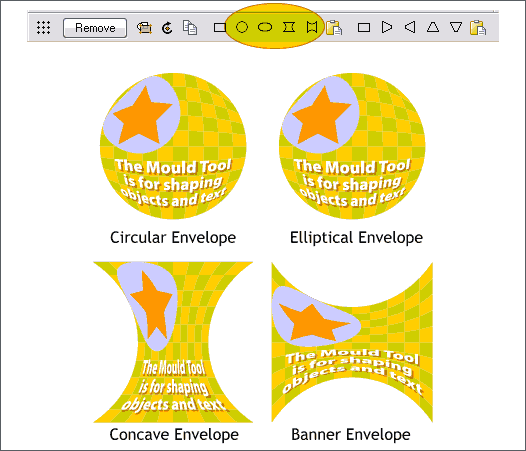
Shown above are the 4 round-sided preset envelopes. When applied to a square selection the Circular and Elliptical envelopes produce the same effect. But if the selection is rectangular, then the Elliptical envelope will produce an elliptical result.
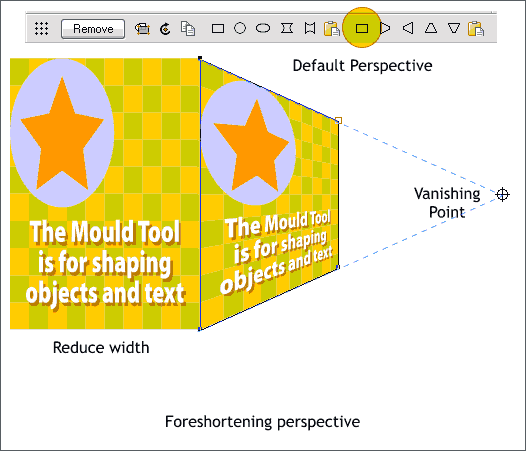
You can use the Default Perspective straight sided envelope to create selections that diminish to a vanishing point. When creating exaggerated perspective sides, it is best to reduce the width or height to about 60%. This is called foreshortening. When you drag the ends of the Default Perspective envelope or any of the presets, a vanishing point appears which you can drag to a horizon line if desired to create true perspective.
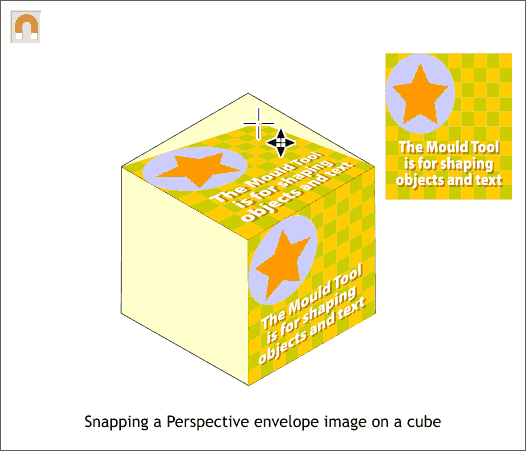
You can drag the ends of straight sided envelopes and snap them to corners of an object, in this case a cube.
|
||
|
|


