|
|
|
There are those among us who used to envy CorelDRAW and Illustrator's Spiral Tool. But some time back, Dmitry Malutin created a terrific spiral generator that lets you create spirals exactly the way you like them then drag and drop them from SPX Spiral Generator and drop them onto the page in Xara. You can download a free copy in the Shareware Page. We'll use it to create a flower.
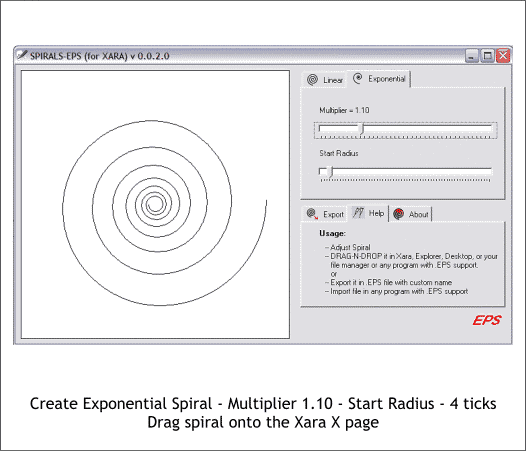
Open the Spiral-EPS generator (the file looks like a Xara file. Double click on the file icon to open the generator). Select the Exponential tab. Move the top slider to about 1.10. Move the bottom slider about 4 tick marks to the right. Drag the spiral from the preview window and drop it onto a Xara X page. (The generator will automatically close).
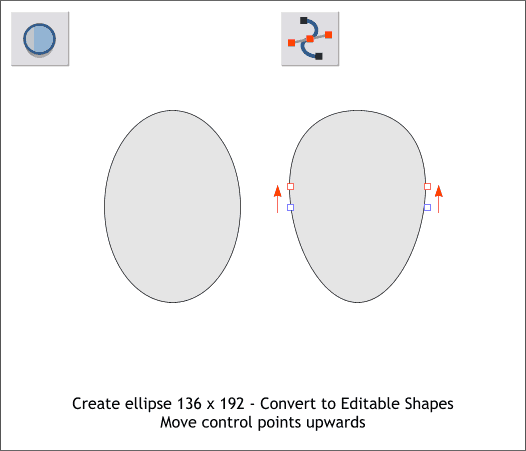
Set the ellipse to one side for the moment. Using the Ellipse Tool, create an ellipse to the size shown above. Convert the ellipse to Editable Shapes (Arrange > Convert to Editable Shapes). With the ellipse still selected, switch to the Shape Editor Tool. Select the two center control points and nudge them upwards using the arrow keys on your keyboard.
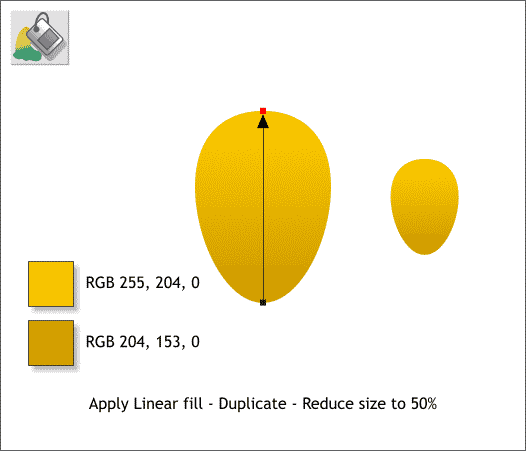
Apply a Linear fill using the two colors shown. Duplicate the shape (Ctrl d) and reduce the size to 50%.
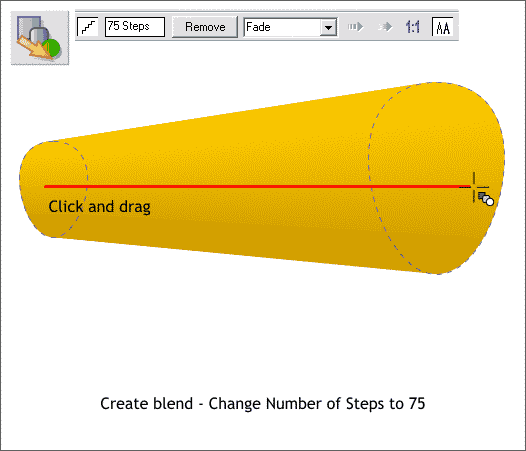
Position the two shapes well apart from one another. Click the Blend Tool on the small shape and drag over to the larger shape to create a blend. Change the number of Blend Steps on the Infobar to 75 and press Enter to apply the change.
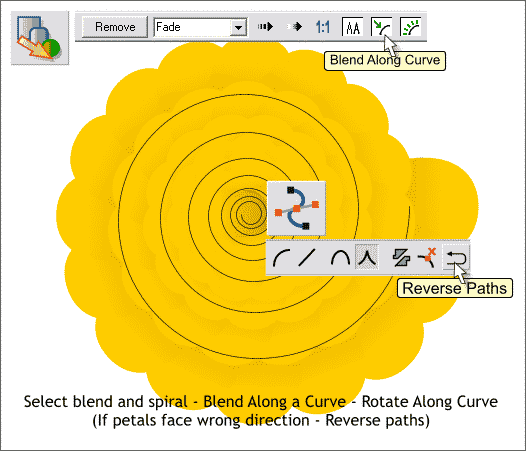
With the Blend Tool and the blend still selected, hold down the Shift key and click on the spiral to select it. On the Infobar, click the Blend Along Curve icon then the Rotate Along Curve icon to the right. If the petals appear to be upside down, switch to the Shape Editor Tool and click the Reverse Paths icon.
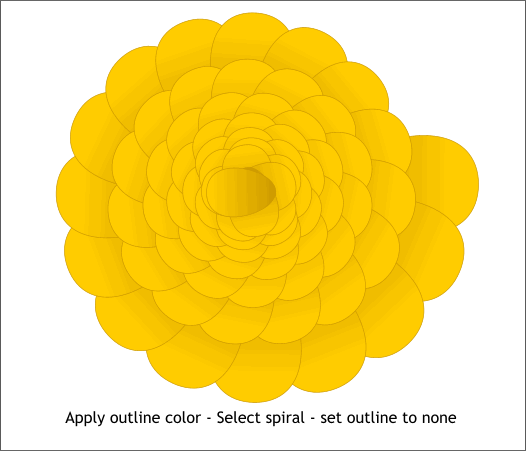
Apply an outline color. Ctrl click on the spiral (if visible) and then right click on the cross hatched square to the left of the screen color palette to set the outline to none.
|
||
|
|


