|
|
|
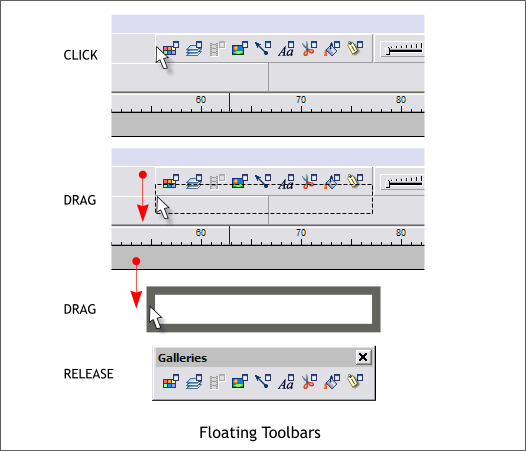
Most of Xara X's toolbars can be dragged from where they are docked onto the page (called floating) or docked in a new location. It's easy to do as you will see.
For this example, we'll drag the Galleries Toolbar from the Infobar and onto the page. Drag any of the 4 corners (you need to be very close to the edge). As you drag, you will see a dashed outline. When the toolbar is over the page the outline changes to a thick gray outline. Release the left mouse button and the toolbar will now appear as it does in the last example shown above.
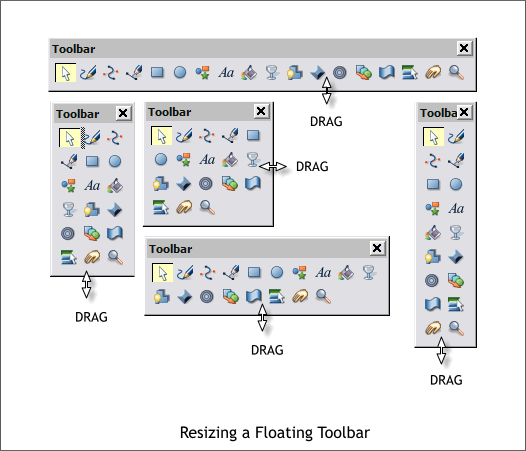
Once the toolbar is docked on the page (in this example we have docked the main toolbar), you can drag the outside in or out to reconfigure the toolbar. One of these configurations has to be just right for you!
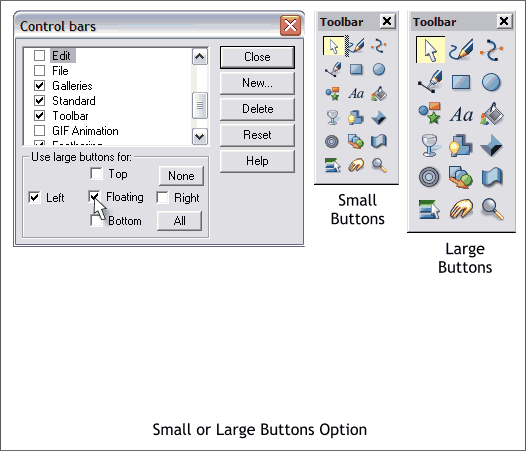
If your eyes are like mine, you might have trouble seeing the icons on the toolbars. In that case open the Control Bars dialog (Window > Control Bars...) and check Floating in the Use Large Buttons for: section. You can use this to make the buttons on the other toolbars larger or smaller as well.
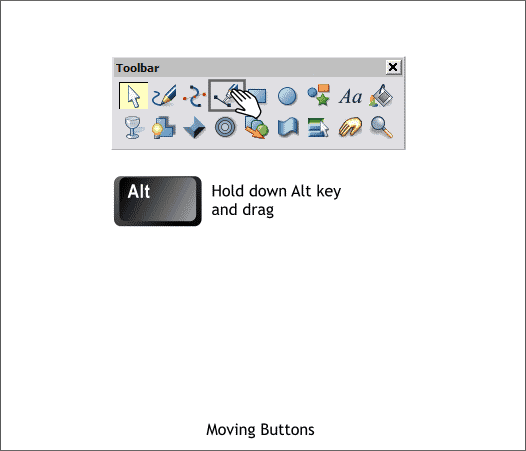
In a recent post in the Xara X Conference on TalkGraphics, a clueless Xara user whined that moving buttons was "too hard"!. (Actually, his post was titled "Customizing Toolbars is like the RUBIX CUBE...It's a TOO HARD!!! )" What a weenie, I swear! Well, here's how hard it is. Hold down the Alt key and drag the button to a new location. Not exactly rocket science, eh? Those interested in creating a custom control bar (they're very useful) see Creating a Custom Control Bar in Workbook 24.
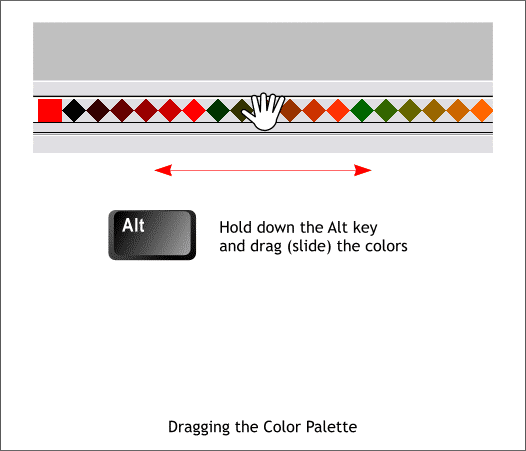
Finally, this is kind of related. I rediscovered this while trying to drag the color palette onto the screen (something that actually would be a good idea). If you hold down the Alt key when the cursor is over the screen palette, the cursor changes to a funny little stubby hand. Continue to hold down the Alt key and you can drag all of the colors at once one way and the other.
|
||
|
|


