 |
 |
| H 1 2 3 4 5 6 |
|
|
|
Spring hopes eternal. Or is it Hope springs eternal? Here is a quick and easy way to create a coiling spring.
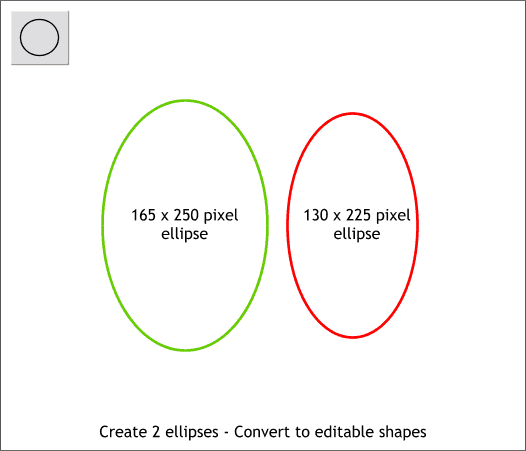
Step 1 Create two ellipses to the sizes shown. Select both and Arrange > Convert to Editable Shapes.
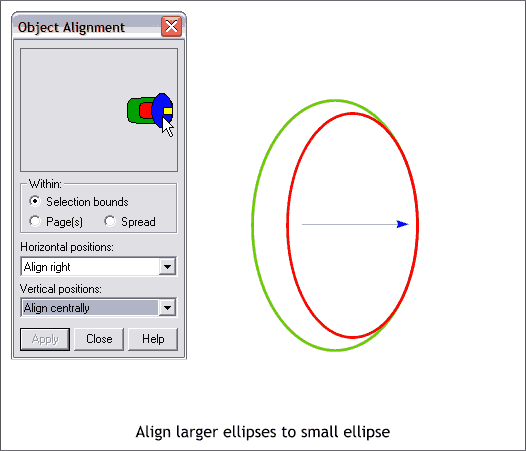
Step 2 Align center right the two ellipses using the Object Alignment dialog (Arrange > Alignment). TIP: With the two ellipses selected, click in the right middle area of the preview window as shown above. This automatically aligns the two ellipses to their right centers. (You can intuitively click in 9 areas to automatically align selected objects).
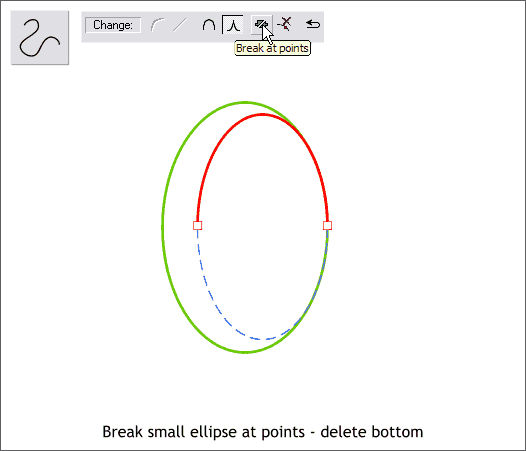
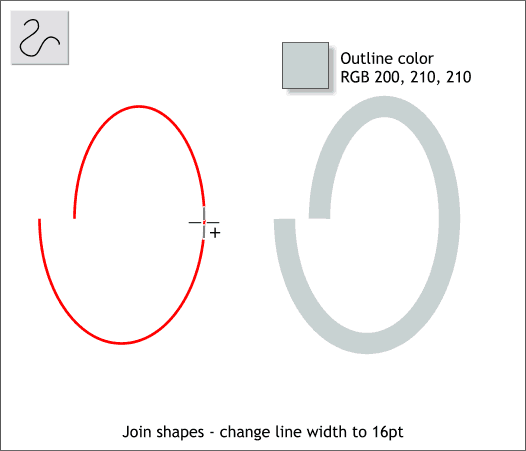
Step 3 Select the smaller ellipse using the Selector Tool (the arrow pointer). Switch to the Shape Editor Tool. Hold down the Shift key and click to select the two middle control points. Press the Break at Points icon on the Infobar. Select the bottom section with the Selector Tool and delete it.
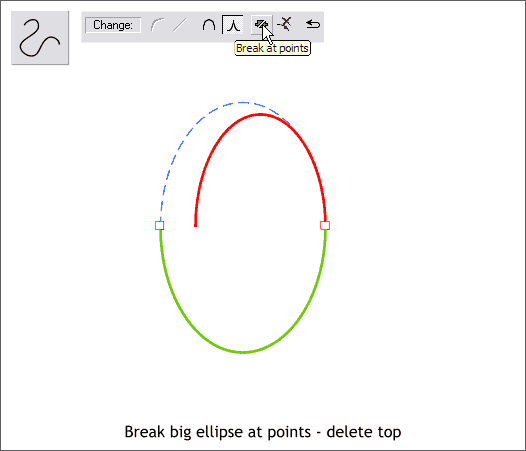
Step 4 Repeat Step 3 on the larger ellipse and delete the top section.
Step 5 Select the two arcs and Arrange > Join Shapes. With the joined shape selected, switch to the Shape Editor Tool. Locate the area where the two shapes were joined (switching to outline view quality will make it easier to see the two control points). Drag the top control point a little bit away and then drag it back over the other control point. The cursor changes to a + to indicate the two control points are now joined into one. Change the outline width to 16pt and change the outline color as shown. (Right click the small color wheel icon to the left of the screen palette to open the Color Editor > Local Line Color and enter the 3 RGB color numbers).
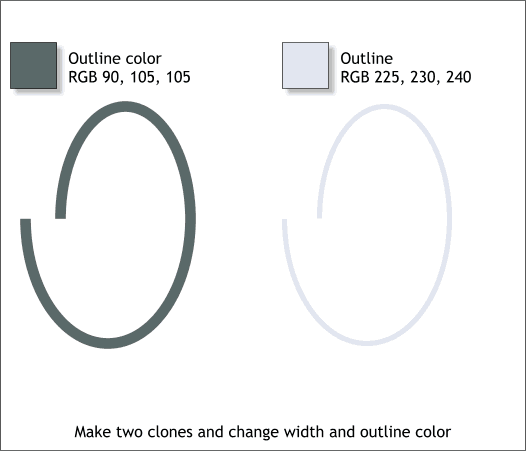
Step 6 Make two clones. Change the outline colors and outline widths as shown above.
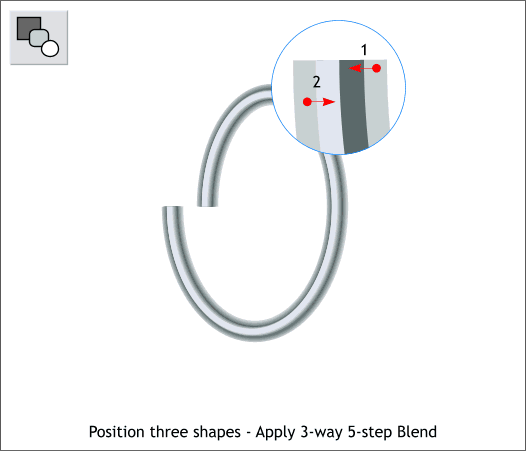
Step 7 Position the 3 shapes as shown in the close up. Select the Blend Tool. Drag from the largest shape to the to the darkest shape (1). Now drag from the left outside shape to the lightest shape (2).
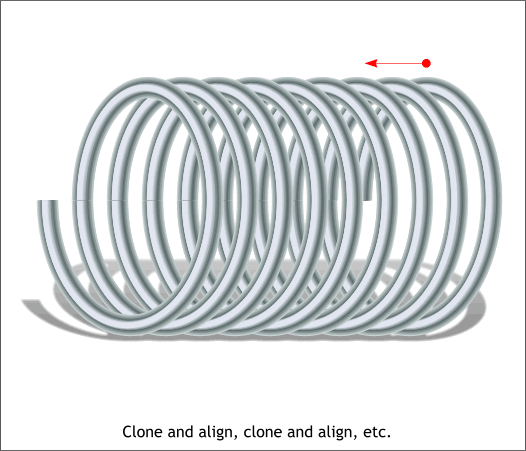
Step 8 Duplicate and align the blended shapes to produce the coil shown. This concludes another Workbook. Your feedback is important to my mental health. (When I don't get any responses I get very paranoid). Please take a second to let me know how I am doing by submitting the feedback form on the next page. Gary W. Priester
|
|
|
|
|
|
|