 |
 |
| H 1 2 3 4 5 6 |
|
|
|
You can use this next technique with any letter but the letters without curves are easier.
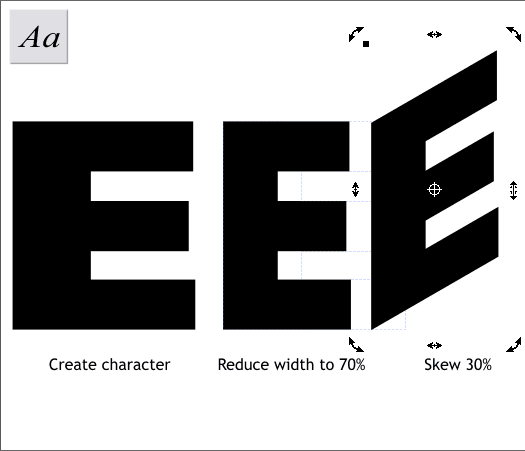
Step 1 Using the Text Tool, create a capital E using a bold sans serif font. Scale the letter up until it is about the same size as shown above. Reduce the width of the E to 70%. Click twice to enable Rotate/Skew mode. Hold down the Ctrl key and drag the right center Skew handle upwards. Look at the Skew Angle on the Infobar and stop when you reach 30 degrees.
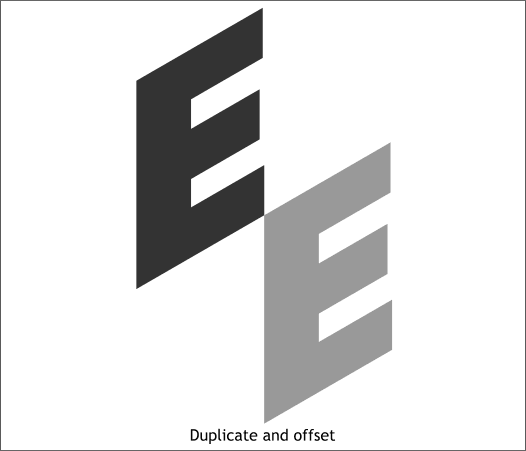
Step 2 Duplicate (Ctrl d) the E and offset the duplicate so that the top and bottom corners meet as shown.
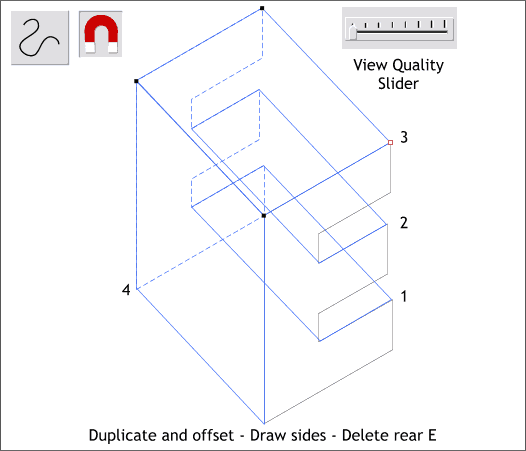
Step 3 Enable Snap to Objects by clicking the red magnet icon on the Infobar so that it is in the down position. Move the View Quality slider (on the top center area of the Infobar) all the way to the left. (Or Window > Quality... Outline). Using the Shape Editor Tool, create the four shapes shown above: the top, and left sides, and the two inside shapes. Select the rear E and delete it.
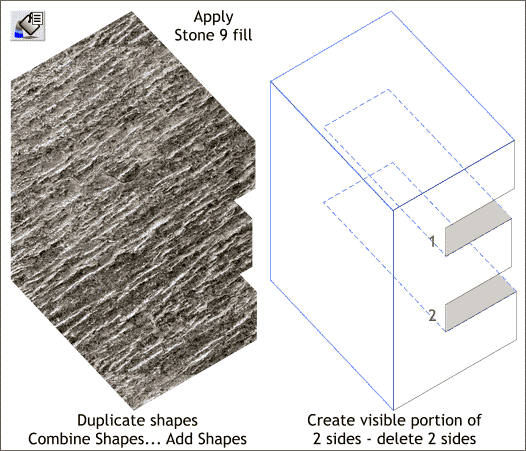
Step 4 Duplicate all the shapes and Arrange > Combine Shapes... Add Shapes. Select the combined shape and open the Fill Gallery. Select the Stone folder and then select the Stone 9 fill. Press the Fill button to apply the fill to the shape. Using the Shape Editor Tool, create new shapes for the exposed inside portions of the E as shown above in gray. Delete the two hidden shapes (shown in blue dashed outlines).
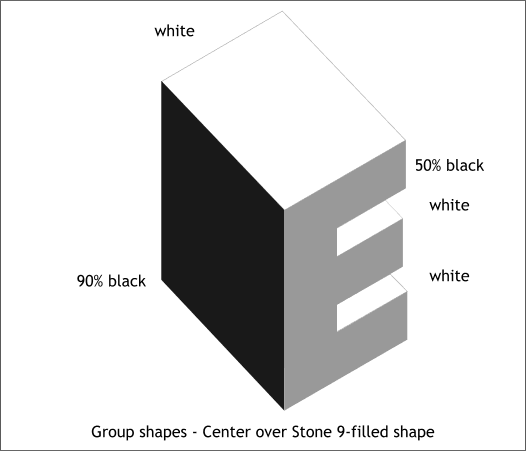
Step 5 Apply the solid colors shown above to the various sides. (I have added an outline around the white shapes so that the shapes will be visible).
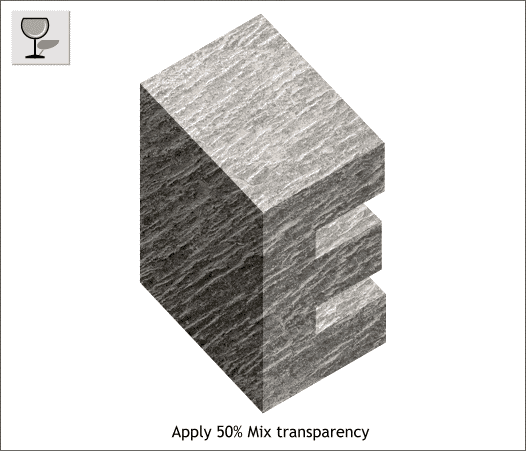
Step 6 Select the grouped shape and apply a Flat, Mix, 50% transparency.
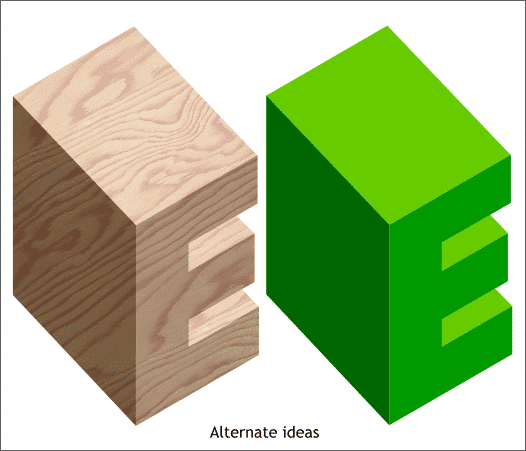
Here are two suggestions for other applications of this technique.
|
|
|
|
|
|
|