 |
 |
| H 1 2 3 4 5 6 |
|
|
|
Marble, and other polished stone surfaces, is a lot harder and this attempt was not quite as successful as the sandstone. Still, nothing ventured, nothing gained. In this next tutorial, we shall attempt to create a slab of green marble.
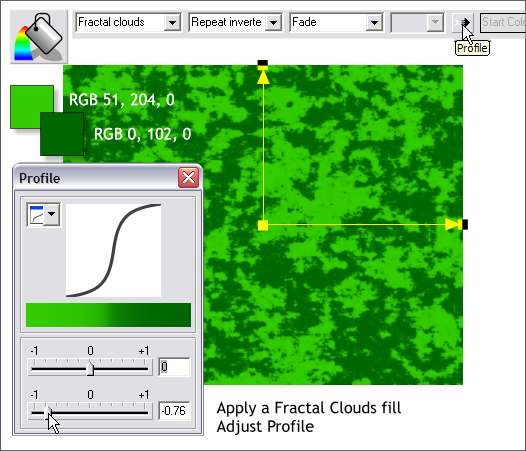
Step 1 Create another rectangle the same size as from the sandstone tutorial. Apply a Fractal Clouds fill using the two colors shown above. Click the Profile arrow icon on the Infobar. Move the bottom slider to the left to about 0.76. This makes the distinction between the two colors more pronounced.
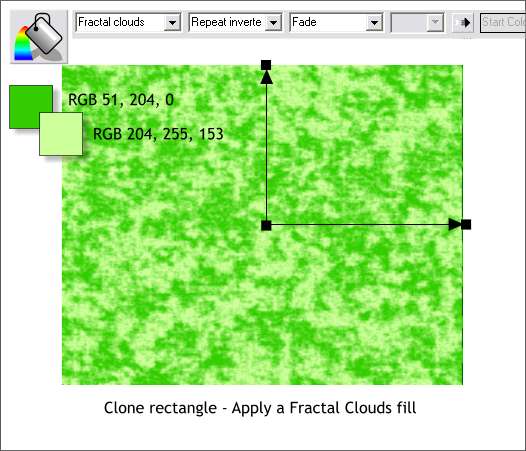
Step 2 Select the rectangle and Clone it (Ctrl k). Clone makes a duplicate in the same place. Change the fill colors as shown. Open the Profile dialog and select the first preset, Normal , from the drop down list.
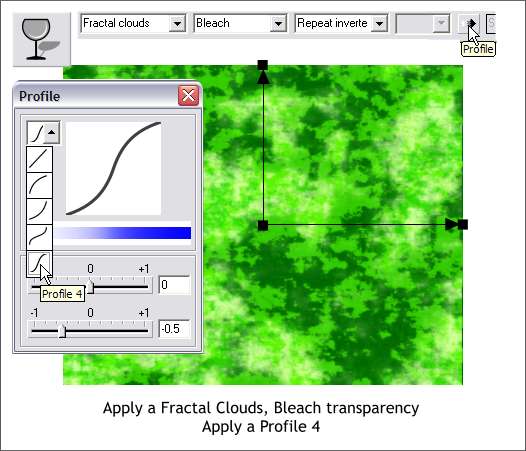
Step 3 Select the cloned rectangle with the Transparency Tool. Apply a Fractal Clouds, Bleach transparency. Open the Profile dialog, and select Profile 4.
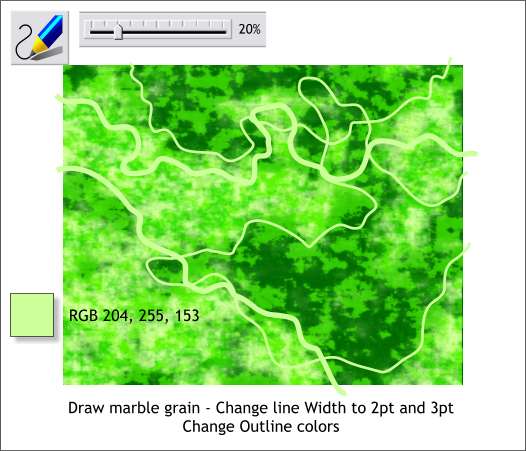
Step 4 Some marble has veins running randomly through the stone. We'll attempt to replicate this. Select the Freehand and Brush Tool. Set the Smoothness slider to around 20-30% . Draw a series of jaggedly lines across the surface as shown. Make some of the lines 2pt and others 3pt. Change the outline color to the pale green color shown. How to: Select all the lines (hold down the Shift key and click to multiple select) and right click on the small color wheel icon to the left of the screen colors. This opens the Color Editor in Outline Color mode. Enter the three RGB values.
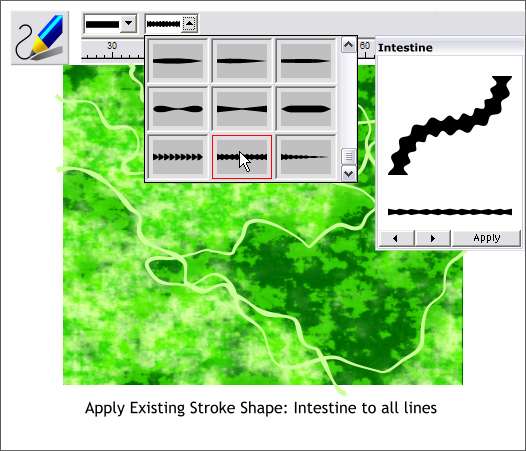
Step 5 Select all the lines and then switch to the Freehand and Brush Tool. On the Infobar, open the second Stroke Shape drop down list. Scroll down to the very bottom of the list and select the center existing stroke shape, Intestine. This gives the marble veins a more natural thick and thinness.
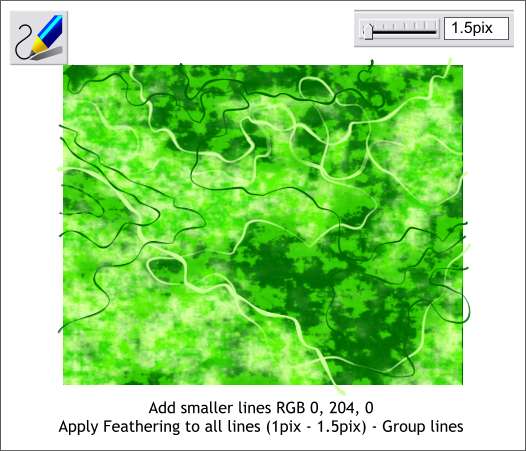
Step 6 Add some additional lines and change the size to 2pt and make the outline color dark green. Select all the lines and add a small amount of feathering using the Change Size of Feather Region slider found on the top right area of the Infobar. Add less feathering for the thinner lines.
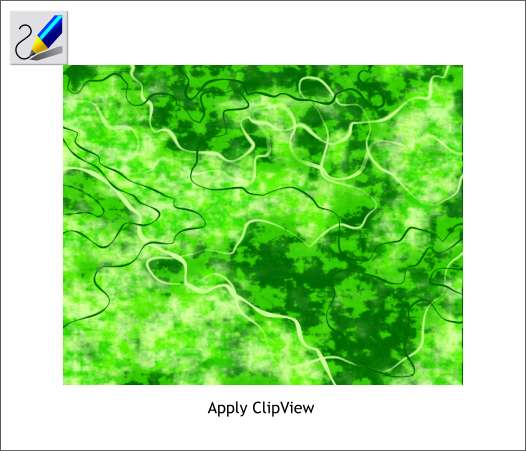
Step 7 Select all the lines and the top rectangle. From the Arrange menu, select Apply ClipView. The lines are now neatly masked by the top rectangle.
If you Create Bitmap Copy (Arrange menu) of the marble surface, you can use it as a fill by selecting an object, opening the Bitmap Gallery on the Infobar, selecting the bitmap in the Bitmap Gallery , and clicking Fill. You can then switch to the Fill Tool and adjust the size of the fill. It actually looks OK when used as a fill. And perhaps I should call it Malachite?
|
|
|
|
|
|
|
|