 |
 |
| H 1 2 3 4 5 6 |
|
|
|
In the July 2001 Xara Xone Tutorial I cover what I call, the Ultimate Neon Sign Effect. And while this is not far from the truth (he says in all humility), here is a very good and easy alternative technique.
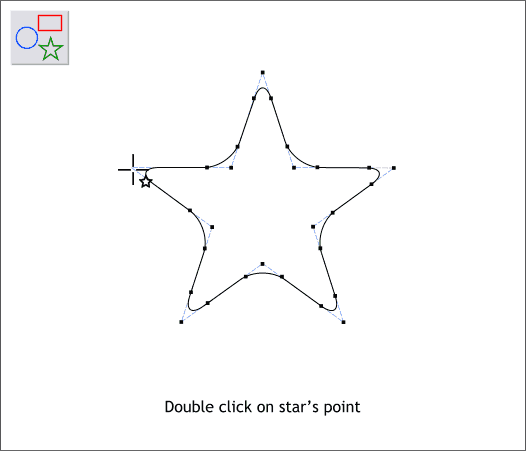
Recreate the star from the first tutorial. Don't use the later ones we created because these have been converted to editable shapes and will not work. Double click on any of the points with the QuickShape Tool to instantly change the point to a rounded point.
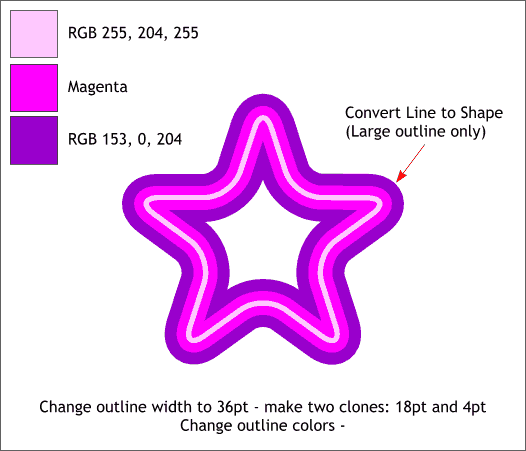
Change the outline width to 36pts and change the outline color as shown. (Open the Color Editor [Ctrl e] and select Current Line Color from the drop down list. Clone this star (Ctrl k ), change the width to 18pt and change the line color to magenta. Clone the star once again and change the width to 4pt and the line color as shown on top. Select the widest outline and Arrange > Convert Line to Shape. Make a duplicate of the middle star and set it to one side for the moment.
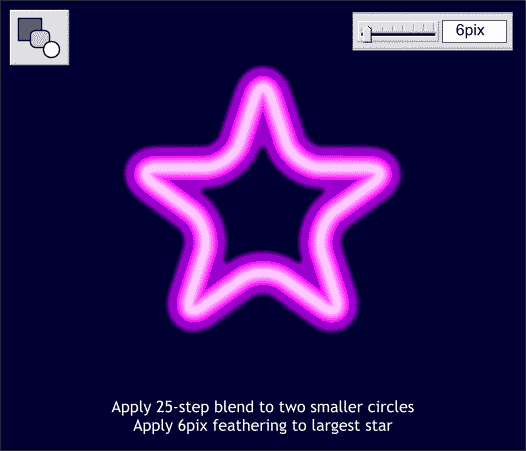
Add a dark blue rectangle behind the stars. (We'll change the fill later). Click on the middle star with the Blend Tool and drag to the smallest star to create a Blend. Change the number of Blend Steps to 25 and press Enter to apply the change. Select the largest star and apply 6pix of feathering using the Change Size of Feather Region slider on the top right area of the Infobar.
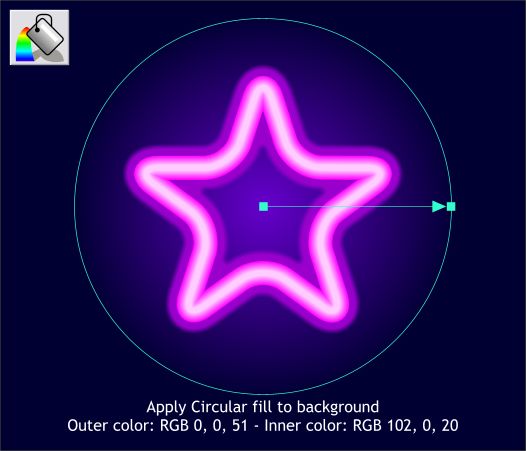
Apply a circular fill to the rectangle using the two colors shown above. Click on either square on the fill path arrow to apply a color. This creates the appearance of a glow behind the neon.
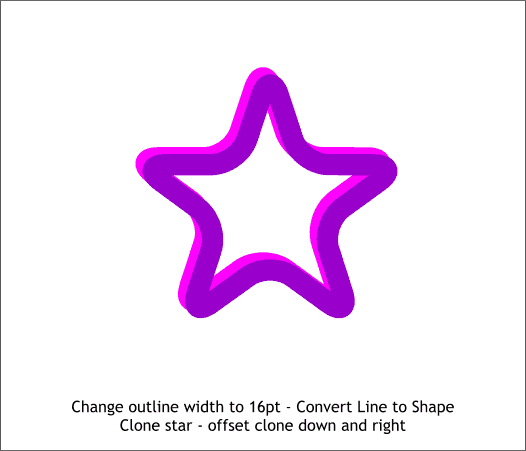
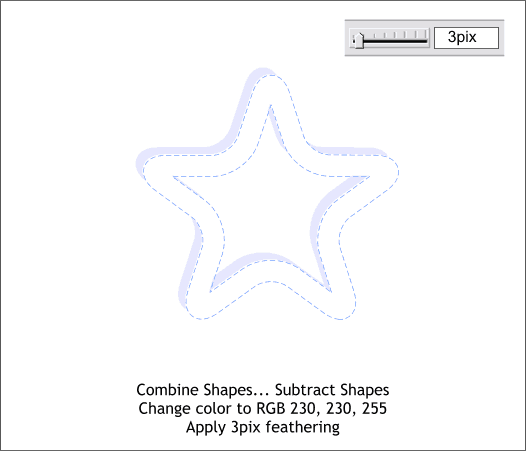
Select the duplicate middle star we made in step one and change the width to 16pt. Clone (Ctrl k) it. Offset the clone down and right as shown above.
Select both stars and Arrange > Combine Shapes... Subtract Shapes. Change the fill color as shown and apply 3pix of feathering to soften the edges. This will be a highlight on the glass tube that contains the neon gas.
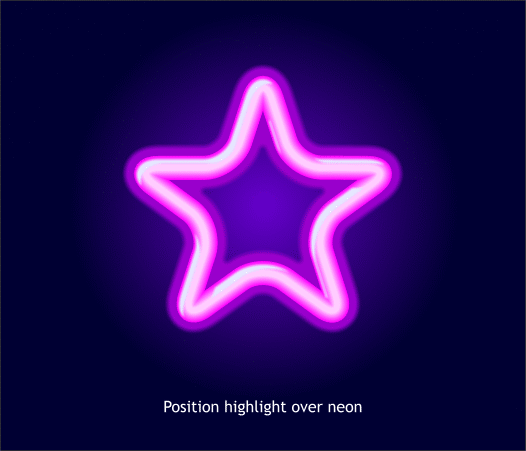
Position the highlight over the stars as shown and it's Show Time!
And that wraps up another Workbook. What do you think? Did you learn anything? Do you have any comments of questions or criticisms? Or compliments? Your feedback is important as it lets me know that you are out there and that these efforts of mine are being put to some use. Please use the feedback form on the next page to send me your comments. Gary W. Priester
|
|
|
|
|
|
|