|
There are times when you may want to conform only the bottom (or just the top) of text to a path while the top (or bottom) remains unchanged. Here is a method for doing just that.
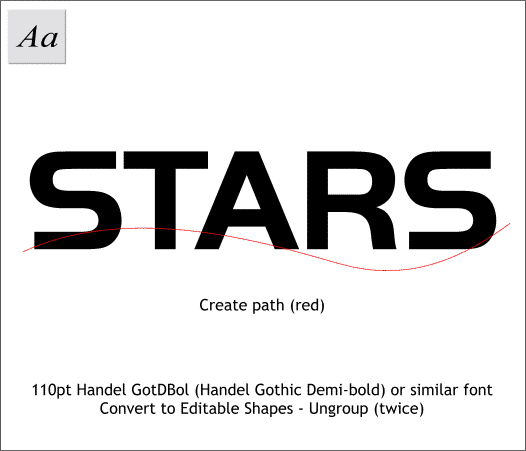
Click the Text Tool on the page and key in STARS in Handel Gothic Bold or a similar font. Increase the Point Size so that it is about the same size as shown. Using the Freehand and Brush Tool
, draw a wavy line like the one shown above in red. This will be the path to which the characters will adhere.
With the text selected, select Convert to Editable Shapes, then Ungroup twice. The letters will now be five individual shapes.
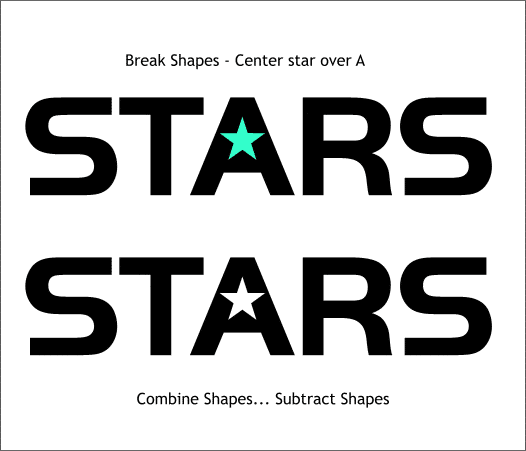
Select the A and Arrange > Break Shapes. Select the counter (the small triangle), and delete it. Center a small star over the A. Select the small star and the A and Combine Shapes... Subtract Shapes (or
Arrange > Join Shapes will do the same thing).
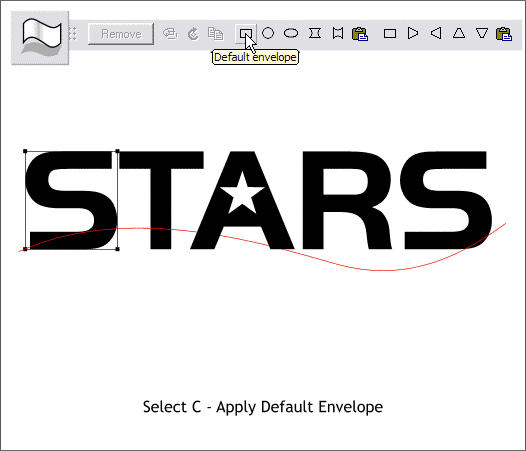
Select the first S with the Mould Tool. Click the Default Envelope icon to apply a curved-sided envelope. A rectangle with four Bezier control points
appears around the letter. We will use these control points to conform the bottom of the S to the path.
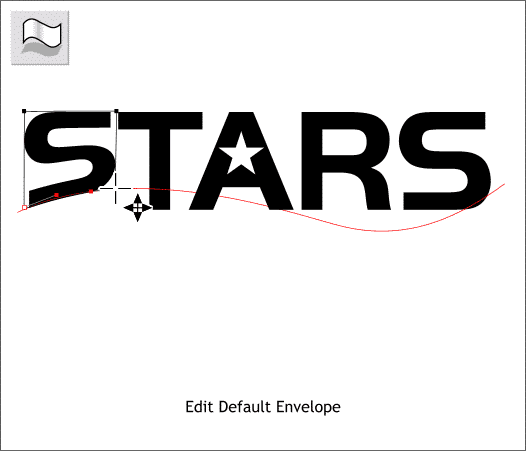
Click the Mould Tool on the bottom right control point and move it upwards until it is resting on the path. You will notice little lines that extend from the
corner points with small red boxes on the ends. These are the Bezier control handles. Drag them to adjust the bottom of the envelope to fit the path as
shown above. If you are new to this it can take a little while to get the hang of it. Zoom in with the Zoom Tool (the magnifying glass icon) to help you see
what you are doing. As a rule, you want the angle of the line part of the control handle to be parallel to the path.
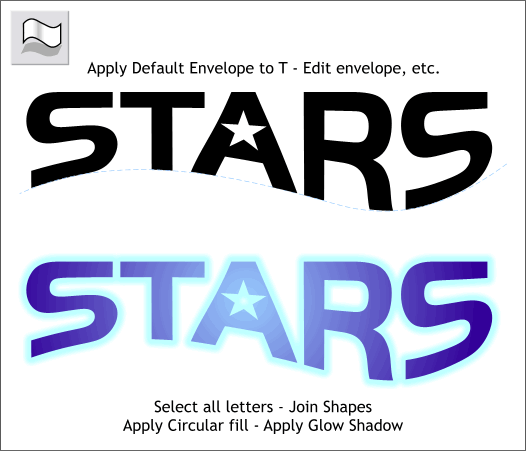
Repeat adding default envelopes to, and adjusting the other letters until they all conform to the path as shown. Select all the letters and Arrange > Join Shapes.
On the bottom are some ideas of how to further enhance the type.
Apply a Circular Fill (with the Fill Tool) and move the center of the fill over the middle of the star. Use a light blue in the center of the fill and a deep blue for the outer fill color. Apply a Glow Shadow with the
Shadow Tool then drag and drop a light blue (or any other color) onto the glow shadow. To drag and drop a color onto another object, hold down the Ctrl key and drag any color
from the screen palette and drop in onto the desired target object. You can always edit the color in the Color Editor (Ctrl e) if desired. To edit the shadow color, Ctrl click on the shadow then edit the color.
|

