 |
 |
| H 1 2 3 4 5 6 |
|
|
|
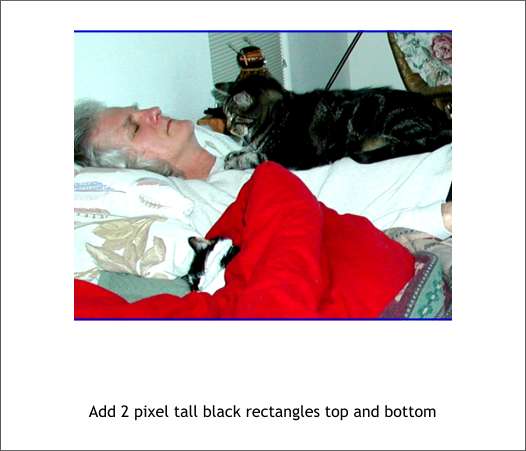
The chap in the photo below is not dead. He's just trying to take a nap with a cat napping on his chest and one to his right. (Good thing he's not allergic to cats!) In this tutorial we will create a TV scan line effect. You can use any image but it should look newsworthy. (Source of breathing problems found!)
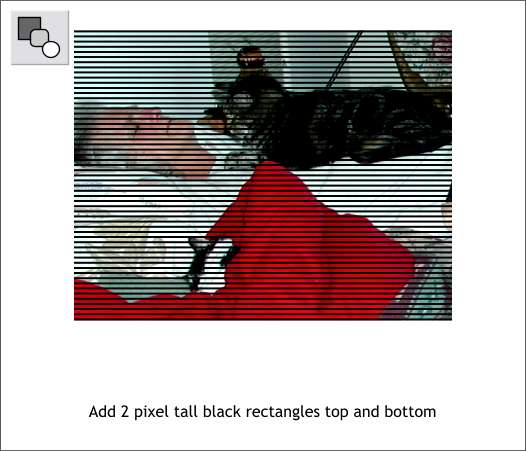
Create a black rectangle 2 pixels tall and the same width as the image. Duplicate the rectangle and place one at the very top of the image and one at the very bottom.
Select the Blend Tool. Click on the top rectangle and drag down to the bottom rectangle before you release the mouse button. Increase the number of Blend Steps on the Infobar until you have a about 2 pixels of space between each rectangle. TIP: Cut (Ctrl x) the image to the clipboard before you create your blend. It will make it easier. After you create and adjust the blend, paste the image on top (Shift Ctrl v) and send it to the back ( Ctrl b).
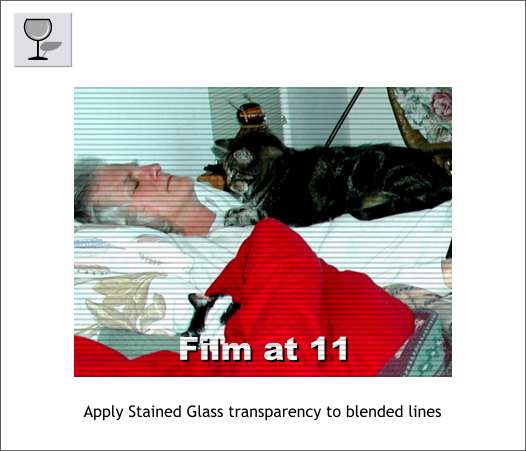
Select the blend and apply a Flat, Stained Glass transparency. Increase the transparency (using the Transparency slider on the Infobar) until the blend lines are very pale (mine is 80% transparent). Add an appropriate title and send it between the blend and the photo.
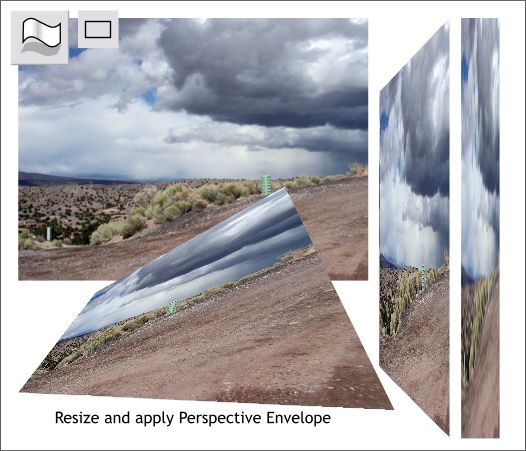
Here are some other fun things you can do with photos. Resize the image in the height or width only using the middle resizing handles. Photos take on a whole new and eerie look when you do this. You can also apply a Perspective Envelope with the Mould Tool and adjust it like the images shown. The straight-sided envelopes are the only ones that work with bitmaps. Select the bitmap with the Mould Tool . Click the second rectangle icon on the Infobar to apply a Perspective Envelope. Drag the control points on the ends of the envelope as desired.
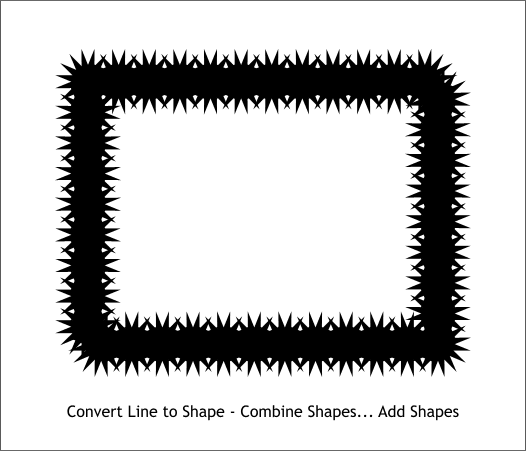
The fun never stops! Create a rectangle about the size as the one shown here. With the QuickShape Tool, create a 16-sided star. With the star selected, select the Freehand and Brush Tool. Press Create Brush on the Infobar and name your new brush Spikes. Select the rectangle with the Freehand and Brush Tool. Open the Line Gallery (on the top left area of the Infobar with the arrow icon) and then open the New Brush Strokes folder and select and apply your new brush, Spikes, to the rectangle.
Select the shape with the Selector Tool (the arrow cursor). From the Arrange menu, select Convert Line to Shape. Then from the Arrange menu, select Combine Shapes... Add Shapes.
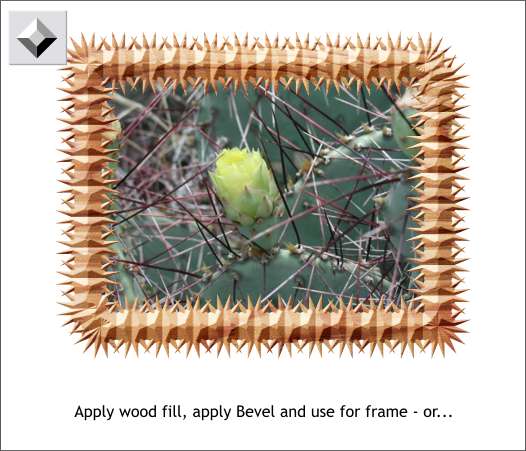
Apply a wood grain fill from the Fill Gallery Wood Fills folder or a fill of your choice. Apply a Flat, Inner Bevel to create a spiked wooden frame, which in this case is framing a flowering cactus plant.
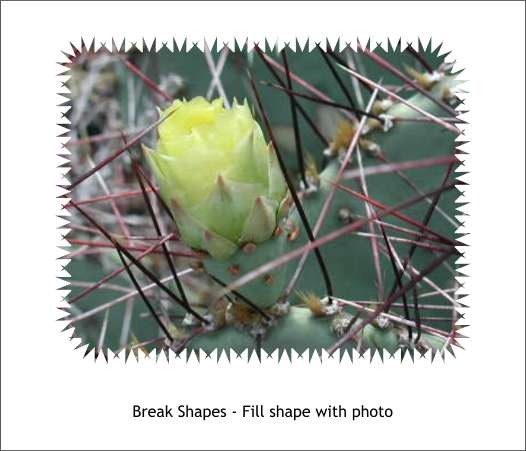
An alternative to frame is to select the shape and Arrange > Break Shapes. Import a bitmap image in to Xara. Select the shape, then open the Bitmap Gallery , select your imported photo, and press Fill. Resize the image with the Fill Tool if necessary.
|
|
|
|
|
|
|