 |
 |
| H 1 2 3 4 5 6 |
|
|
|
Creating a simple sphere is a little more involved than one might think. Anyone who has taken a basic drawing class in which spheres are part of a still life probably knows that light cast upon a sphere creates a highlight, a core shadow, and a reflected light on the far side. In this tutorial I'll show you how to do the same thing in Xara.
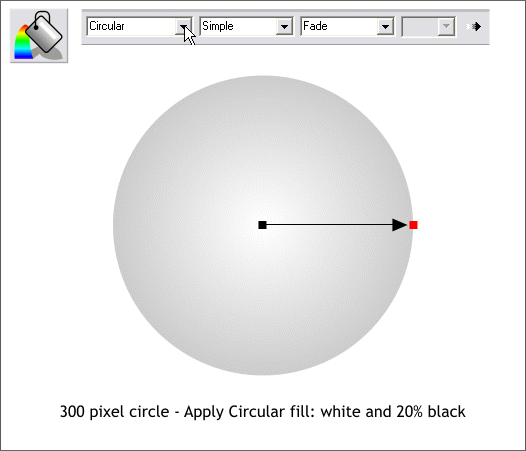
Using the Ellipse Tool, and holding down the Ctrl key to constrain the ellipse to a circle, draw a 300 pixel circle (the actual size is not that important). Select the circle with the Fill Tool, select Circular from the Fill Type drop down list on the Infobar. Click the outside control handle (the red square) with the Fill Tool then click the 20% Black (gray) square on the screen palette.
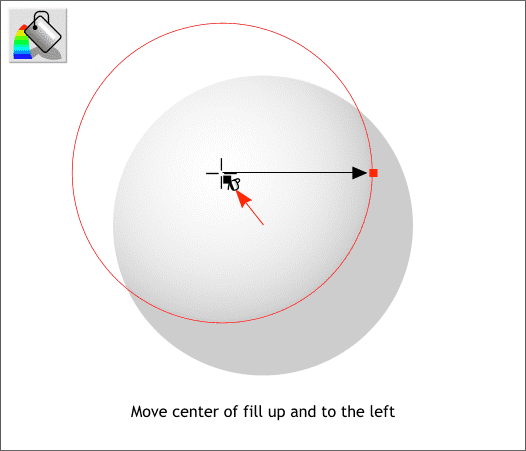
We'll assume the light source is to the top left of the sphere. With the circle and the Fill Tool selected, drag the center of the fill up and to the left as shown. Now that looks more sphere-like already.
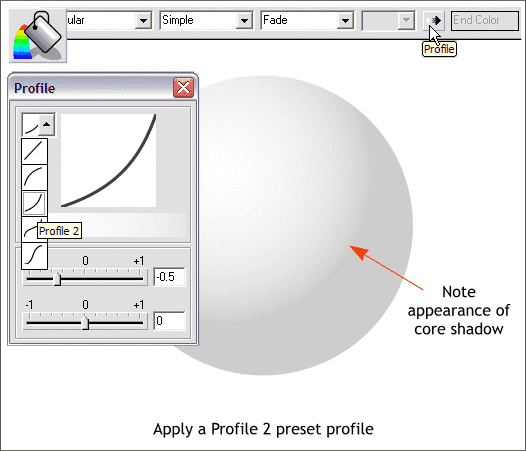
With the circle and the Fill Tool still selected, press the Profile arrow icon on the Infobar to open the Fill Tool Profile dialog. From the drop down list of Preset Profiles,, select Profile 2 . This extends the light portion of the sphere towards the edge creating the appearance of a core shadow. The core shadow is the darkest portion of the shadow. As the shadow portion wraps around the edge of the sphere it gets lighter as it reflects light from the surface upon which it sits. Close the dialog.
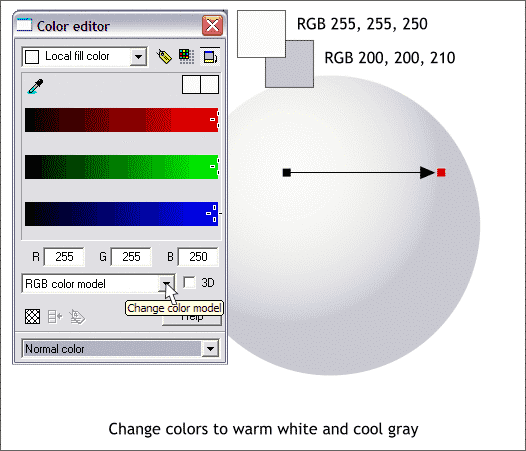
Few things in life are perfectly black, white or neutral. So we'll change the colors of the sphere to reflect this. Change the white to the color shown, which has just a hint of yellow. Change the dark color to the slightly bluish gray color.
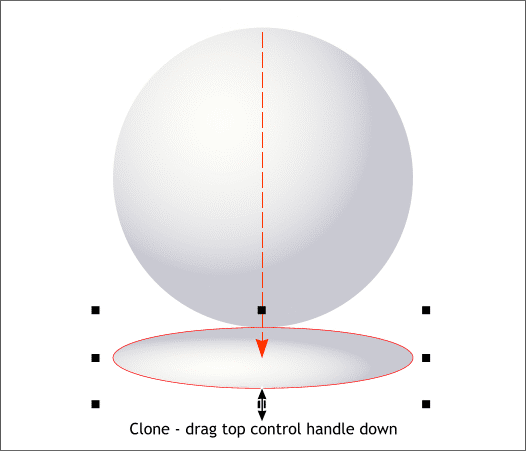
A shadow will add dimension to the sphere. Clone the circle (Ctrl k). Select the top center resizing handle (the black squares that make up the bounding box) and drag it down and past the bottom of the circle as shown above.
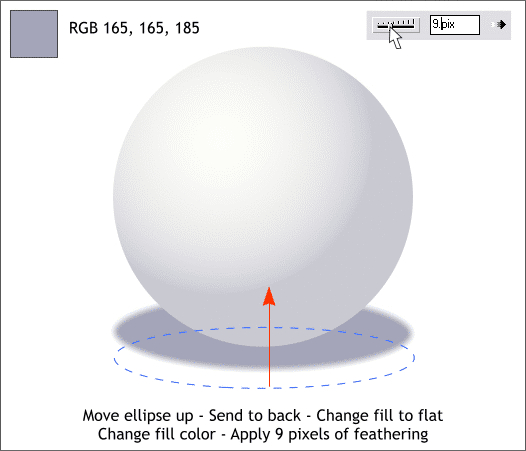
Change the fill to Flat and change the color to the color shown. Send the shadow to the back (Ctrl b) and move it up so that most of the shadow is behind the sphere. With the shadow selected, apply around 9 pixels of feathering to create a soft edge.
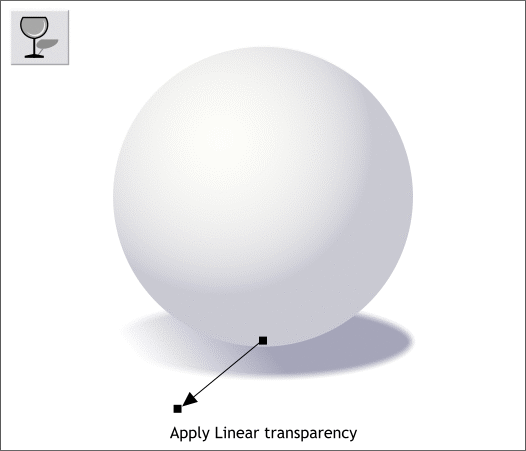
The shadow will be darker on the shadowed side of the sphere. Select the shadow with the Transparency Tool. Click and drag from the center down and to the left past the edge of the shadow to make the left side of the shadow lighter.
|
|
|
|
|
|
|