 |
 |
| H 1 2 3 4 5 6 |
|
|
|
In this tutorial we will create a wax seal like those used in olden days to seal envelopes and important documents.
Draw a 300 pixel circle. Create five small circles ranging in size from about 25 to 40 pixels in diameter.
Select the five small circles (by dragging a box around them with the Selector Tool or by holding down the Shift key and clicking each circle individually). Select the Freehand and Brush Tool. Press the Create Brush button on the Infobar. Name your new brush blobs and press OK.
Select the large circle. Open the Line Gallery (located on the top right area of the Infobar) and from the New Brush Strokes section, locate blobs and press Apply. Change the line Width to 48pt and press Apply to close the Line Gallery. Select the shape with the Freehand and Brush Tool and then press the Edit Brush button on the Infobar. In the Spacing tabbed section, adjust the Spacing slider to about 75%. Close the Edit Brush dialog.
Select the shape and from the Arrange menu' select Convert Line to Shape. The center of the circle will disappear. Draw a new circle (shown in red) that covers the center of the circular shapes. With the circle and the circular outline selected, select Combine Shapes... Add Shapes.
Select the new combined shape with the Bevel Tool. Drag any of the red arrows a small distance towards the center to apply an Inner Bevel. From the drop down list of Bevel Types on the Infobar, select Rounded. Move the Contrast slider to 70%. From the drop down list select Light Elevation and change the slider setting to 40. Change the Size to 16pix.
Add a 250 pixel circle with no fill and an 8pt outline width. Add a large capital X. Center all as shown.
Convert the outlined circle to shapes (Arrange > Convert Line to Shape). Change the fill color to red. Apply an inner bevel using the setting shown. Drag the Light Angle arrow in the center of the bevel in the opposite direction to make the bevel appear recessed.
Apply a red fill to the X. Apply an Outer Rounded bevel. Set the Contrast to 60% and the Size to 8pix.
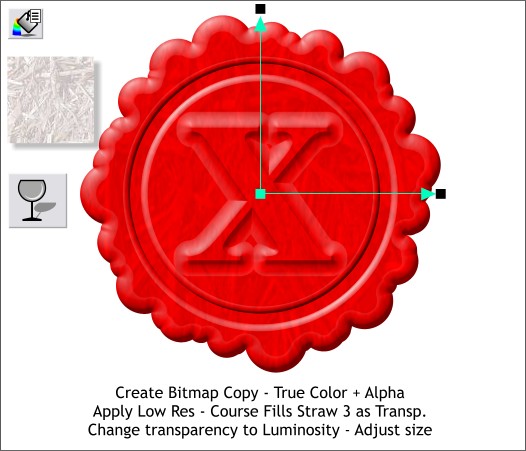
Select all the elements and then from the Arrange menu, select Create Bitmap Copy... Use the True Color + Alpha default setting. Hold down the Shift key and press Create to create the bitmap copy in the same position. Open the Fill Gallery and from the Low Res - Course Fills folder, select Straw 3 and press the Transp. button. This applies the fill as a transparency to the bitmap. Now select the bitmap with the Transparency Tool, change the Transparency Type to Luminosity. Drag the ends of the fill path arrow outwards to make the texture more obvious as shown.
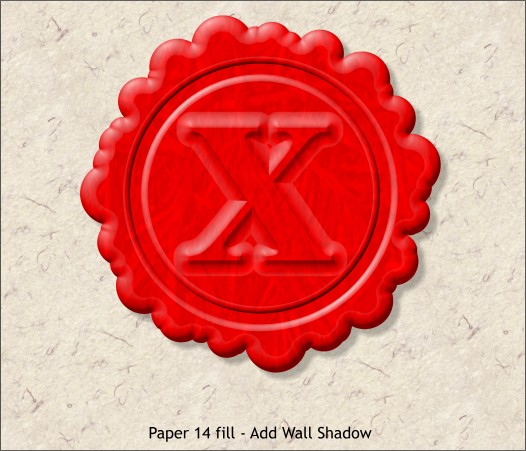
I have added a Paper 14 fill from the Background Fills folder in the Fill Gallery. I also selected the beveled shape beneath the bitmap and applied a Wall Shadow using the Shadow Tool. Comments? Questions? Please use the form on the next page. If you have learned anything from this tutorial, or even if you already knew all this, please take a moment to send in your comments so that I know there is someone out there reading these tutorials. Thanks. Gary Priester
|
|
|
|
|
|
|
|