 |
 |
| H 1 2 3 4 5 6 |
|
|
|
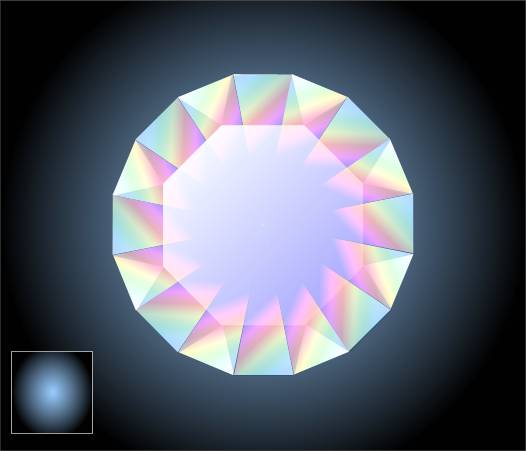
Using the QuickShape Tool again we will create a sparkling transparent diamond. Here's how.
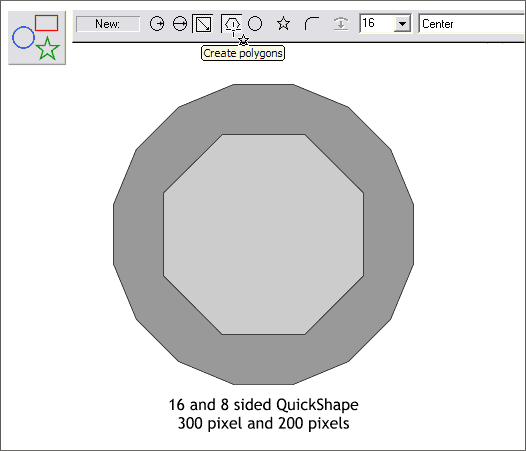
Select the QuickShape Tool. Set the number of Sides to 16 and deselect the star option. Hold down the Ctrl key and drag a 16-sided shape approximately 300 pixels in diameter. Deselect the shape. Select the QuickShape Tool and this time create an 8-sided shape. Center align both shapes.
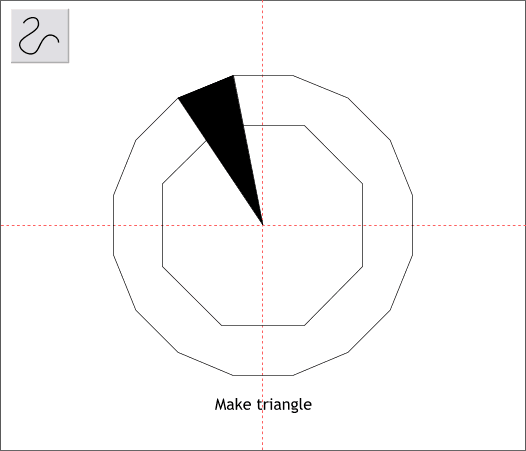
Enable Snap to Objects (right click on the page and select from the pop up menu). Drag guidelines through the exact center of the shapes. Using the Shape Editor Tool, click four points to draw a triangle as shown.
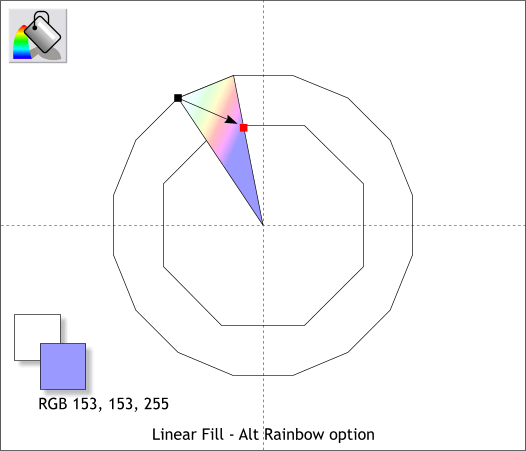
Select the triangle with the Fill Tool. From the drop down list of Fill Types on the Infobar, select Linear. Drag the ends of the fill path so the angle of the fill is as shown. Click on the top left end of the fill path and then click the white color on the screen palette. Click the opposite end and change the color to a pale purple. From the Fill Effect drop down list, select Alt Rainbow.
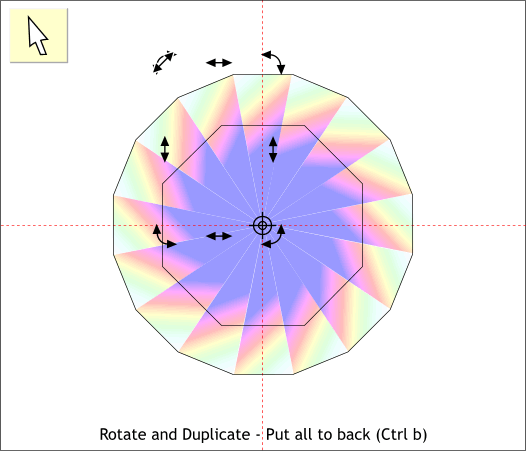
Click twice on the triangle with the Selector Tool to enable rotate/skew mode. Drag the center of rotation bulls eye to the intersection of the two arrows. Drag one of the upper corner curved arrow rotation handles to rotate the triangle until the top aligns with the next flat side of the 16-sided shape. Before you release the left mouse button, press the right mouse button to drop a duplicate. Continue to drag and drop duplicates using this technique until you have all 16 triangles in place as shown. Alternate method: Clone (Ctrl k) the triangle. Make sure the center of rotation bulls eye is at the intersection of the two guidelines. Enter 22.5 in the Angle of Selection text entry box on the Infobar, and press Enter. Repeat cloning and rotating until all 16 triangles are in place.
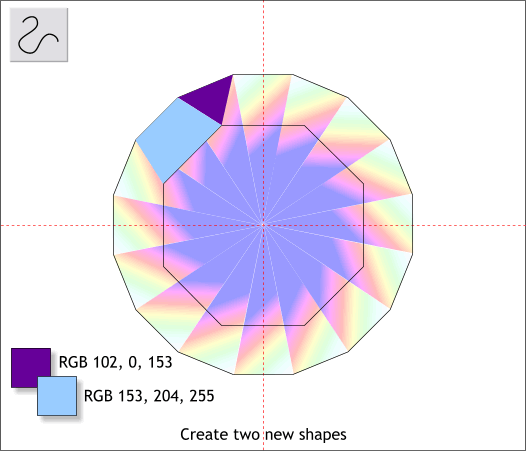
Using the Shape Editor Tool, create the two shapes shown above in light blue and violet.
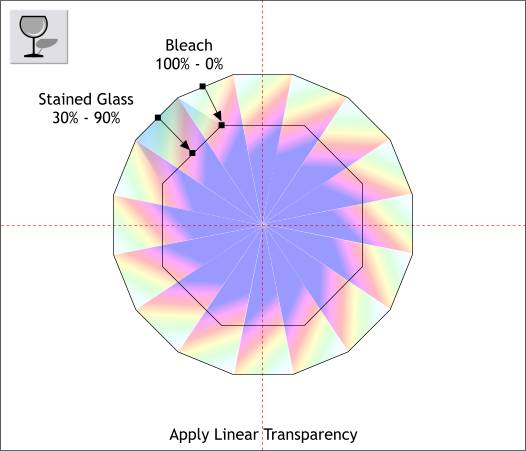
Apply Linear transparencies to the two new shapes, using the the Transparency Types, percentages and fill angles shown above.
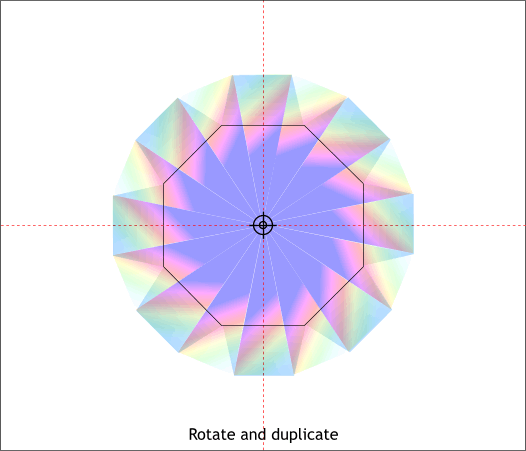
Rotate and duplicate the two shapes using the same technique covered previously to create the facets.
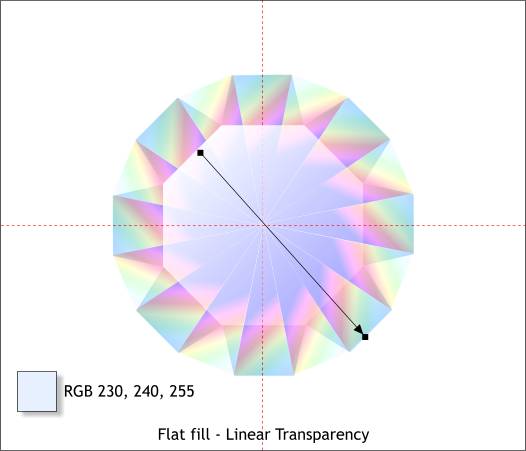
Apply a solid flat very pale blue fill to the 8-sided shape. Select the shape with the Transparency Tool and drag from the top left to the edge of the 16-sided shape as shown. Set all the outlines to none.
Create a rectangle behind the diamond. Using the Fill Tool add a black and pale blue Circular fill behind the diamond to create a diffused glow.
|
|
|
|
|
|
|
|