|
I had to create a compass rose for a map to go on a website and brochure I am designing. I thought it would make a fun workbook tutorial.
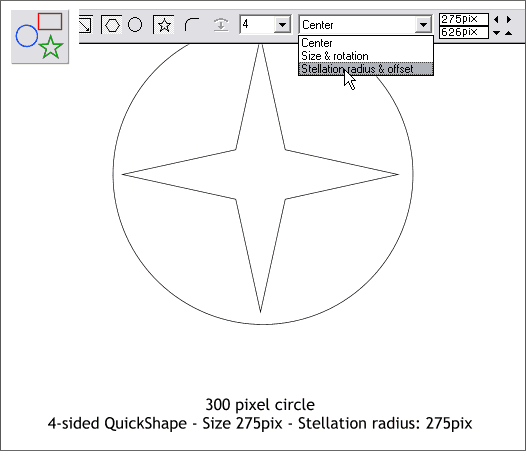
Create a 300 pixel circle. Select the QuickShape Tool. On the Infobar, select 4 for the number of sides and click the star icon. Hold down the Ctrl key and drag a four pointed star 275
pixels square. Select Stellation Radius and Offset from the drop down list and change the Stellation radius to 275.
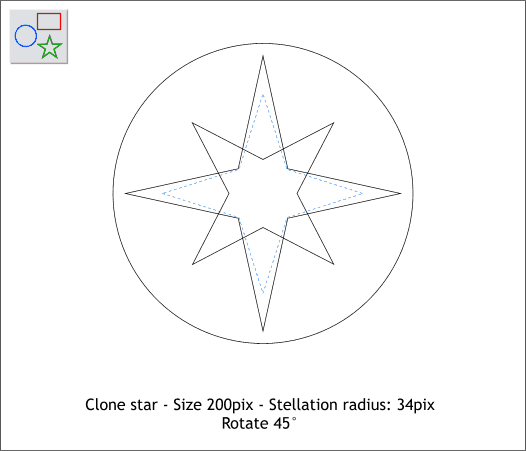
Clone the star (Ctrl k), reduce the size to 200 pixels and rotate it 45 degrees. Select the QuickShape Tool and modify the Stellation Radius to 34 pixels.
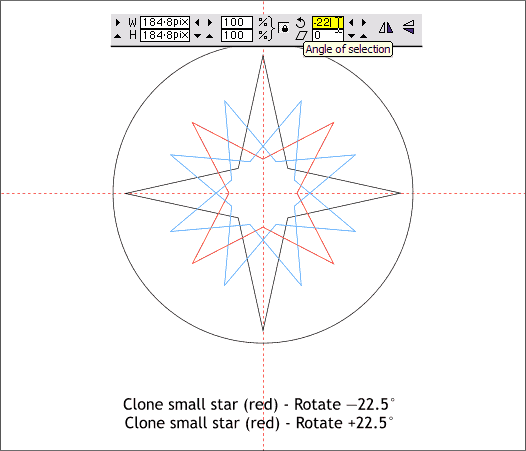
Clone (Ctrl k) the smaller star (red outline). Enter -22.5 in the Angle of Selection text entry box and press Enter to apply the rotation. Clone the small star (red outline) again and this time enter
22.5 and press Enter.
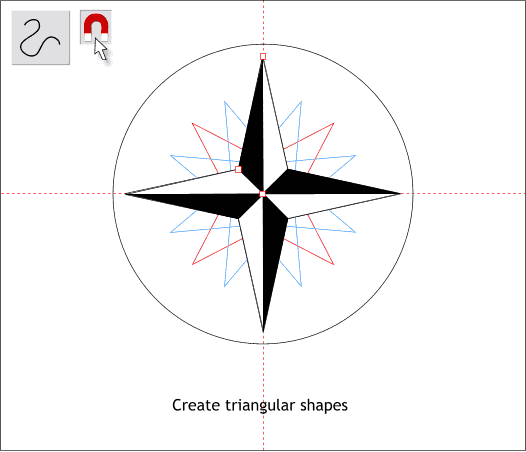
Press the red magnet icon on the Infobar to enable Snap to Objects. Drag two guidelines from the screen rulers (Ctrl l to display rulers) through the center of the big star.
Using the Shape Editor Tool, click anchor points to create the black triangle shown top left. Create a matching triangular shape and change the fill to white. Repeat until the large star has 8 black and white triangles.
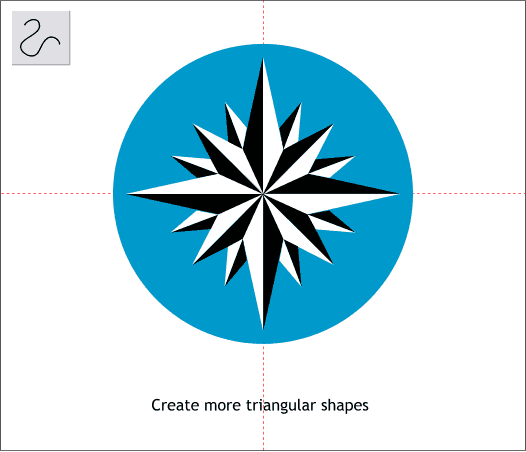
Continue to create the other triangular shapes as shown. Apply a blue fill to the circle.
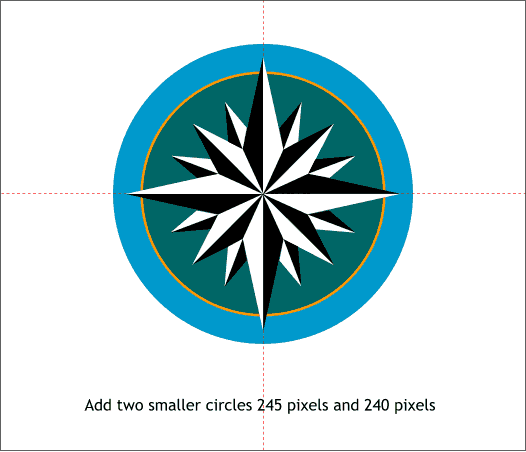
Add two smaller circles to the sizes shown. Fill the smallest circle blue green and the in-between circle orange. The orange circle should be in-between the blue green and blue circles. (Use Shift Ctrl f and
Shift Ctrl b to move objects forward and backward on layer at a time).
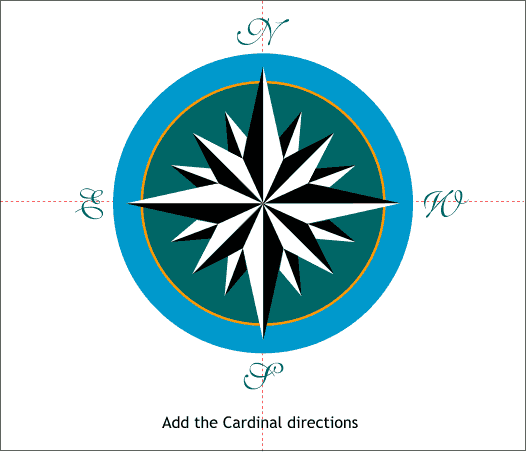
Using whatever fancy script font you have available, add the four cardinal directions.
Group (Ctrl g) all the elements except the orange circle. (Marquee select all the objects, hold down the Shift key and click on the orange circle to deselect it, then group the remaining objects).
(Continued on next page >)
|
