 |
 |
| H 1 2 3 4 5 6 |
|
|
|
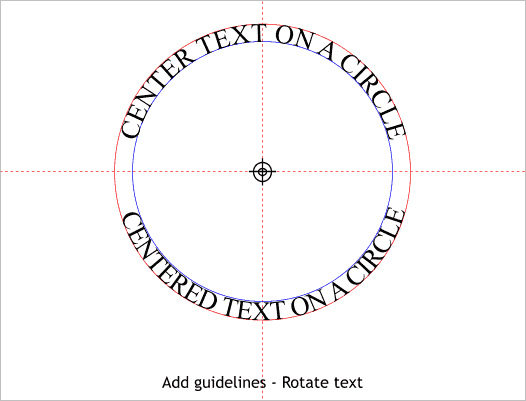
The question of how to place text on both sides of a circle recently came up in the Xara Conference and I thought it might be the good subject of a tutorial. This is one of the areas in which CorelDRAW comes out far ahead of all the other vector drawing applications. But with a little effort we can do something that looks just as nice.
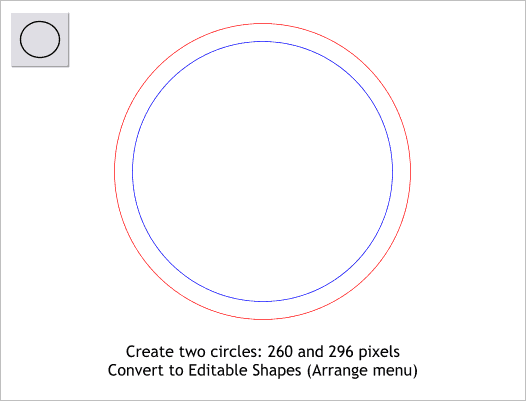
Step 1 The trick is to use two circles. The space between the two circles is the cap height of the selected font. For this example the font we will use will be 20pt Times Roman. Create two centered circles to the sizes shown. Convert the circles to editable shapes (Arrange > Convert to Editable Shapes). This is important as you cannot add text to a circle that has not been converted to editable shapes.
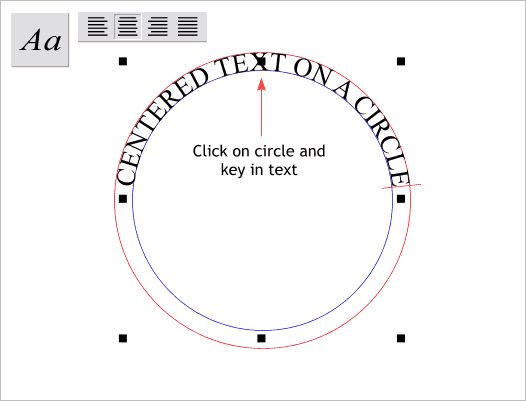
Step 2 Select the smaller circle (blue outline), then select the Text Tool. Before you do anything, click the Center Justify icon on the Infobar and select Times Roman, and set the size to 20pt . Click the text cursor in the top center of the selected circle and key in the text shown above in all caps. Because we selected Center Justify before we keyed in the text, the text is automatically centered.
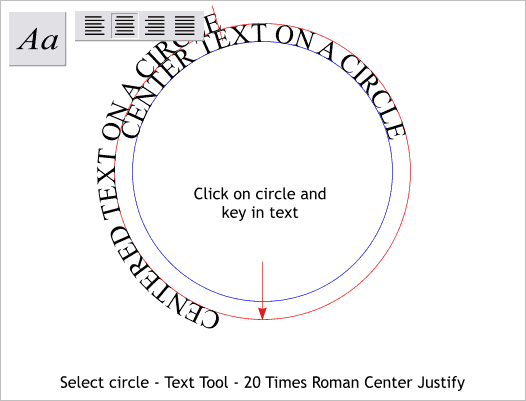
Step 3 Select the larger circle (red outline). Click the text cursor in the bottom center portion of the circle and key in the same text. Alors! This is not the way it's supposed to look!
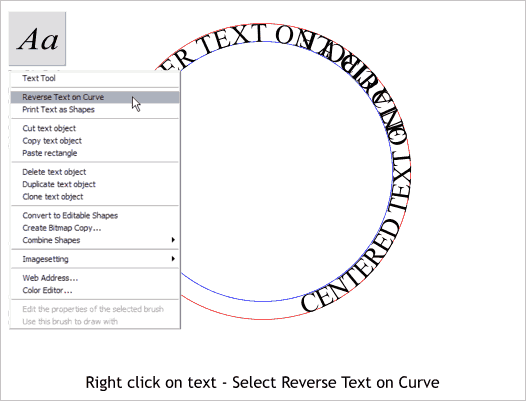
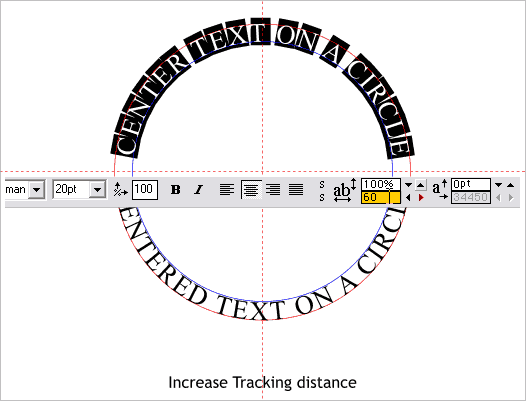
Step 4 First of all, we need to get the new text on the other side of the circle. Right click on the new text. From the pop up menu, select Reverse Text on Curve.
Step 5 Hold down the Ctrl key and click on either of the circles. Drag guidelines from the screen rulers (Ctrl L to display rulers) though the center of the circle. Click twice on the type on the larger circle to enable rotate/skew mode. Drag the center of rotation bulls eye to the intersection of the two guidelines. Drag any of the corner rotation handles and rotate the circle and text until it is centered as shown. NOTE: If it seems like the rotation handles are inordinately far away from the center of the text, you're right. This is a bug.
Step 6 Text on a circle tends to get bunched up. Dragging the Text Tool cursor across the text, highlight the text (it works better if you highlight from the last letter to the first). Increase the Tracking distance (highlighted in yellow in the example above) by pressing the right Tracking arrow. Highlight the text on the bottom and do the same thing. In my example the tracking distance is greater on the bottom, about 100.
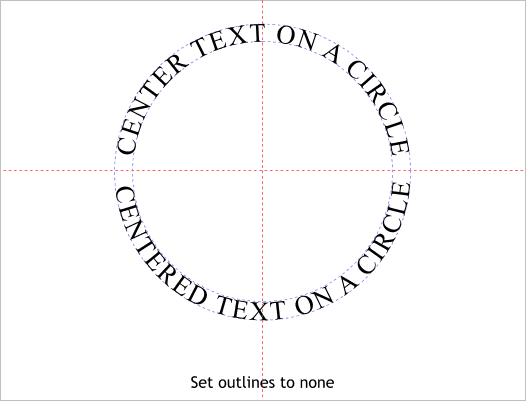
Step 7 Individually, Ctrl click the circles and set the line Width to none. I made the outlines pale blue dashed lines so you can see where they are.
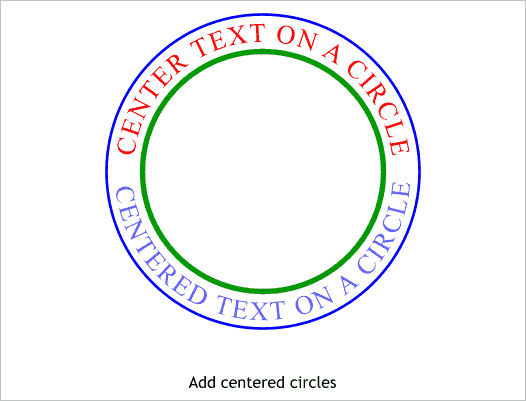
Step 8 This is not so much of a step as it is a suggestion. Construct two circles centered on the now invisible circles. And that's all folks! Comments? Questions? Tutorial suggestions? Please use the form on the next page to send me your comments. Gary Priester
|
|
|
|
|
|
|