 |
 |
| H 1 2 3 4 5 6 |
|
|
|
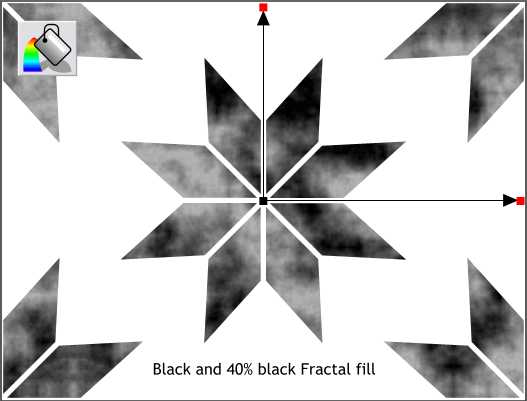
Step 7 Select all the black shapes. Select the Fill Tool then select Fractal Clouds from the Fill Type drop down list on the Infobar. Click the center control handle (where the two arrows come together) and then click the black color on the screen palette. Click one of the outside control handles and change the color to 40% black.
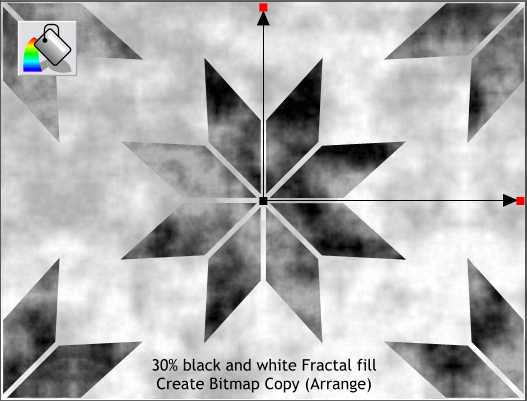
Step 8 Apply a Fractal Clouds fill to the rectangle using white and 30% black.
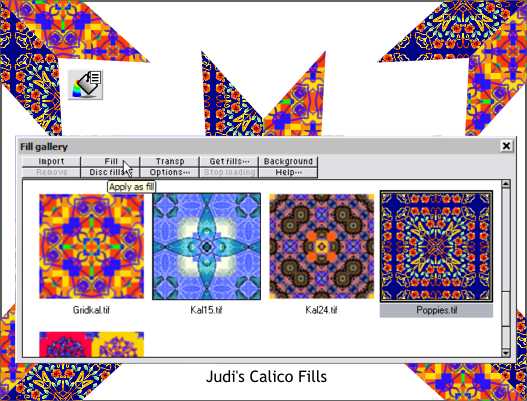
Step 9 For this step, we will be using Judi Assony's Calico Fills which are found in the Xara Xone Fills and Brushes page (240K). Click here to download the fills. Apply two contrasting fills to the red and blue shapes. I have used Poppies and Gridkal. Select all the red shapes and then select Gridjal.til (or any of the other neat fills, and press Fill. HOW TO: Once you download the file, create a new folder in your Xara folder and call it Calico Fills. Unzip the file to this new folder. In the Fill Gallery, click Disc Fills... and browse to the Calico Fills folder and press Add. Xara will create a new folder in your Fill Gallery and create small preview icons like the ones shown above.
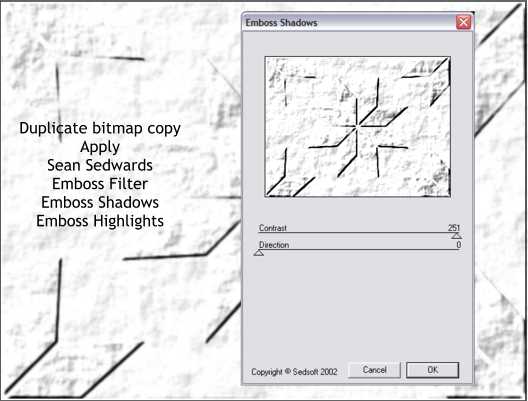
Step 10 Select all the black and white elements including the rectangle and set the outlines to none by right clicking on the crosshatched box to the left of the screen palette (the Color Line). Right click on the selection and select Create Bitmap Copy... (you can also select this option in the Arrange menu). Select True Color (not True Color + Alpha) and press Create. Make a duplicate bitmap (Ctrl d). We will Sean Sedwards' Emboss plug-in filter for this next step. If you don't have this filter installed, click here to download it. (Unzip the filter into the Xara Plug-ins folder (C:/program files/Xara/XaraX/plugins). Right click on the page and select Page Options... then select the Plug-ins tabbed section. Press Add... and browse to the XaraX/Plugins folder. Double click the Emboss filter. Select the First bitmap then select Utilities > Bitmap Effects & Plugins. Locate the Emboss... section and from the flyout select Emboss Shadows... Move the Contrast slider right to 250. Press OK. Now select the second bitmap. This time select Emboss... Emboss Highlights. Move the slider to the right and press OK. You will now have a very dark bitmap and a very light bitmap like the one shown above.
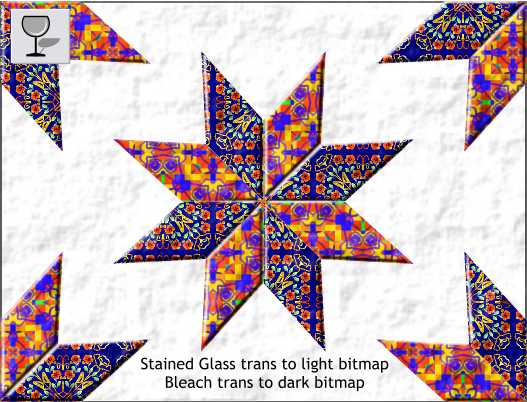
Step 11 Center align the light colored bitmap over the colored sections. Select the Transparency Tool then apply a Flat, Stained Glass transparency. Stained Glass treats white as transparent and only applies the darker portions of the bitmap to the image. Center align the dark bitmap over the colored objects and apply a Flat, Bleach transparency. Bleach transparency treats black as if it were transparent and applies only the lighter values or in this case, the highlights.
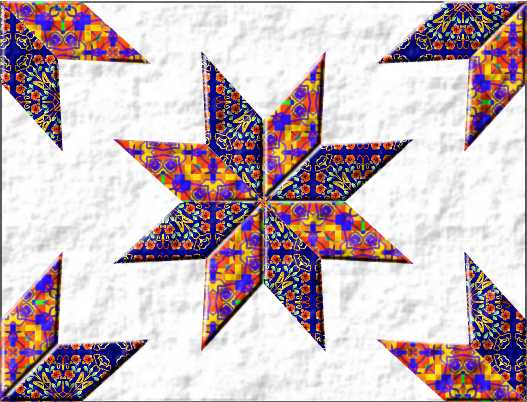
And here is the finished image.
|
|
|
|
|
|