|
|
|
|
|
||||
 |
|||||
|
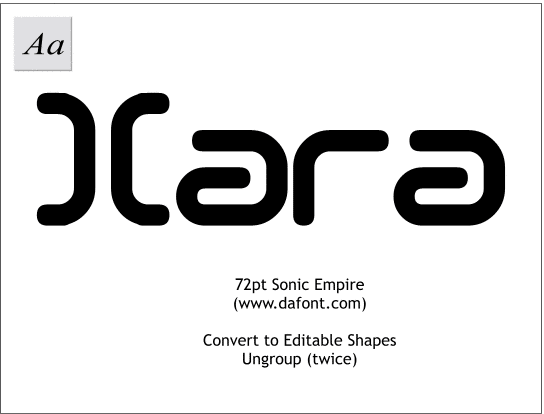
In this mini-tutorial, we'll modify an existing type face and create a custom logotype. The font I will be using is called Sonic Empire and is available from www.DaFont.com. With a few modifications, we can make the text into a unique logo.
Step 1 Using the Text Tool, key in Xara using Sonic Empire for the font and setting the size to 72pt. Convert the text to editable shapes (Arrange > Convert to Editable Shapes). With the text selected, select Ungroup twice from the Arrange menu. This converts the text to four individual closed path shapes.
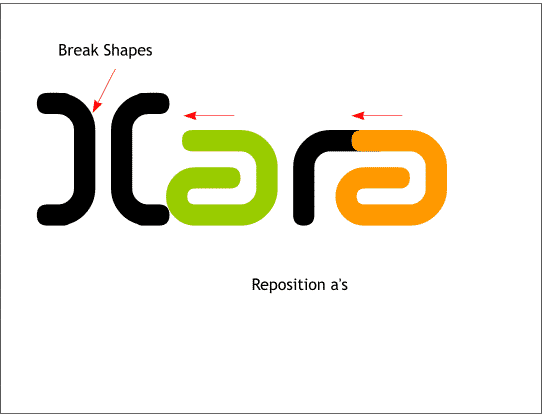
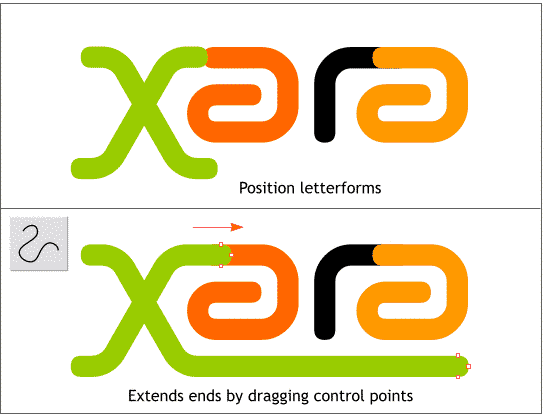
Step 2 Select the X and Arrange > Break Shapes. Reposition the two a's as shown. (I have applied different colors to help differentiate the individual characters.
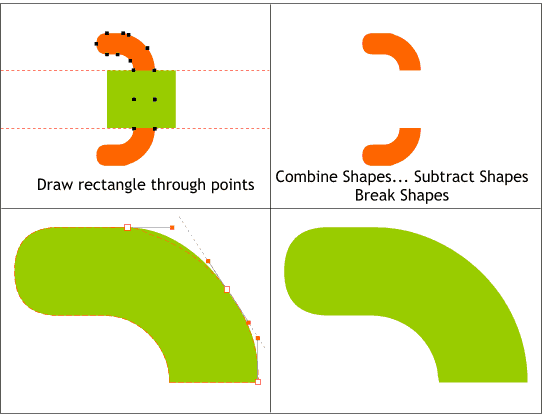
Step 3 Select the left side of the X, then select the Shape Editor Tool. Drag two guides through the control points as shown. Using the Rectangle Tool, draw a rectangle that aligns with the points as shown top left. Select the rectangle and the left part of the X and Arrange > Combine Shapes... Subtract Shapes. Select the shape and Arrange > Break Shapes. Delete the bottom shape. The character is not very well drawn or perhaps it was just not digitized very accurately. Select the shape then select the Shape Editor Tool. Click on a control point to enable the Bezier control handles and drag the handles to they form a tangency to the curves as shown bottom left. When you are finished the shape should look like the example shown bottom right with nice rounded corners.
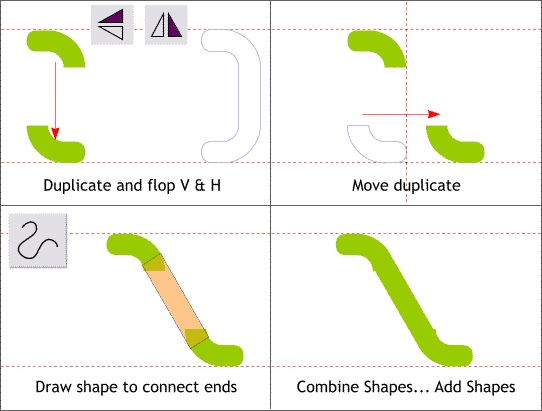
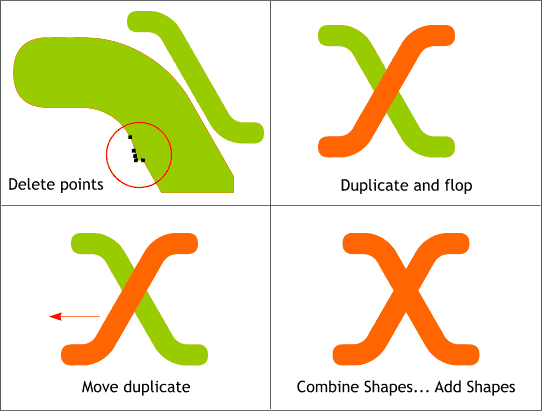
Step 4 Duplicate the shape and then press the Flip Horizontal and Flip Vertical buttons on the Infobar. Drag the duplicate down to align with the bottom of the other half of the X. Move the duplicate to the right about 1 1/2 times the width of the shape. Using the Shape Editor Tool, draw a closed rectangular shape that connects the two shapes as shown lower left. Select all three shapes and Arrange > Combine Shapes... Add Shapes. There are a few bumps left which we will eliminate next.
Step 5 Select the shape with the Selector Tool then select the Shape Editor Tool. Select the control points that make up the jagged outcropping (shown inside the red circle) and delete them. Do the same for the bottom right side of the shape. Clone the modified shape (I've colored the duplicate orange) and press the Flip Horizontally icon. Move the duplicate (orange) shape a few pixels to the left. Select both shapes and Arrange > Combine Shapes... Add Shapes. (Delete the remaining part of the original text X).
Step 6 Position the X shape so it aligns with the a as shown. Select the X shape with the Selector Tool, then with the Shape Editor Tool. Select the three top right end control points (the red boxes) and use the right arrow key to move the selected points over the a-shape. Do the same with the bottom right side of the X as shown.
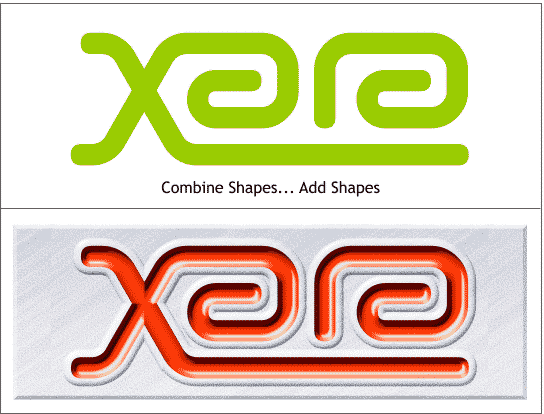
Step 7 Select all the shapes and Arrange > Combine Shapes... Add Shapes to complete the logotype. The bottom illustration shows an application of the logo type using the brushed aluminum fill and a pair of bevels. And with this we come to the end of another Workbook. Your comments, questions, and suggestions for future tutorials are always welcome. Please use the form on the next page to send me your comments. Gary W. Priester |
|
