|
|
|
|
|
||
 |
|||
Creating a Simple Animation in Xara 3D 5Xara Ltd., has just released the newest version on its cool little 3D application, Xara 3D 5. While many of you may already be familiar with, or already own this product, for those of you who have never used Xara 3D, here is a mini-tutorial which also demonstrates some of the new features. Click here to download a free trial version of X3D 5.0
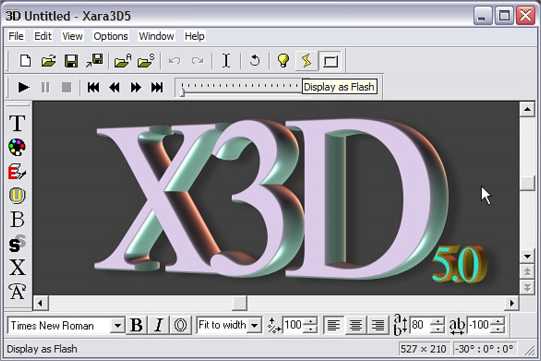
When you first open X3D 5 you see this window. Some of the new features include the ability to display the image in Flash. This removes some of the elements that do not translate into Flash. Also new are control panel buttons that let you step through the animation one frame at a time.
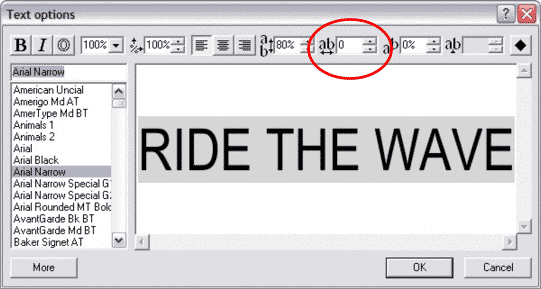
Press the T icon on the toolbar on the left side of the window to open the Text Options view. Highlight the X3D 5.0 text and delete it. Key in RIDE THE WAVE in a narrow sans serif font such as Arial Narrow. X3D 5 defaults to a tracking amount (the space between characters) of -100. I'm not sure why but highlight the -100 and delete it. Press OK.
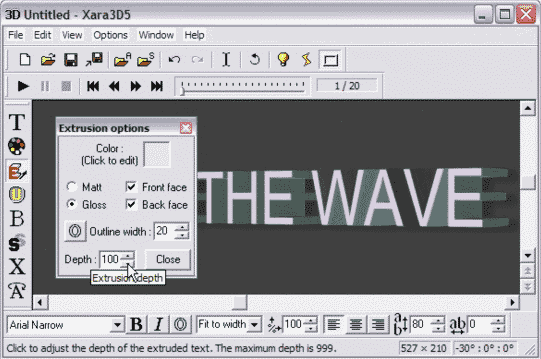
Click the red E button on the toolbar to open the Extrusion Options dialog. Change the Extrusion Depth to 100 and press Close. This increases the depth of the characters.
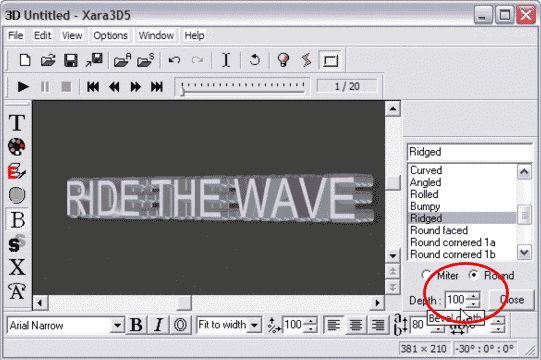
Click the B on the toolbar to open the Bevel Options view. Select Ridged from the scrolling list. Check the Round option and set the Bevel Depth to 100. Press Close.
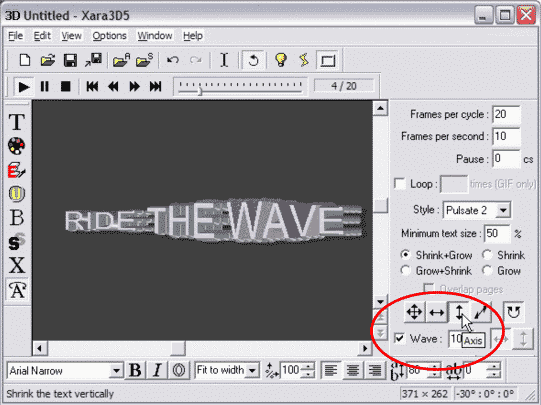
Click the Animation button (the A with the circular arrow on the bottom left of the toolbar) to open the Animation Options view. From the Style drop down list, select Pulsate 2. Click the vertical axis icon (the vertical up and down arrow). Check the Wave check box and in the Wave Length text entry box enter 100. (You may need to extent the window downward to see these options). Press the circular arrow icon at the top of the screen to preview the animation. You can also experiment with all the other styles and settings. It's tens of laughs. When you are done, press the A icon again to close the Animation Options view.
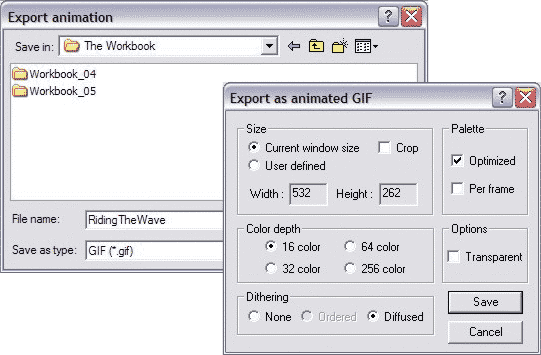
From the File menu, select Export Animation. In the Export Animation dialog select Animated Gif from the drop down list of Export Options (other options include AVI, Flash SWF vector, Flash SWF Bitmap and animated GIF. Press Save. In the Export as Animated GIF dialog, select Optimized for the Palette, Color Depth, 16, and Diffused Dithering. Press Save.
There are loads of new features and options which are more than I have room to explore here. But the best way to learn these is to dive right in and explore. The Help menu is extremely helpful. And if you have questions or want to show off your animations, visit the Xara 3D Conference. Please try to keep the file size of your animations down to a reasonable size. And with that, we end another Workbook. Your comments and feedback are the payment I get for creating these tutorials. So please take a moment to send me your comments and questions using the feedback form on the next page. |
|
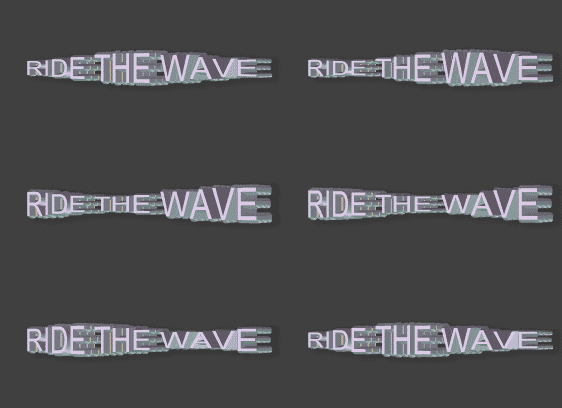 Your animation will now look like this (I reduced the size of mine by resizing the
window to make the file size smaller).