|
|
|
|
|
||
 |
|||
Making Lightning
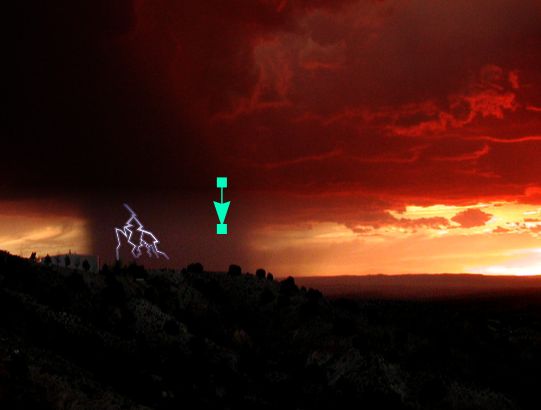
Recently I needed a moody photo for a web site I was working on. The photo was to illustrate New Mexico weather. I thought it would look neat to have some forked lightning coming out of the clouds. Unfortunately my digital camera (as well as its operator) is not fast enough to catch lightning as it happens. But I had an appropriate photograph and I figured I could make the lightning happen in Xara. It worked as you can see and so I decided to share my technique with you in this tutorial.
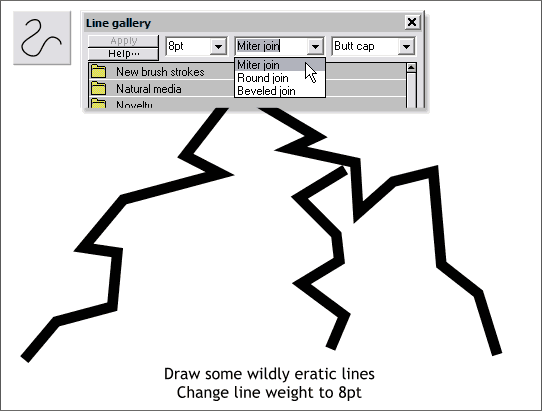
Step 1 Using the Shape Editor Tool, or the Pen Tool, create some jagged lines about the size of the image above. Set the Line Width to 8pt. Open the Line Gallery (found on the top right area of the Infobar) and from the Set Join Type drop down list, select Miter Join. This sharpens the angles where the line segments meet.
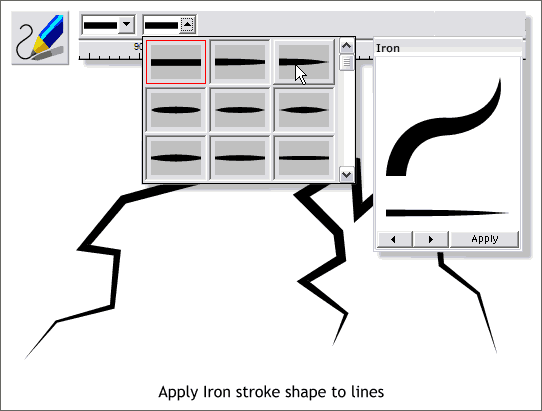
Step 2 Lightning as far as I can tell, tends to taper down to a point. We can do this by applying a stroke shape to the three lines we just created. Select all three lines (hold down the Shift key and click on each line to multiple select). From the Select an Existing Stroke Shape drop down list on the Infobar (shown above), select the tapered shape on the right of the first row of shapes, Iron.
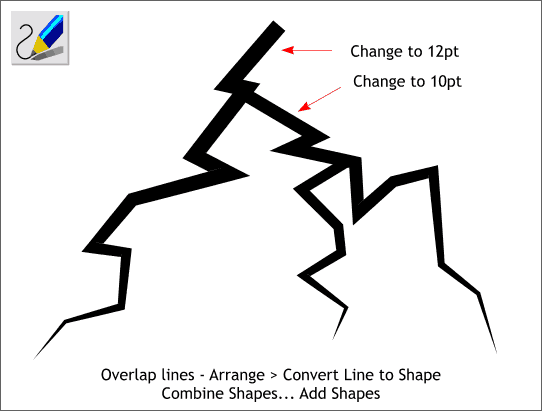
Step 3 Change the line widths as shown above by selecting the line and then selecting the appropriate width from the Set Line Width drop down list. Overlap the lines so that the beginning part of the two smaller lines are hidden within the larger line. Select all three lines and from the Arrange menu, select Convert Line to Shape. (The lines are now shapes to which you can apply any fill and/or outlines). Select the three shapes and from the Arrange menu, select Combine Shapes... Add Shapes. The three shapes are now one shape with a common and continuous outline. NOTE: I'm afraid Xara does not do a very clean job of this. If you select the line then select the Shape Editor Tool, you will notice Xara has added a lot of extra control points. I edited my shapes and removed all but the main control points. This is not necessary but it will make the more compulsive of us feel better.
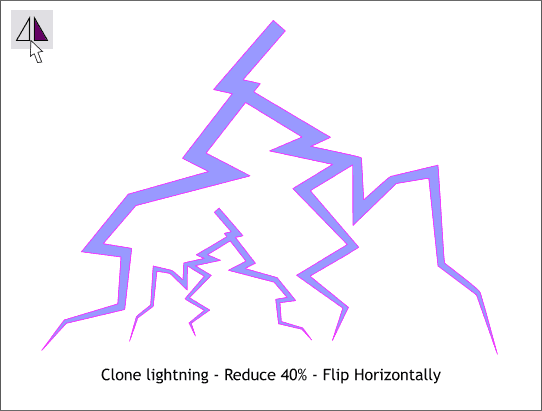
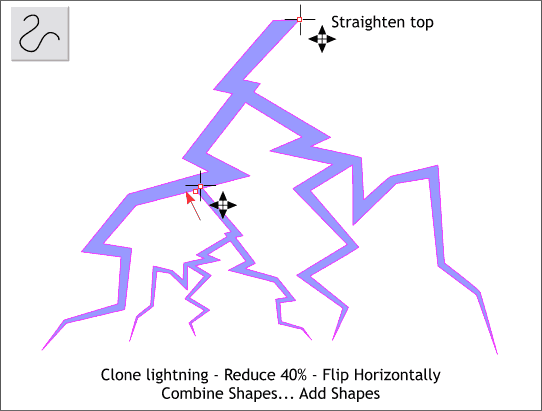
Step 4 Make a clone (Ctrl k) of the lightning. On the Infobar, change the percentage to 40% (either height or width) and press Enter to apply the change. Press the Flip Horizontally icon to flop the clone.
Step 5 Select the clone lightning then select the Shape Editor Tool. Drag the top two control points up and left until they overlap the big lightning. Select both the big and small lighting and Arrange > Combine Shapes... Add Shapes. Straighten the top portion as shown.
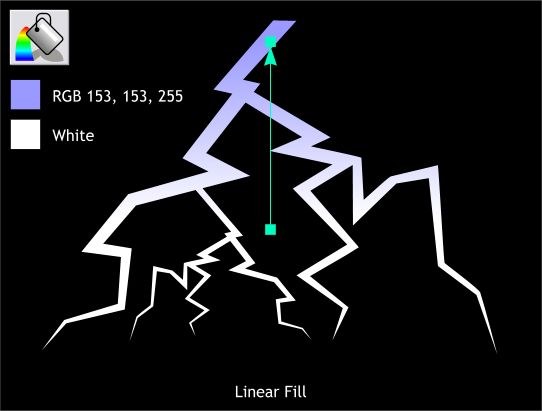
Step 6 Add a dark rectangle behind the lightning. Select the combined lightning with the Fill Tool. From the Fill Types drop down list on the Infobar, select Linear . Drag the fill path arrow with the Fill Tool cursor until it matches the image above. Make the top portion of the fill pale purple by clicking the end control point (the box at the top of the arrow) to select it and then clicking on the pale purple found at the far right end of the screen palette. (Set the outline to none),
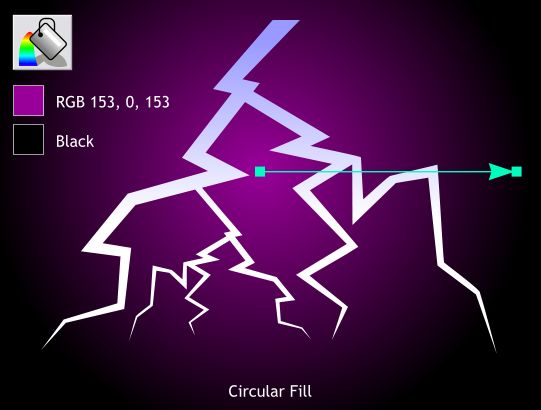
Step 7 Select the rectangle behind the lightning and apply a Circular Fill using the two colors shown and moving the center of the fill as indicated above.
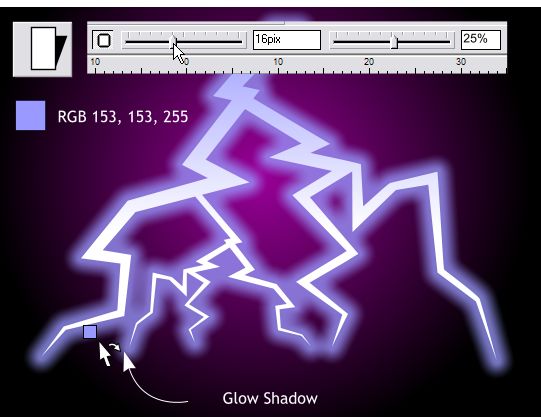
Step 8 Lightning has a diffused, glowing edge. To replicate this look, select the lightning, then select the Shadow Tool. Apply a Glow Shadow and then adjust the Shadow Blur and Shadow Transparency settings shown above. Locate the pale purple on the screen palette and drag the color from the screen palette onto the screen and drop the color on the shadow.
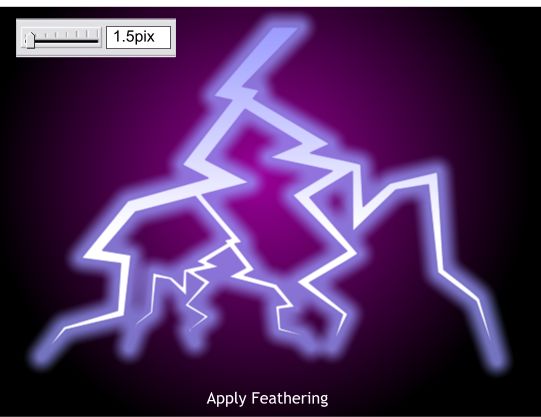
Step 9 To further soften the hard edge on the lightning, select the lightning then add a small amount (1.5pix) of feathering by entering this amount in the Change Size of the Feather Region text entry box on the far right side of the Infobar. Press Enter to apply the change. That is my lighting technique.
Step 10 I just happened to have another dramatic photographic of a New Mexico sunset/cloudburst (someone was getting a lot of rain dumped on them!). I reduced the size of the lightning (I deleted the rectangle) and placed the lightning bolts over the downpour area. To soften the top portion of the lightning, I cloned the photo, and added a Linear, Stained Glass t ransparency starting above the lighting and ending about halfway down. In retrospect, I think I would have made my line weights smaller. Maybe about 1/2 the size. But all the rest of the techniques I would keep the same. |
|

