|
|
|
|
|
||
 |
|||
Spirals - The Xara WayMany vector drawing applications have a spiral tool with which you can create perfect spirals. Sometimes you have a choice of concentric or algorithmic spirals. Sadly, Xara does not have a spiral tool. But, if you are willing to work a little bit, here is a way to create your own concentric spiral. This tutorial uses Pixels as the unit of measurement. To set your units to Pixels and your rulers to Pixels as well, select Options from the Utilities drop down menu which will open the Page Options dialog. In the Units tabbed section, select Pixels from the Page Units drop down list. Check the radio button next to 0-255 for the Color Units. (We will be using RGB color for our color designations and I like to use the 0-255 scale for this). In the Grid and Ruler tabbed section, key in 100pix (key it in exactly like this) in the Major Spacing text entry box. Key in 10 in the Number of Subdivisions text entry box. Press OK to apply these changes and to close the Page Options dialog.
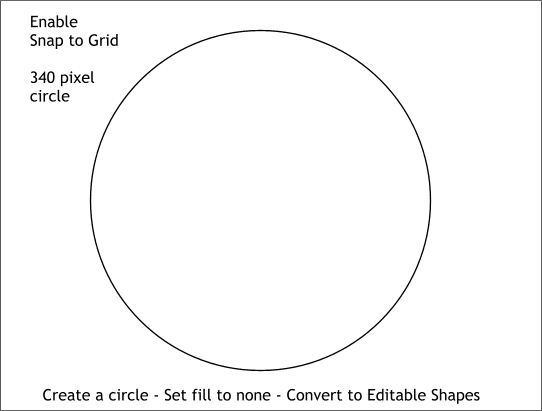
Step 1 Enable Snap to Grid (right click on the page and select Snap to Grid from the pop up menu). Select the Ellipse Tool and holding down the Ctrl key to constrain the ellipse to a circle, draw a circle about 340 pixels in diameter. Set the fill to none by clicking the crosshatched box to the left of the screen color palette. With the circle selected, select Convert to Editable Shapes from the Arrange menu.
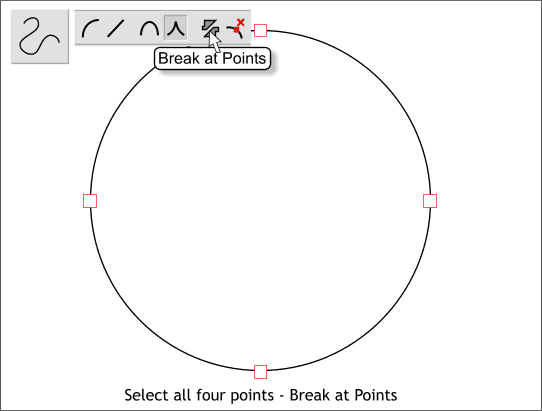
Step 2 With the circle selected, select the Shape Editor Tool. Drag a rectangle around the circle to marquee select all four control points. (When the control points are selected they will show as a red outlined box). On the Infobar at the top of the screen, click the Break at Points icon (shown above). This creates four equal arcs.
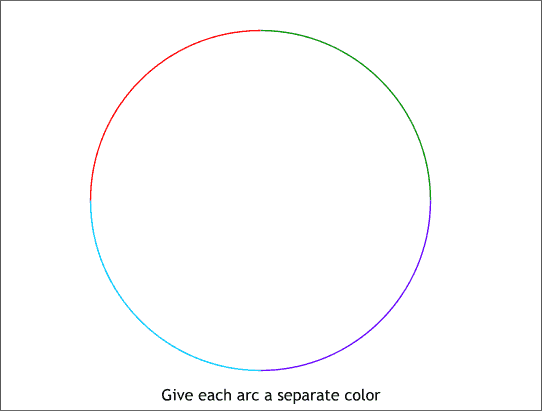
Step 3 Select each arc individually and right click on a color on the screen palette to change the outline color. Repeat this for the other three arcs giving each a distinct color. The color itself is not important, only that you can easily tell the four arcs apart.
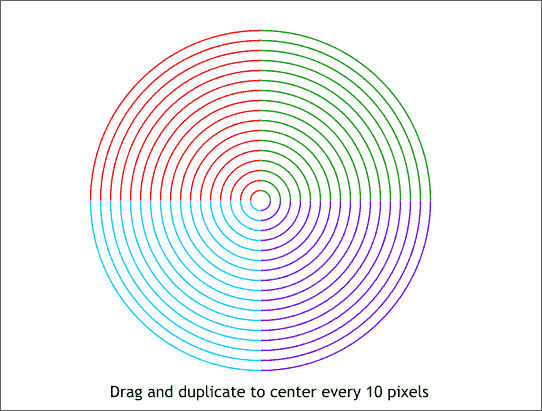
Step 4 This may take a bit of trial and error if you have never done it before. Using the Selector Tool (the arrow pointer), drag a rectangle around all four arcs to marquee select them. Hold down the Shift key (to constrain resizing from the center of the selection) and drag inwards until the four arcs snap down to the next size (remember we set the grid subdivisions to 10 so 10 pixels is the next size down). Do not release the left mouse button but click the right mouse button to drop a set of four duplicate arcs. Continue resizing like this until you are down to a tiny circle as shown above. Now you can release the left mouse button.
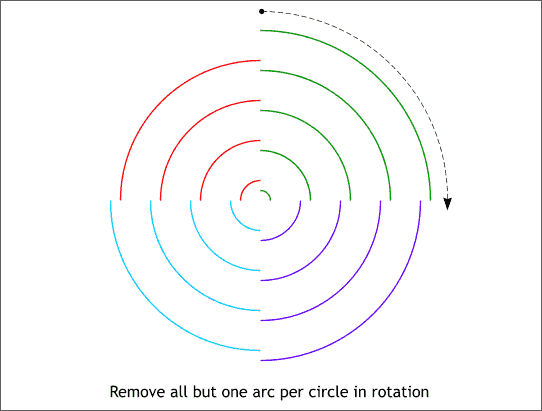
Step 5 Moving in a clockwise direction, we are going to remove all but one arc per set of four. Then we will do the same for the next group down except the arc left remaining will be the next arc in clockwise rotation. In the example above, all but the green arcs were removed from the outer set. The next arc in rotation is the purple arc which was left while the other three in that set were removed. Next was the light blue arc, followed in the next set down by the red arc, and so on until only one arc remains per circular set as shown above.
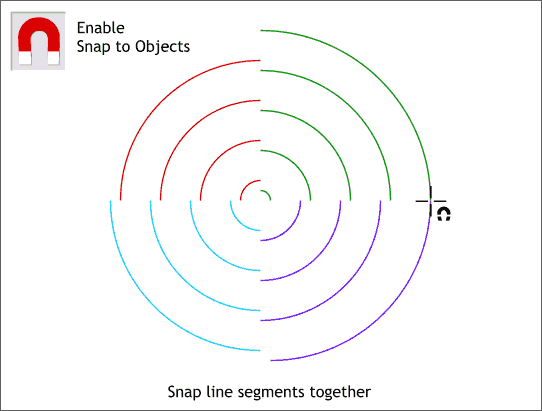
Step 6 Click the red magnet icon at the top of the screen to enable Snap to Objects. (At the same time, right click on the page and select Snap to Grid to disable this function). This causes objects to snap together at their control points. Snap to Objects is enabled when the red magnet icon appears to be in the down position. Select the second arc on the right and drag the top end of the arc until it snaps to the bottom end of the first arc. When the two arcs are about to snap into place, the cursor will display a small magnet icon.
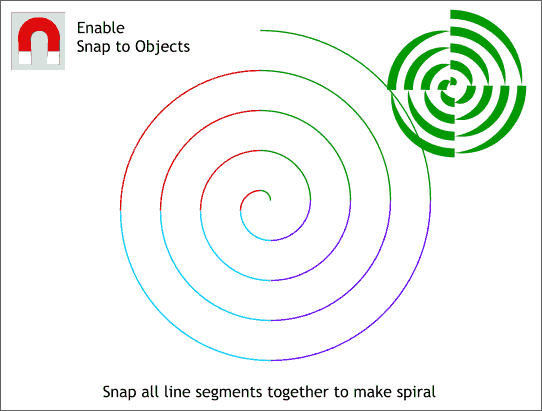
Step 7 Continue snapping the arcs together until you have a spiral shape such as the example shown above. At the moment, the spiral is made up of the individual arc shapes. You can select all arc shapes, increase the line width to 10 points or more, and apply a Stroke Shape such as the one shown above top right. To do this, select the arcs, then select the Freehand and Brush Tool, and then select a shape from the Select an Existing Stroke Shape drop down list on the Infobar.
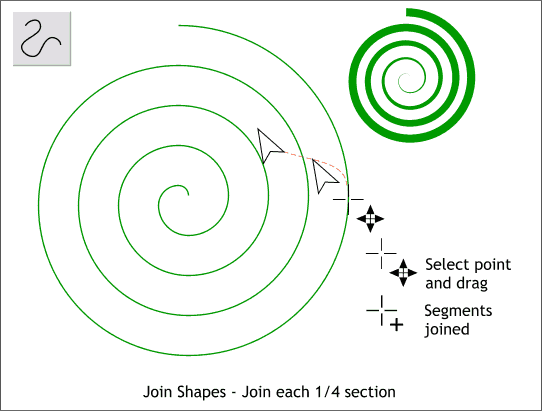
Step 8 Making the spiral a continuous shape, so that a shape or blend applied to the line looks like the example shown top right requires some addition steps. Marquee select all the arc shapes. From the Arrange menu, select Join Shapes. All the line segments will now become the same color. But they are still individual arcs. Select the spiral, then select the Shape Editor Tool (the squiggly line icon). Move to the junction of the first two arcs. When the cursor is over the end point of the first arc and the start point of the second arc, the arrow icon changes to a cross hair and a 4 sided arrow. This indicates you can edit a point. Drag outward and one of the points will move as well. Drag the point back to its original position and the cursor will change again, this time to a + indicating that the two arcs are now one united path. Continue working your way around the spiral connecting each arc to the next until all arcs are united. Part II
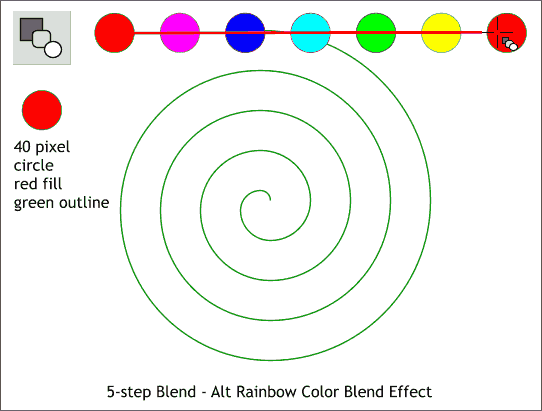
Step 9 This next part can be done either by just Joining all the arc shapes or by making one continuous path as we did in the last step. Make a 40 pixel circle and apply a red fill and a green outline. Duplicate the circle and move it to the right. Select the Blend Tool. Click on the left circle and without releasing the left mouse button, drag over to the right circle. This creates a simple 5-step blend. From the Color Blend Effects drop down list on the Infobar (the default is Fade), select Alt Rainbow to change the colors to a rainbow.
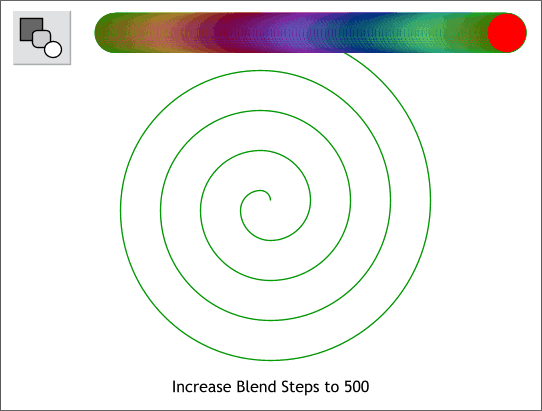
Step 10 In the Blend Steps text entry box on the Infobar, highlight 5 and change it to 500. Press Enter to apply the changes.
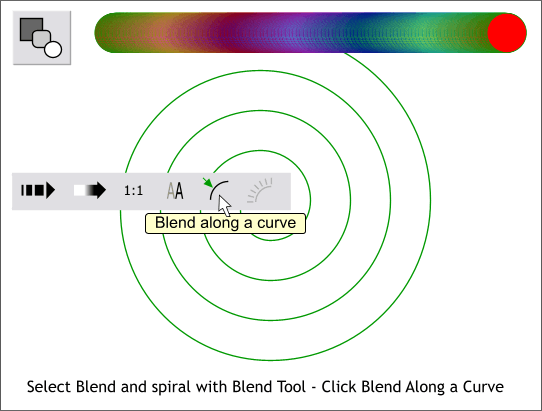
Step 11 Select the Blend Tool. Click on the blend to select it and hold down the Shift key and click on the spiral to select it as well. Click the Blend Along a Curve icon on the Infobar.
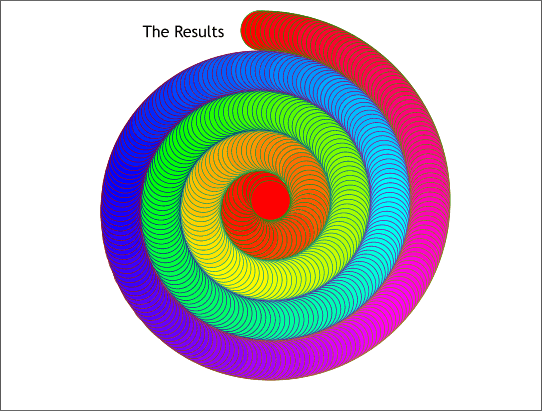
The results: The blend is applied to the spiral creating a rainbow colored spiral. If you select the blend and set the line width to none, you will get a continuous and seamless rainbow. NOTE: The maximum amount of blend steps in Xara is 999. Some of you undoubtedly are asking how I knew that a 40 pixel circle would be just the right size for the above effect. The simple answer is I didn't. It was just a happy accident. |
|
