|
|
|
|
|
||
 |
|||
Ice Text EffectLuca from Italy requested this next effect. Says Luca, "I'd like to request a tutorial showing an ice technique (text, crystals, and so on!) in Xara X." Well, Luca, this tutorial is for you.
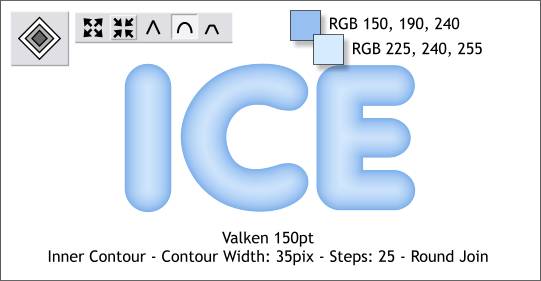
Step 1 Key in the text ICE in Valken 150 points. Apply an Inner Contour using the settings and colors shown above. Remember to change the colors of the contour, Ctrl click on the top shape with the Selector Tool, change the colors in the Color Editor (Ctrl e) and then press the Tab key to select the back shape and change its color. And that's all there is to it. Well, OK, there are a few more steps.
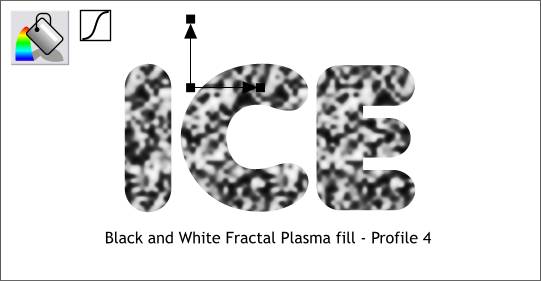
Step 2 Clone the text (Ctrl k). Apply a black and white Fractal Plasma fill (select from the Fill Types drop down list on the Fill Tool Infobar). Adjust the fill path arrows as shown. Change the Profile setting to Profile 4. This maximizes the difference between the black and white colors.
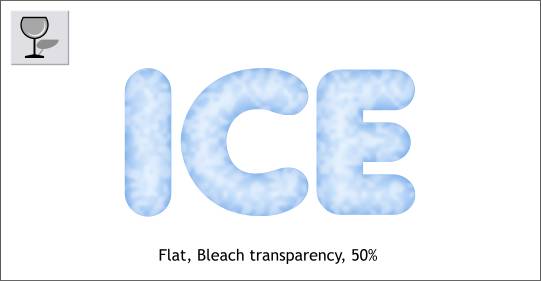
Step 3 Center the fractal plasma fill over the contour. Select the fractal filled text with the Transparency Tool. Apply a Flat, Bleach transparency. And that's all there is too it. Well, OK, there's a bit more.
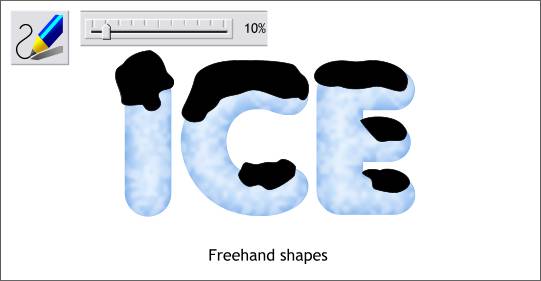
Step 4 In this step, we'll add some shapes that will be snow atop the letters. Select the Freehand and Brush Tool. Set the Smoothness slider on the Infobar to 10. Draw some blobby snow shapes on top of the letters as shown.
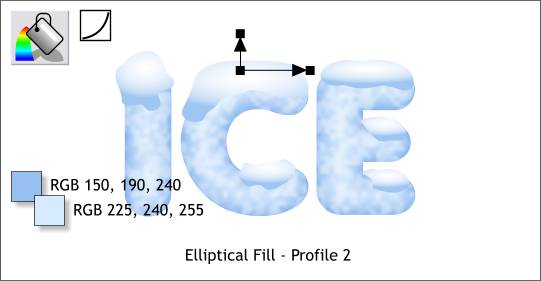
Step 5 Using the two colors shown, apply Elliptical fills to the snow blobs. Drag the center of the fill upwards and apply a Profile 2 profile setting. We're done! Well...
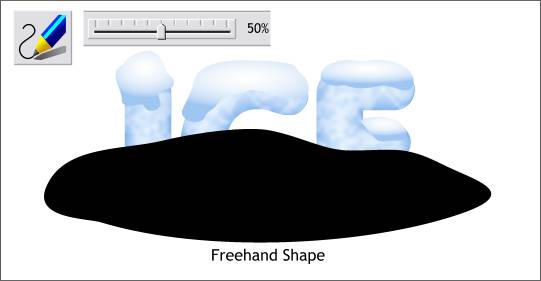
Step 6 Change the Smoothness setting for the Freehand and Brush Tool to 50% for a smoother line. Draw a shape similar to the one shown above. This will be a puddle shape caused by the melting text. (The end of the line has to be placed over the starting point for the shape to be solid and filled).
Step 7 Apply a two color Linear fill using the two colors shown and adjusting the fill path arrow so that it is vertical.
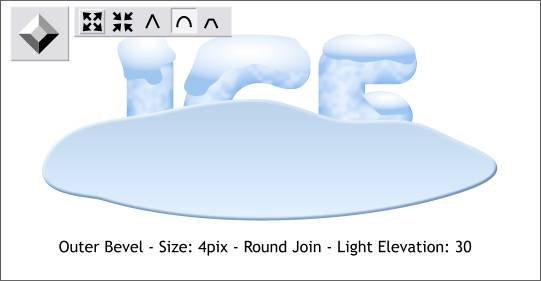
Step 8 Select the freehand shape with the Bevel Tool. Apply an Inner, Rounded bevel (select from the Bevel Types drop down list) and click the Round Join icon on the Infobar. From the drop down list of Slider types, select Light Elevation. Move the slider to the left to 30.
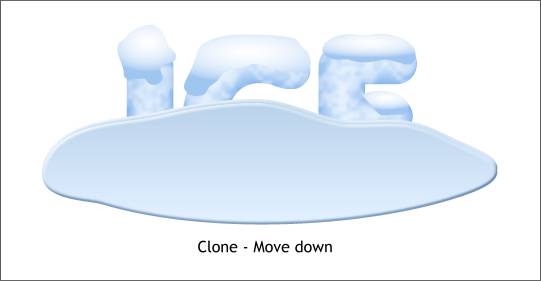
Step 9 From our eye level, we will not see the back edge of the puddle. Here's how we can remedy that. Clone the puddle and move it straight down until you can see the highlight edge of the puddle shape below it.
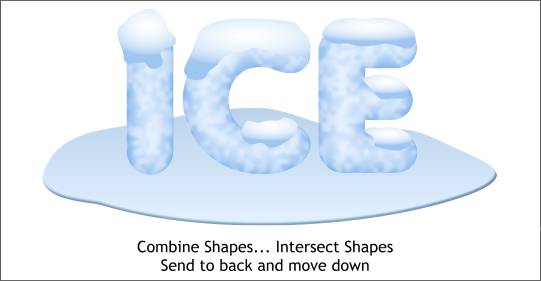
Step 10 Select both puddle shapes and Arrange > Combine Shapes... Intersect Shapes. This effectively eliminates the back edge to the puddle. Send the puddle to the back (Ctrl b).
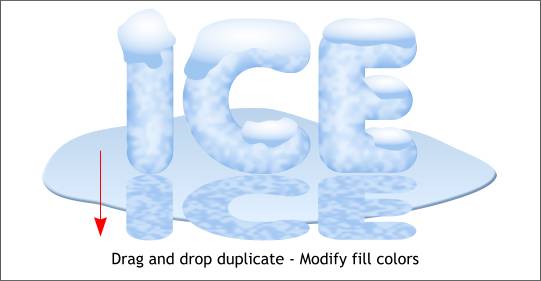
Step 11 Select the top ice text shape and drag the top center control handle (the black box) downwards past the bottom of the ice. When the shape is about as deep as shown above, press the right mouse button (before you release the left mouse button) to drop a duplicate. Select the black and white fractal filled shape and change the colors as shown above. TIP: Select the black and white Fractal Plasma-filled text with the Fill Tool. Open the Color Editor (Ctrl e) and use the Color Picker (the eyedropper tool) to pick a dark and medium blue color from the ice text to apply to the Fractal Plasma fill so that the fill now looks like the image above.
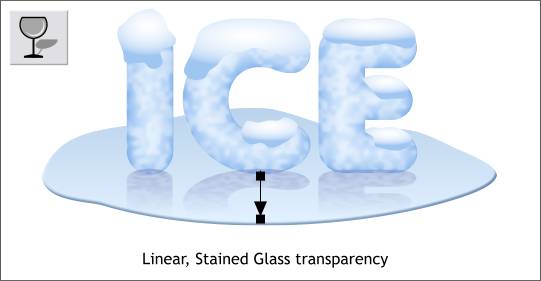
Step 12 Select the reflection with the Transparency Tool. Drag from the top downward as shown to apply a Linear transparency. Change the Transparency Type to Stained Glass . We're done!
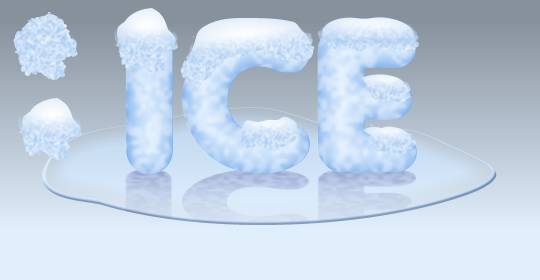
Step 13 I lied! Place a rectangle behind the ice and puddle and apply a two color Linear fill using the two colors shown. Now we are done. Well, almost!
I added a few extra steps which for the sake of time I'll just highlight. I cloned the snow shapes and applied a two color Fractal Plasma fill and adjusted the fill path handles to make the texture very fine. I then applied a Linear, Mix transparency to each exposing the texture at the bottom. This makes the snow mounds more snow like. I extended the transparency for the reflection below the puddle then selected the shadow and the puddle and selected Apply Clip View from the Arrange menu. This masks the reflection inside the puddle. I also applied a small amount of feathering to the reflection before applying clip view. So what do you think? Does it look like ice? I think I can do better. Maybe I will tackle this some day for a full blown tutorial where I can use more steps to add more detail. Your comments and questions are welcome. In fact they are mandatory. If I don't hear from each and every one of you, I will be very disappointed and may go into a dark sulk. Please use the response form on the next page to send me your feedback. All responses are confidential and for my bloodshot eyeballs only. |


|