|
|
|
|
|
||
 |
|||
|
Enhancing Black & White Photos One of my monthly gigs is Webmaster for the Signpost, the Web version of our local monthly newspaper. The paper is printed in black and white with one spot color on newsprint. Because the resolution is so low and the images are being printed on newsprint, which is a dull yellowish white, the editor of the paper version reduces the dynamic range of the photos so the darkest dark is about 80% black and the whitest white is about 20% black. While this looks OK for the newspaper version, the images the publisher sends me are flat and washed out and look very bad on the Web. So I came up with a technique for adding back some interest to the photos and a little bit of color at the same time. Here is my technique for restoring faded images. |
|
|
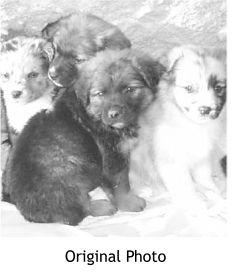 Here is a good example of the kinds of photos I have to work with. The darks aren't very dark and the lights
are very washed out and dull.
Here is a good example of the kinds of photos I have to work with. The darks aren't very dark and the lights
are very washed out and dull.|
|
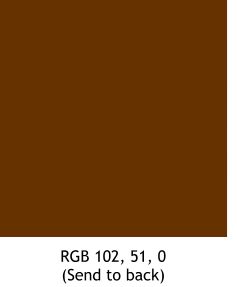 Step 1 I make a rectangle the same size as the photo and apply a deep
reddish brown fill. The rectangle is sent to the back (Ctrl B).
Step 1 I make a rectangle the same size as the photo and apply a deep
reddish brown fill. The rectangle is sent to the back (Ctrl B).|
|
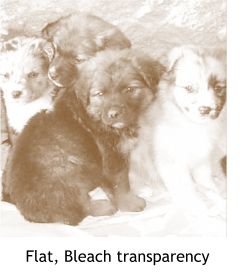 Step 2 A Flat, Bleach transparency applied to the wahsed out bitmap
image exposes the colored rectangle that was sent to the back. Already the photo has a little more snap and warmth. But this might be due to the charming subject matter?
Step 2 A Flat, Bleach transparency applied to the wahsed out bitmap
image exposes the colored rectangle that was sent to the back. Already the photo has a little more snap and warmth. But this might be due to the charming subject matter?|
|
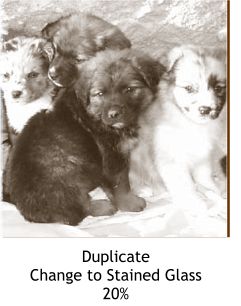 Step 3 The photo image with the Bleach transparency is cloned (Ctrl k
) and the transparency changed from Bleach to Stained Glass. The Transparency slider on the Infobar at the top of the screen is changed to 20%. The photo now has a sepia
tone or duo-tone look and displays a lot better on the Web site. (After all, we were trying to find homes for all these cute little puppies, 12 in all, and the better we presented them the better their chances for
adoption).
Step 3 The photo image with the Bleach transparency is cloned (Ctrl k
) and the transparency changed from Bleach to Stained Glass. The Transparency slider on the Infobar at the top of the screen is changed to 20%. The photo now has a sepia
tone or duo-tone look and displays a lot better on the Web site. (After all, we were trying to find homes for all these cute little puppies, 12 in all, and the better we presented them the better their chances for
adoption).|
In this case a green to orange Linear fill has been applied to the rectangle. |
 Step 1a You don't have to use the dark brown fill color, nor do you have to use a solid fill.
|
|
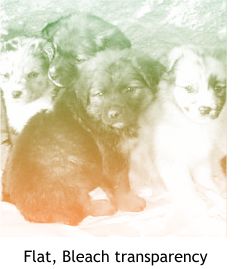 Step 2a The Bleach transparency reveals the color of the Linear fill.
|
|
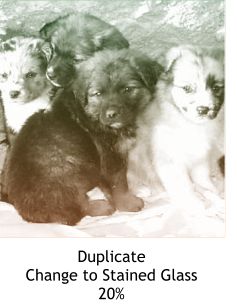 Step 3a And cloning the Bleach transparency bitmap and changing the transparency to
Stained Glass, 20% produces this result.
Step 3a And cloning the Bleach transparency bitmap and changing the transparency to
Stained Glass, 20% produces this result.|
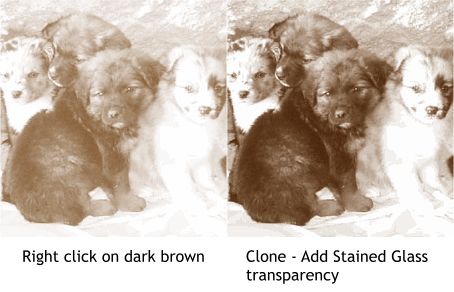
Alternate Method Here is another method I use that is just about as effective. I'll explain in a moment why I prefer the first technique, however. Select the bitmap and right click on any deep color on the screen palette. Clone the bitmap and apply a Flat, 0%, Stained Glass transparency. |
|
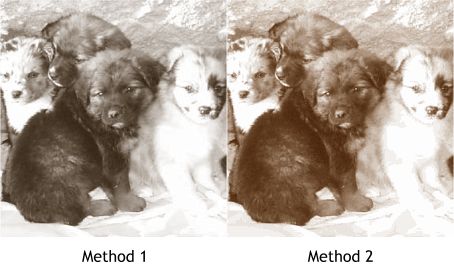
Here are the results of the first method and the alternative method side-by-side. I think the first example has more depth and richness and so that is the method I prefer. But there is another reason I use the first method. The photos when I receive them have about a 12 pixels white border around them. I convert them to editable shapes (Arrange menu) and then use the Shape Editor Tool to move the outside control points to the edges of the photo in essence cropping the photo. When I convert the photo, however, I can no longer right click on a color to change the dark colors because converting the photo makes it an object and no longer a bitmap. So the first method does essentially the same thing. |
|