|
|
|
|
|
||
 |
|||
|
Gel Capsule Effect About a year ago, there was a lot of excitement in the Xara Conferences regarding how to recreate the Apple Macintosh gel capsule effect in Xara. There were dozens of great solutions. For those of you new to Xara since then, here is my solution for the gel effect with a colored shadow thrown in for good measure.
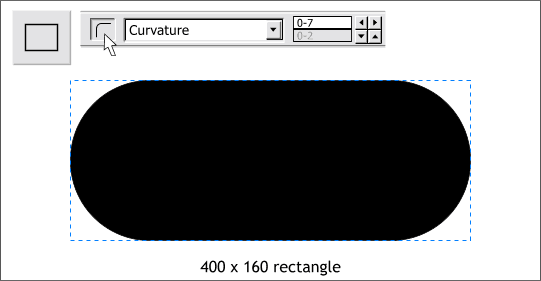
Step 1 Draw a rectangle to the size shown. Press the Curved Corners icon on the Infobar to round the corners. From the drop down list of Editable Items on the Infobar, select Curvature. Set the amount in the Primary Curvature Ratio to 0.7. Press Enter to apply the changes.
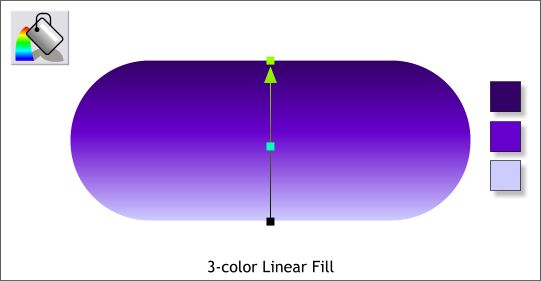
Step 2 With the capsule shape selected, select the Fill Tool then select Linear fill from the drop down list of Fill Types. Drag the fill path arrow to a vertical position as shown. Click the top control point (the small box) and then click on a deep violet color on the screen palette. Press the Tab key to select the opposite control point. From the far right side of the screen palette, select the very pale lavender color. Double click on the center of the fill path arrow to add a new color station. With the new color station selected, click on a bright violet color.
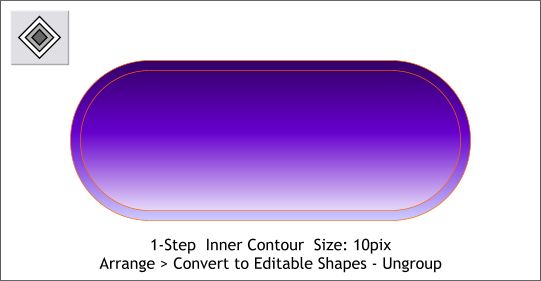
Step 3 Select the shape with the Contour Tool. Drag any of the red arrows towards the center a little to create an Inner Contour. Change the Bevel size slider amount to 10pix and press Enter to apply the change. Change the Contour Steps amount to 1 and press Enter to apply the changes. From the Arrange pull down menu. select Convert to Editable Shapes (to disable any further contouring). From the Arrange menu select Ungroup. The original shape and the contour shape are now two separate objects.
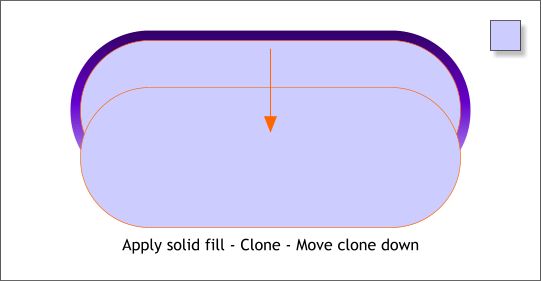
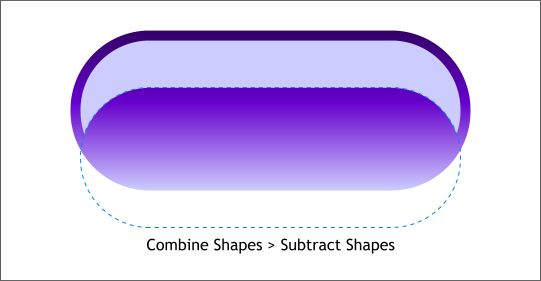
Step 4 Change the fill for the contoured shape to flat by dragging and dropping the pale purple color from the screen palette onto the shape. Clone (Ctrl k) the shape and move it downwards as shown.
Step 5 Hold down the Shift key (to multiple select) and click on each of the two pale purple shapes. From the Arrange menu, select Combine Shapes... Subtract Shapes. This removes the top shape from the shape below creating a highlight for the capsule.
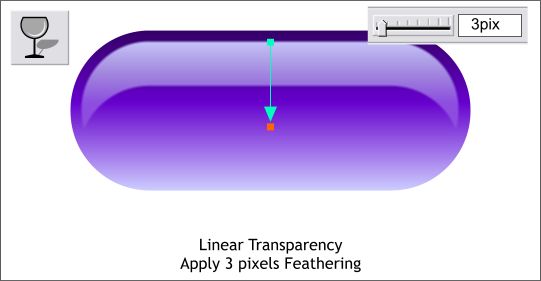
Step 6 Select the highlight shape and adjust the Feathering slider (at the top right hand side of the Infobar) to about 3pix. This softens the edge of the highlight shape giving it a more natural appearance. Select the Transparency Tool. Click just above the highlight and holding down the Ctrl key (to constrain the direction) drag downwards to about the bottom of the highlight. This produces a natural falloff in the intensity of the highlight.
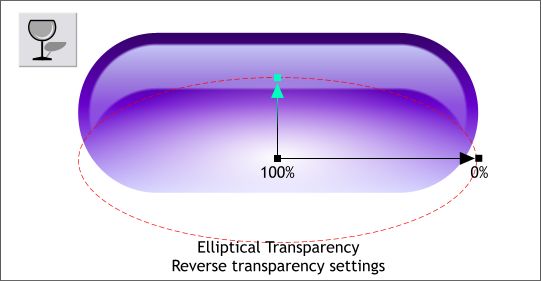
Step 7 To make the gel capsule really look as if it were really transparent, we will add an Elliptical transparency. Select the shape with the Transparency Tool. Select Elliptical from the drop down list of Transparency Shapes on the Infobar. Click the center control handle (the small box where the two arrows come together) and move the slider on the Infobar to 100% (Totally transparent). Press the Tab key to select the outside control point and reverse the setting to 0% (completely opaque).
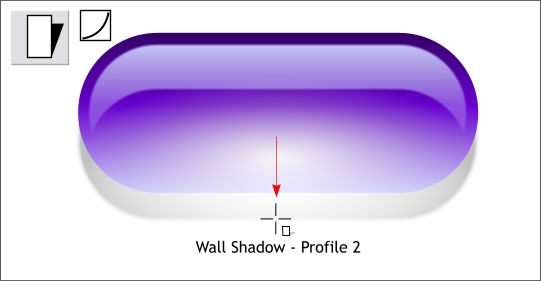
Step 8 Select the Shadow Tool and drag downwards until the shadow fall directly beneath the shape as shown. Click the Profile arrow on the Infobar to open the Profile menu. From the drop down list of preset Profiles select Profile 2. Profiles change the way an effect is distributed.
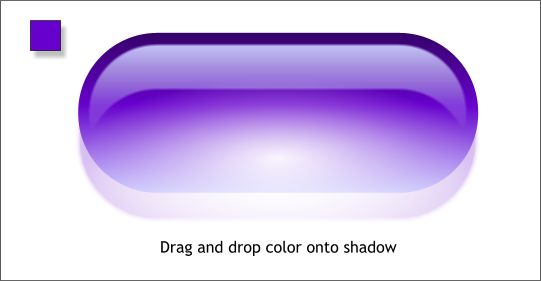
Step 9 In reality, if the capsule were filled with purple gel, the shadow would be purple and not gray. This can be easily accomplished by dragging a nice deep purple color from the screen palette and dropping it onto the shadow. And that's all there is to it. |
|