|
|
|
|
|
||
 |
|||
Cut Out ShapesOne or two of you asked how I accomplished the cutout look to my logo on my home page. The technique is as easy as pie. This is a fine example of "Make the hard ones look easy and the easy ones look hard!" (this is the easy one that just looks hard!)
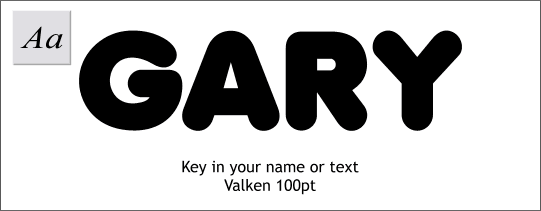
Step 1 We'll use text for this demo although you could use a logo, a silhouette of the Queen, or a variety of other shapes. Using the Text Tool, click on the screen and key in your name or some interesting text. Drag the text cursor over the text to highlight it (or if it is a single word, double click on the text with the Text Tool) and then change the point size to something big. You can also select the text with the Selector Tool (the arrow) and then resize it. You decide. Use a bold font such as Valken which is in the Xara X CD (Fonts folder).
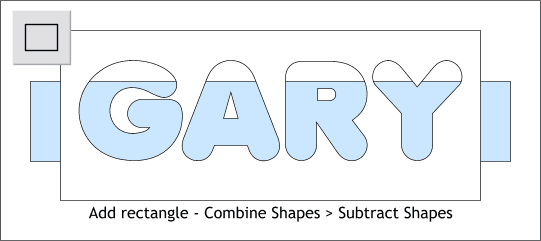
Step 2 Drag a rectangle around the text with the Rectangle Tool. Make the rectangle a bit larger than the text. Bring the text to the front (Ctrl f). Select the text and the rectangle and Arrange > Combine Shapes... Subtract Shapes. (You can also select both and Arrange > Join Shapes). This removes the shape of the text from the rectangle as illustrated by the blue rectangle I placed behind.
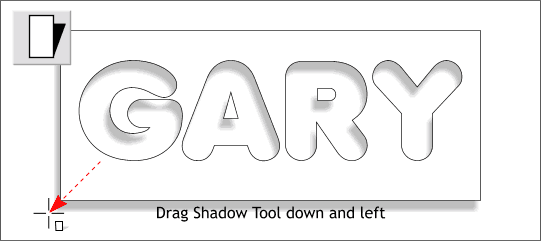
Step 3 Select the Shadow Tool. Drag on the shape, down and left a bit until the shadow looks like the illustration above. Looks pretty good already. I told you it was easy.
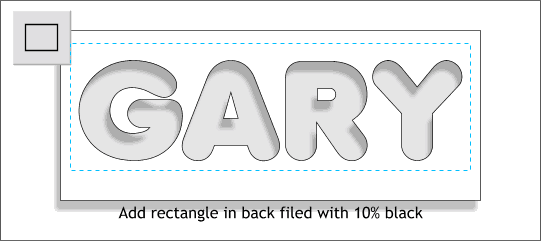
Step 4 To make sure that people know the shape is cut out, we'll make the area beneath the cut out darker. Create a rectangle that is not as large as the rectangle with the cut out text (blue outline). Apply a 10% black fill. Send the rectangle to the back (Ctrl b).
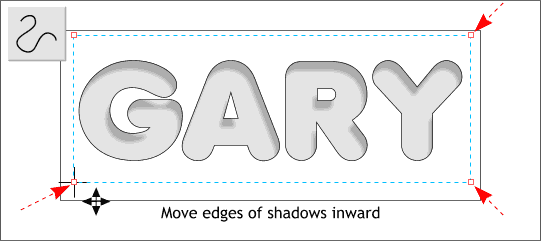
Step 5 Select the shape and shadow and Arrange > Convert to Editable Shapes. Now ungroup the shape and shadow (Ctrl u). With just the shadow shape selected (the status bar on the bottom left portion of the screen should read 1 Shape on Layer 1 and show a black fill. Select the corner control points with the Shape Editor Tool and bring the corner control points inside the cutout shape's rectangles. The blue dotted line represents the shadow rectangle.
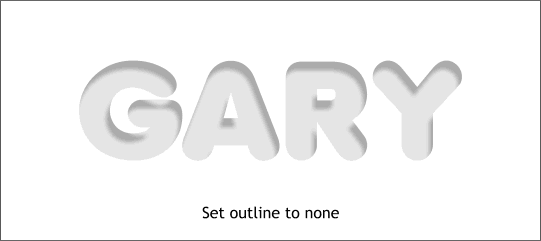
Step 6 And now the hard part. Select the rectangle with the cutout shape and change the outline to none (either select None from the Line Width drop down list on the Infobar, or right click on the crosshatched box to the left of the screen palette. Easy enough? You can also use this with solid colors or even patterns. And that wraps up this edition of the Workbook. I hope you all learned at least one or two new tricks or techniques. I also hope you will respond either by using the form on the next page or by using the e-mail link on the next page to let me know you are still out there and that these articles are useful to you. (The handful of loyal readers who always respond are excused from responding this month) It's you silent ones I need to hear from. |
|