|
|
|
|
|
||
 |
|||
More Lens FlaresMore sophisticated cameras have lenses that are made up up many different lenses. These multi-lens lenses can create some splendid lens flares when direct sunlight finds its way into the lens or when the lens picks up a brilliant highlight on metal or other shiny surfaces. In this half of the Lens Flare effect, we'll look at these multiple lens flares.
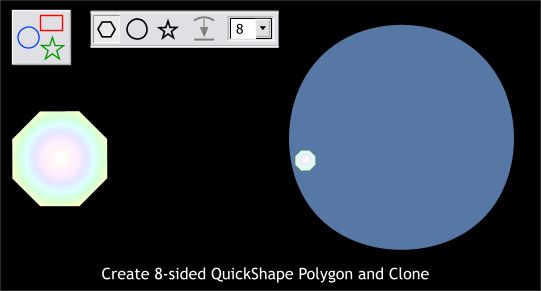
Step 1 Select the QuickShape Tool and set the Number of Sides to 8. If the star icon is selected, deselect it. Hold down the Ctrl key to constrain the shape to equal proportions and drag an octagon. Apply the same Circular fill as on Step 4 on the previous page. Duplicate the shape (Ctrl d ) and reduce the size to about 25% the size. Set the duplicate to the right as shown. (The blue circle represents the silver mirrored ball shown on the previous page.
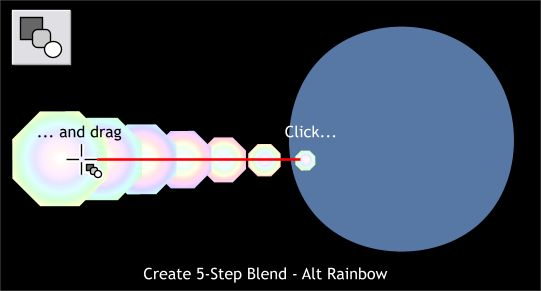
Step 2 Select and bring the larger octagon to the front (Ctrl f). Select the Blend Tool. Click on the smaller octagon and drag to the large octagon before you release the mouse button. From the Color Blend Effect drop down list, select Alt Rainbow.
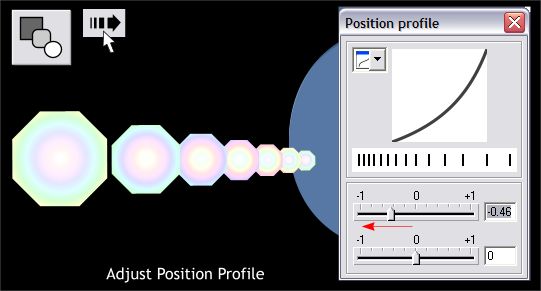
Step 3 With the blend and the Blend Tool selected, click the Profile Arrow on the Infobar to open the Position Profile dialog. Move the top slider to the left until the position of the octagons looks more like the example above and the distance between objects looks more natural.
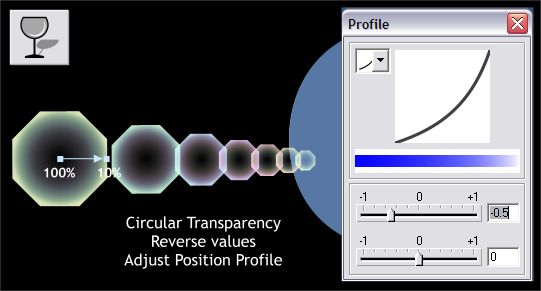
Step 4 Hold down the Ctrl key and click on the larger octagon to select just it. Bounding box handles will appear around the octagon if it is selected. Select the Transparency Tool then select Circular from the drop down list of Transparency Shapes. Click the inside control point (the square are the beginning of the arrow) and move the Transparency slider all the way to the right to 100%. Select the outside control point and move the slider to the left to 10%. Press Ctrl c to copy the shape to the clipboard. Ctrl click on the smallest octagon to select just it and from the Edit menu select Paste Attributes or press Shift Ctrl a.
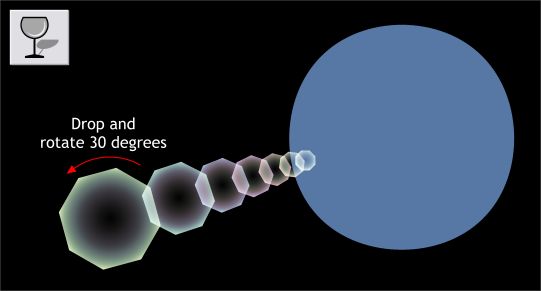
Step 5 Ctrl click the large octagon and drag it downward a bit as shown. Hold down the Ctrl key and click again to enable rotate/skew mode. Drag any of the corner control handles (the rounded arrows) and rotate the octagon about 30 degrees.
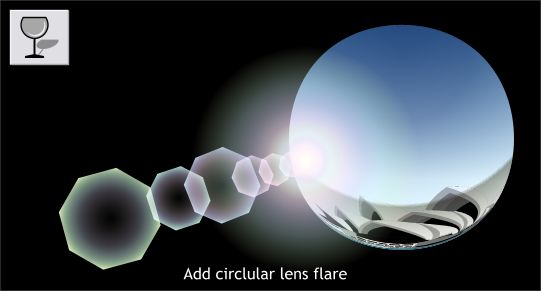
Step 6 Select the blend and from the Arrange menu select Convert to Editable Shapes. This removes the blend mechanism and lets us edit the individual shapes. But first we need to select the former blend and from the Arrange menu select Ungroup or Ctrl u. Select the middle blend octagon and holding down the Shift key to constrain resizing from the center, drag any of the corner bounding box handles outward to make the shape larger. Finally place the completed flare from the previous page on top so it is centered over the smallest octagon. And that's lens flares. On to cut out shapes. |
|