


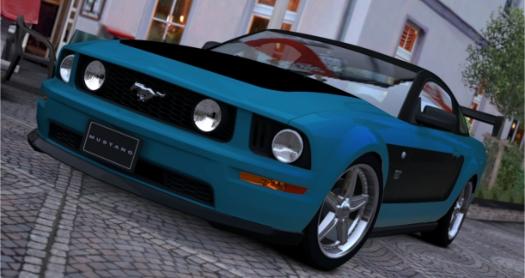
 STEP 9
Create a new layer and name it Car Paint Reflection - (Contrast).
Edit > Paste in Place a new copy of the white photographic shell
STEP 9
Create a new layer and name it Car Paint Reflection - (Contrast).
Edit > Paste in Place a new copy of the white photographic shell
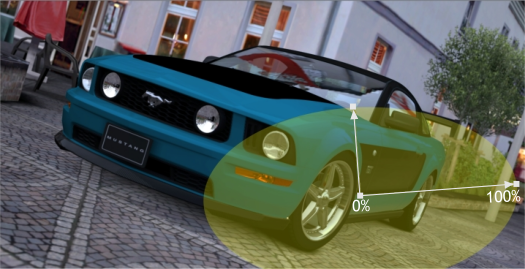
 Using the Transparency Tool (F6), apply an Elliptical, Contrast,
transparency with 0% at the center and 100% at the outer edge. Edit
the size and rotation of the elliptical transparency to match the
example shown above.
Note: The yellow elliptical shape in the above image is to help you
see the size and angle of the elliptical transparency.
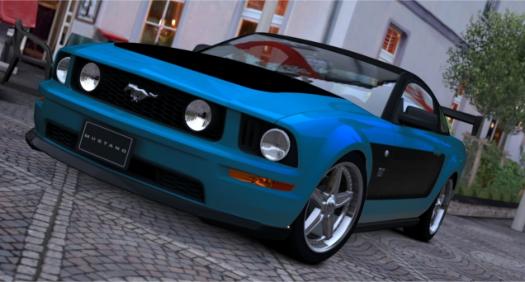
If you have done it correctly, your car should look like the example
shown below.
Using the Transparency Tool (F6), apply an Elliptical, Contrast,
transparency with 0% at the center and 100% at the outer edge. Edit
the size and rotation of the elliptical transparency to match the
example shown above.
Note: The yellow elliptical shape in the above image is to help you
see the size and angle of the elliptical transparency.
If you have done it correctly, your car should look like the example
shown below.
 STEP 10
Create a new layer and name this layer Car Paint Reflection -
(Saturation).
Edit > Paste in Place another copy of the cut out white photographic
shell.
Select the cut out shape the switch to the Transparency Tool. Apply a
Flat, Saturation, 0% transparency. This transparency makes the blue
paint brighter and deeper and brings out the highlights as you can see
in the image below.
The hood of the car looks flat and needs some work as the reflection of
the sky should be visible. We’ll address this detail next.
STEP 11
Create a new layer and name this new layer Car Paint Reflection -
(Brightness). Edit > Paste in Place a new copy of the white cutout
shell.
STEP 10
Create a new layer and name this layer Car Paint Reflection -
(Saturation).
Edit > Paste in Place another copy of the cut out white photographic
shell.
Select the cut out shape the switch to the Transparency Tool. Apply a
Flat, Saturation, 0% transparency. This transparency makes the blue
paint brighter and deeper and brings out the highlights as you can see
in the image below.
The hood of the car looks flat and needs some work as the reflection of
the sky should be visible. We’ll address this detail next.
STEP 11
Create a new layer and name this new layer Car Paint Reflection -
(Brightness). Edit > Paste in Place a new copy of the white cutout
shell.
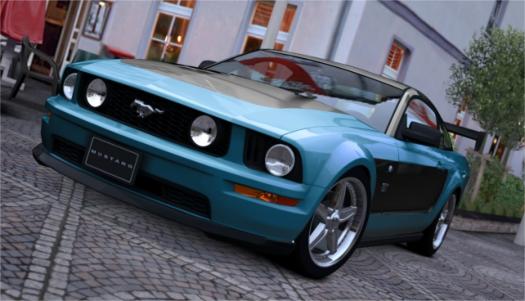 Select the cut out photo shape with the Transparency Tool. Apply a
Flat, Brightness, 0% transparency.
The hood and roof look really good now, Your image should now look
like the example shown above.
The front of the car could use a little tweaking so we need to add one
more layer.
Select the cut out photo shape with the Transparency Tool. Apply a
Flat, Brightness, 0% transparency.
The hood and roof look really good now, Your image should now look
like the example shown above.
The front of the car could use a little tweaking so we need to add one
more layer.


