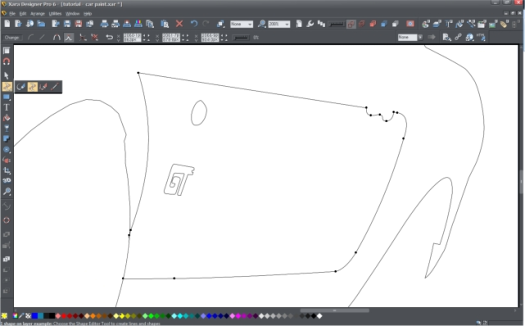


 STEP 4
We need to make another shape for the hood on the Car Paint 2 layer.
Again, you'll want to use the use the Shape Editor Tool (F4) and it
should look very similar to the photos below.
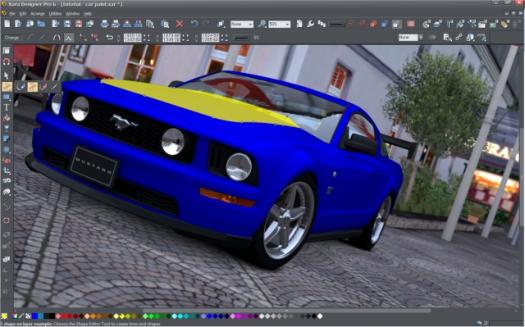
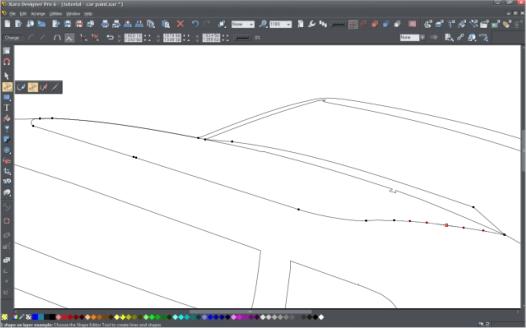
STEP 4
We need to make another shape for the hood on the Car Paint 2 layer.
Again, you'll want to use the use the Shape Editor Tool (F4) and it
should look very similar to the photos below.
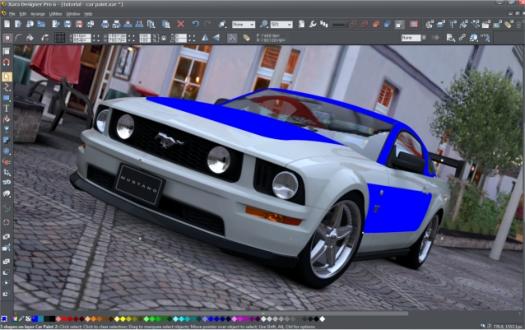
 STEP 5
We need to create one more shape on the indented side panel of the
car on the Car Paint 2 layer. Use the Shape Editor Tool (F4) and it
should look very similar to the images below.
STEP 5
We need to create one more shape on the indented side panel of the
car on the Car Paint 2 layer. Use the Shape Editor Tool (F4) and it
should look very similar to the images below.
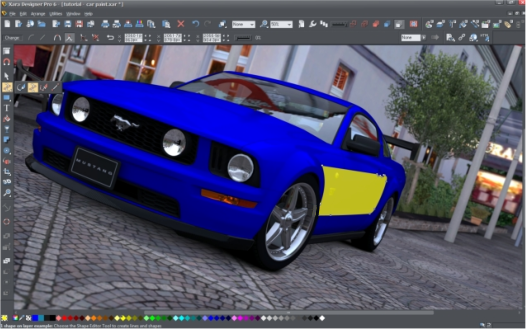
 STEP 6
Now we need to separate each of the new yellow shapes from the blue
body shape. One by one, select one of the new shapes (shown
previously in yellow) and the car body shape and from the Arrange
menu, select Combine Shapes > Slice (cut) Shapes (or press Ctrl + 4).
After slicing all 3 yellow shapes from the blue shape, select and delete
the remaining body shape. You should end up with just 3 shapes shown
in blue in the photo below.
STEP 6
Now we need to separate each of the new yellow shapes from the blue
body shape. One by one, select one of the new shapes (shown
previously in yellow) and the car body shape and from the Arrange
menu, select Combine Shapes > Slice (cut) Shapes (or press Ctrl + 4).
After slicing all 3 yellow shapes from the blue shape, select and delete
the remaining body shape. You should end up with just 3 shapes shown
in blue in the photo below.