


 11. For each frame, the image at the number 1 position should be in
front of all other images and the images at position number 2 should be
behind 1, while 3 should be behind 2, and 4 behind 3 and 5 behind 4.
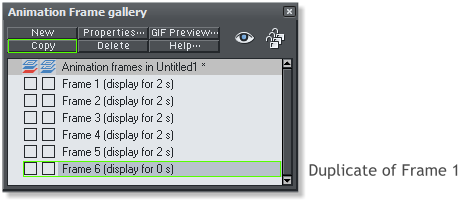
12. Duplicate frame 1 and and set its frame display time for 0 seconds.
This will create a continuous animation as you can see below.
11. For each frame, the image at the number 1 position should be in
front of all other images and the images at position number 2 should be
behind 1, while 3 should be behind 2, and 4 behind 3 and 5 behind 4.
12. Duplicate frame 1 and and set its frame display time for 0 seconds.
This will create a continuous animation as you can see below.


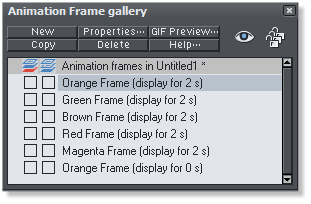 16. Give each frame a new title instead of the default ‘Frame 1’ etc.
using the properties box found within the Animation Frame Gallery.
For this tutorial I have used the colors of each frame for the name. This
will make completing the slide-show easier. The screen above shows
the 5 frames and the first frame duplicated at the end with the same
name as the first frame.
16. Give each frame a new title instead of the default ‘Frame 1’ etc.
using the properties box found within the Animation Frame Gallery.
For this tutorial I have used the colors of each frame for the name. This
will make completing the slide-show easier. The screen above shows
the 5 frames and the first frame duplicated at the end with the same
name as the first frame.


