


 Creating a Flash Slide-show Gallery
©2011 Anas ibn Handel
There are many on-line Flash tools for creating your own galleries but
they are mostly limited in terms of adding your own text and graphic
customisation. This slide-show tutorial will show you how to animate 5
photos or images using Xara version 5 and above. Once you understand
the process, you can use this format or create your own variations.
Creating a Flash Slide-show Gallery
©2011 Anas ibn Handel
There are many on-line Flash tools for creating your own galleries but
they are mostly limited in terms of adding your own text and graphic
customisation. This slide-show tutorial will show you how to animate 5
photos or images using Xara version 5 and above. Once you understand
the process, you can use this format or create your own variations.
 1. Select the 5 images that you wish to work with.
2. Open up a new animation window (File > New > Animation).
3. Determine the size of your flash animation slide-show. I made mine
700 by 365 pixels. (File > Page Options > Paper Size: > Custom).
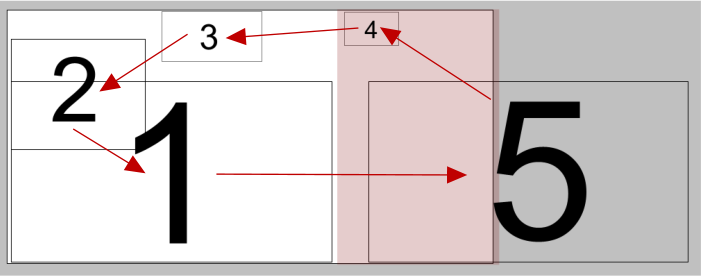
4. Position the 5 images as shown with the arrows indicating the
intended direction of the animation. The pink box is the information
window which will cover the the last two positions of the images (4 and
5)
The white rectangle is the actual page (700 x 365 pixels) and is partially
covered by the pink information box.
The size of images 1 and 5 in this example are the largest version of the
images and should have a resolution of 96 dpi. The other images should
also be 96 dpi when they are displayed at full size. This will be covered
further in the animation.
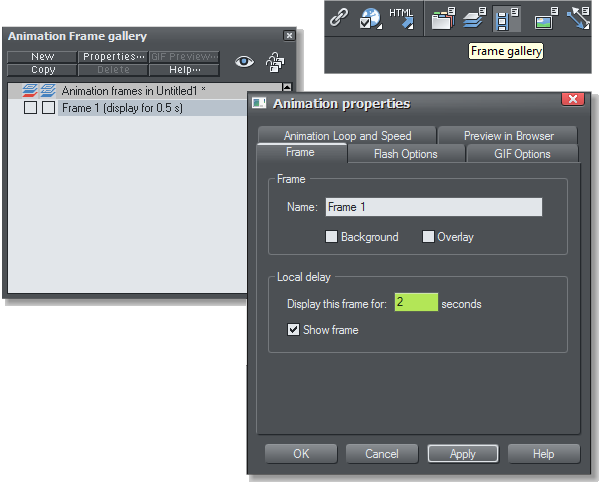
5. Open the Frame Gallery. Double click on the Frame 1 title bar to
open the Animation Properties dialog. Change the Display this frame
for: time to 2. Press Apply to apply this change.
1. Select the 5 images that you wish to work with.
2. Open up a new animation window (File > New > Animation).
3. Determine the size of your flash animation slide-show. I made mine
700 by 365 pixels. (File > Page Options > Paper Size: > Custom).
4. Position the 5 images as shown with the arrows indicating the
intended direction of the animation. The pink box is the information
window which will cover the the last two positions of the images (4 and
5)
The white rectangle is the actual page (700 x 365 pixels) and is partially
covered by the pink information box.
The size of images 1 and 5 in this example are the largest version of the
images and should have a resolution of 96 dpi. The other images should
also be 96 dpi when they are displayed at full size. This will be covered
further in the animation.
5. Open the Frame Gallery. Double click on the Frame 1 title bar to
open the Animation Properties dialog. Change the Display this frame
for: time to 2. Press Apply to apply this change.
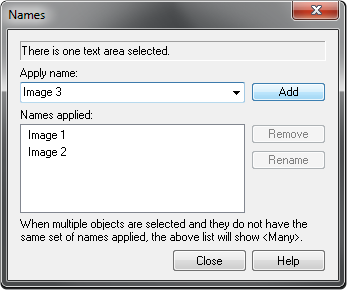 6. Before any object or photo can be “Tweened” (animated), you have
to give each image (object) a name (Utilities> Names...). The actual
name is not important. What is important is that each image have a
unique name because you can only create a smooth transition between
objects with the same name.
Your first image can be named Image 1, the second Image 2, etcetera.
6. Before any object or photo can be “Tweened” (animated), you have
to give each image (object) a name (Utilities> Names...). The actual
name is not important. What is important is that each image have a
unique name because you can only create a smooth transition between
objects with the same name.
Your first image can be named Image 1, the second Image 2, etcetera.


