 WEBSITE AND WEBSITE GRAPHICS CREATED WITH XARA DESIGNER 6 PRO


 I found the size of the actual months a bit small. Zoom (Z) in to just the
calendar portion. Since enlarging the month will move it slightly we
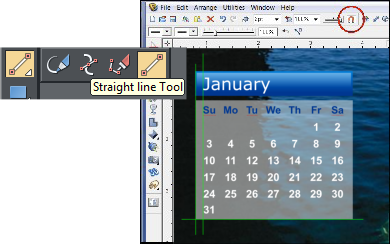
need a guide for re-positioning. Using the Straight Line Tool, draw a
horizontal line (hold the Ctrl key while dragging to constrain the
direction) making it slightly wider than the month itself. Create two
vertical lines the same way. Place two of the lines along the left and
bottom edges of the month keeping part of the lines outside the photo
(easier for selection). We plan to modify the month name, so place the
second vertical line so it just touches the “J” in January.
I found the size of the actual months a bit small. Zoom (Z) in to just the
calendar portion. Since enlarging the month will move it slightly we
need a guide for re-positioning. Using the Straight Line Tool, draw a
horizontal line (hold the Ctrl key while dragging to constrain the
direction) making it slightly wider than the month itself. Create two
vertical lines the same way. Place two of the lines along the left and
bottom edges of the month keeping part of the lines outside the photo
(easier for selection). We plan to modify the month name, so place the
second vertical line so it just touches the “J” in January.
 Enable Snap to Objects (press the orange magnet icon on the Infobar).
Select all three lines (hold down the Shift key and click to select
multiple objects) and group them (Ctrl + G).
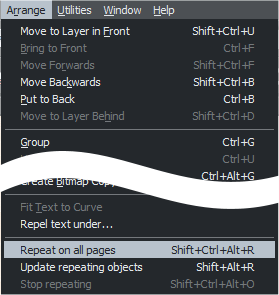
With the lines selected, from the Arrange menu, select Repeat on all
Pages. The pages must already be correctly centred as described on the
last page for this to work properly.
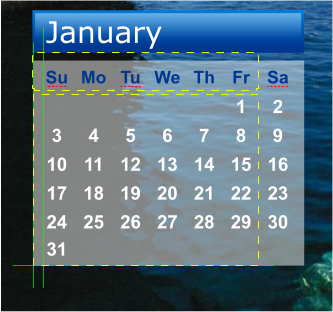
Marquee select the actual January calendar with the Selector Tool (V)
(or select the first group in the Page & Layer Gallery). On the Infobar,
click the lower left square in the Set Origin Position icon. Key in 120 in
the % Width space. Make sure the padlock icon is enabled (in the down
position). Press Enter to apply the change. Before de-selecting, move
the month so it touches the guidelines correctly. Repeat for all months.
The yellow dashed lines represent the original calendar size.
Enable Snap to Objects (press the orange magnet icon on the Infobar).
Select all three lines (hold down the Shift key and click to select
multiple objects) and group them (Ctrl + G).
With the lines selected, from the Arrange menu, select Repeat on all
Pages. The pages must already be correctly centred as described on the
last page for this to work properly.
Marquee select the actual January calendar with the Selector Tool (V)
(or select the first group in the Page & Layer Gallery). On the Infobar,
click the lower left square in the Set Origin Position icon. Key in 120 in
the % Width space. Make sure the padlock icon is enabled (in the down
position). Press Enter to apply the change. Before de-selecting, move
the month so it touches the guidelines correctly. Repeat for all months.
The yellow dashed lines represent the original calendar size.