


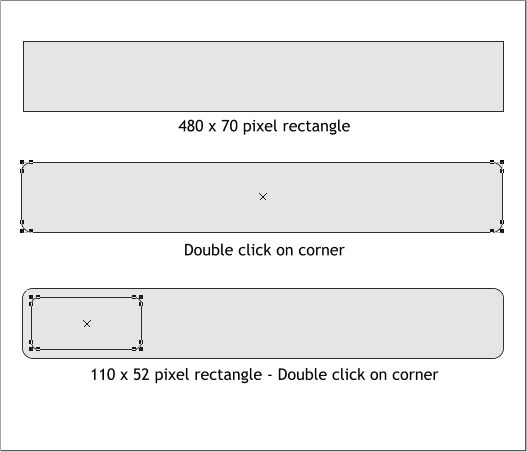
Select the Rectangle Tool (M) and draw a 480 x 70 pixel rectangle.
Double click on any corner control point to create curved corners.
Draw a smaller 110 x 52 pixel rectangle. Double click on any corner to
create curved corners. Position the small rectangle to the left as shown
above.
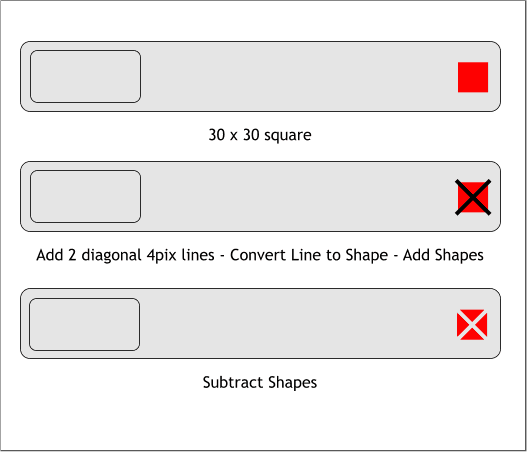
Hold down the Ctrl key, and drag the Rectangle Tool to create a 30 pixel
square. Click the red color on the screen palette to change the fill color.
From the Width drop down list on the Infobar, select None to remove
the outline.
Select the Shape Editor Tool (F4). Click on one corner of the red square
then click at the opposite corner. Change the line Width to 2pix. Switch
back to the Selector Tool, hold down the Shift key and drag any of the
corner control handles to the outside a small distance to extend the line
beyond the square. Repeat this step and create a diagonal line on the
other side to create an X.
Select both lines and from the Arrange menu select Conver Line to
Shape and then Arrange > Combine Shapes > Add Shapes or press Ctrl 1.
Select the X shape and the red square and Arrange > Combine Shapes >
Subtract Shapes or press Ctrl 2. This will be the close player button.
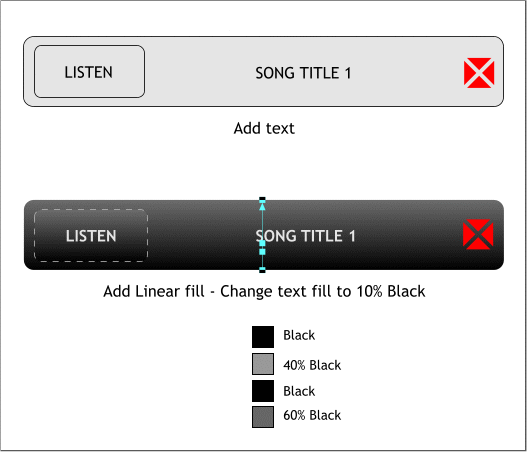
Select the Text Tool (T) and add some text to the button and the
rectangle. Change the fill color of the text to 10% Black.
Select both rectangles then select the Fill Tool (F5). Click on the bottom
of the large rectangle, hold down the Ctrl key and drag up to the top of
the rectangle to apply a Linear fill. Double click on the fill path arrow to
add a new color and then double click again to add a second color.
Adjust the two new color squares on the fill path arrow as shown above.
Click on each of the colors and apply the colors shown above.


