|
The Xara Xone Workbook - The best, easy and fun Xara X tutorials |
|
|
|
THE XARA CONFERENCES | XARA.COM | XARA ONLINE | GRAPHICS.COM TOP SITES | ALL WORKBOOKS |
|
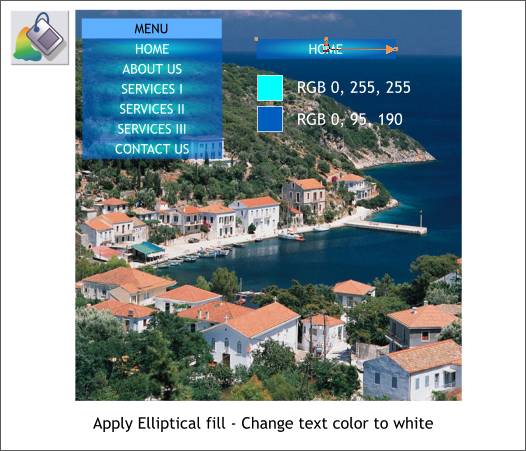
Hold down the Ctrl key and click to select just the HOME button rectangle, then switch to the Fill Tool (F5). From the drop down list of Fill Types on the top left side of the Infobar, select Elliptical. Click on the small black square where the two arrows come together (called a control handle) and change the color to the pale cyan shown above in the Color Editor (Ctrl e ). Click on either of the small squares on the ends of the arrows and change the color to the deep blue. Apply this same fill to the other button rectangles (except MENU). TIP: Copy the color edited rectangle (Ctrl c), then Ctrl click on the next rectangle and Edit > Paste Attributes or press Shift Ctrl a. Repeat this step for the remaining rectangles. Select the Text Tool (t). Drag the cursor over the HOME text (Xtreme can select text that is in a group, even text to which a shadow or bevel has been applied) and change the text color to white. Repeat this for the rest of the button text as shown. This will be the button state when the cursor passes over the button.
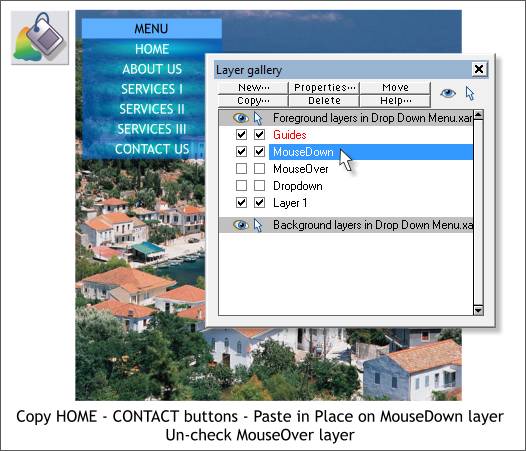
Copy all but the MENU button to the Clipboard (Ctrl c). Uncheck the MouseOver layer check boxes and select the MouseDown layer title bar. Edit > Paste in Place or Shift Ctrl v onto the MouseDown layer.
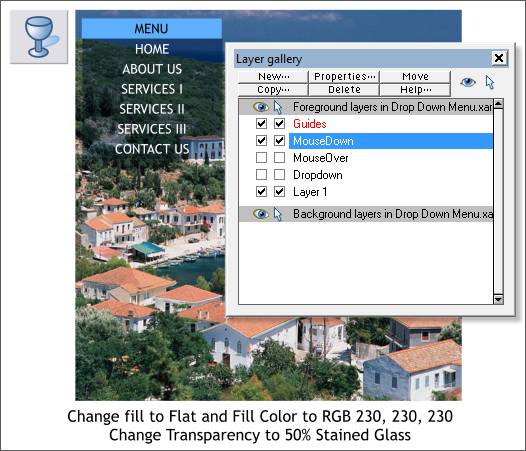
Ctrl click to select the HOME button rectangle. Change the Fill Type to Flat and edit the color to a deep blue using the RGB values shown above. Switch to the Transparency Tool (F6). Select Stained Glass from the Transparency Type drop down list and change the slider % setting to 50. Copy and Paste Attributes to the other rectangles. This will be the button state when the button is pressed.
|
||||||
|
|
||||||


