|
|


|
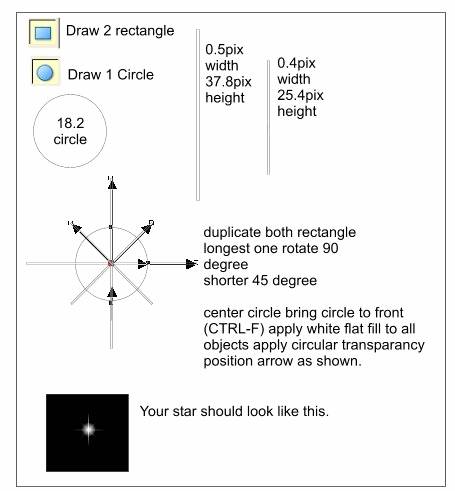
Step 10 Next let's make some stars. For this step you should zoom in very closely (I have zoomed in to 500%). Select the Rectangle Tool and draw a rectangle 0.5 pixels wide by 37.8 pixel tall. Clone the rectangle (CTRL-K) and enter 90 into Angle of Selection text entry box and press Enter. Or you can double click it to enable rotate/skew mode, select any of the corner rotation arrows, hold down the Ctrl key, and rotate to 90 degrees. Make another clone of the original rectangle. Change the width to 0.4 pixels and the height to 25.4 pixels and rotate 45 degrees. Make another clone of the same rectangle and rotate it -90 degrees (this rotates the rectangle in the opposite direction). Next select the Ellipse Tool and draw a circle 18.2 in diameter. Select the rectangles, apply a Flat, White fill, and group them (CTRL-G). Select the circle and the group you just made and align them Centrally. Ungroup the rectangles From the Arrange menu, select Combine Shapes > Add Shapes. Using the Transparency Tool, apply a Circular, Mix transparency. Select the circle and apply the same transparency and bring to the front (CTRL-F). Select the star elements and group them. Your star should look like the one shown here at the bottom of the picture. Save your work and take a short break.
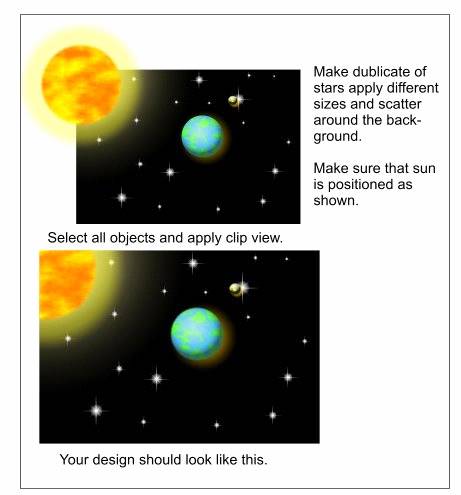
Step 11 We are almost finished. Now that we have a star, make several duplicates, resize them randomly and scatter them around the back ground. Position the moon, earth, and the sun as shown above. The moon and the earth are relevant on their position but the the sun needs to be positioned as shown centered on the top left corner. This is very important for the next step. Once you are satisfied with the positioning of the sun, moon, earth and the stars, select all and from the Arrange menu, select Apply ClipView. This will hide the the remainder of the sun inside of the picture as shown in the bottom example above. While in ClipView, click the center keyhole icon and using your mouse or the arrow keys on your keyboard, move the selection around. Everything in the rectangle will move. Nice, hey? And that's it. Your final picture should now look like on the next page.
|
|||||||
|
|