 |
 |
| 0 1 2 3 4 5 6 7 DOWNLOAD ZIPPED TUTORIAL |
|
|
|
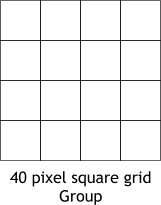
Create a 40 pixel square. Duplicate the square repeatedly to make a 16 square grid. TIP: To move the squares accurately, set the X Duplication Distance to 40 and the Y Duplication Distance to 0 (Utilities > Options... General tabbed section). Press Apply to apply the settings. Select the square and press Ctrl d three times. Change the X Duplication Distance to 0 and the Y Duplication Distance to 40. Press Apply to apply the changes. Select the row of four squares and press Ctrl d three times. Reset the duplication distances to their previous settings. Group all the squares (Ctrl g).
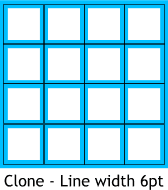
Clone the grouped squares (Ctrl k). Change the line Width to 6pt (change the default Width .5pt to 6pt and press Enter to apply the change). I have made the cloned line blue so you can see both lines.
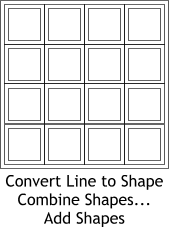
Select the 6pt line group and from the Arrange menu, select Convert Line to Shape. With the shape still selected, from the Arrange menu, select Combine Shapes... Add Shapes . The blue line is now a series of inlines and outlines as you can see in this outline view.
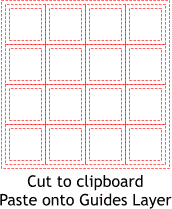
Click the Layer 1 title to make it the active layer and close the Layer Gallery. The grid now becomes a series of snap-to guides.
|
|||
|
|
|||
|
|
|||