XaraXone 2002 - Guest Tutorials
Page 1
0
1
2
3
4
5
6
7
Xara Xone Guest Tutorial - Step 1

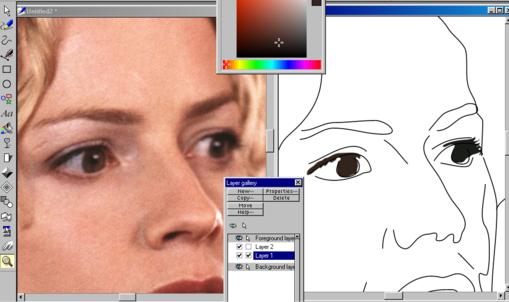
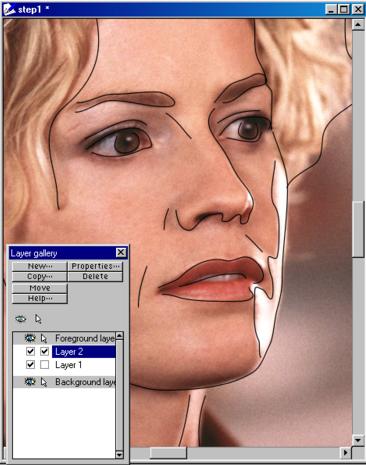
Step 1 Place the reference picture on to Layer 1. Make this layer non-editable (uncheck the check box under the arrow icon as shown above). Create a new layer (press New...), Layer 2. Create your drawing on this layer. Draw in the basic shapes and features of the face as shown using the Freehand and Brush Tool.

Xara Xone Guest Tutorial - Step 2

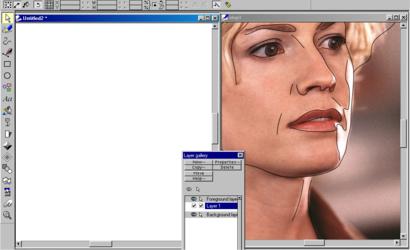
Step 2 Create a new View and place the new view on the left side of the screen. (Window > New View. Then Window > Arrange Views). You will have to reshape each window to get the two side-by-side windows shown above.

Xara Xone Guest Tutorial - Step 3

Step 3 In the right window make Layer 1 editable (add a check in the check box under the arrow icon). Cut the reference photo (Ctrl x ) from Layer 1 and put it in left window. In right window make Layer 2 non-editable and go to Layer 1. Open the Color Editor (Ctrl e). I usually begin from darkest objects of picture, in this case the eyes. Drag the Color Picker (the eye dropper icon) to the right eye of reference picture. Then create dark areas of right eye in Layer 1 of sketch. And left eye too.