|
 Because there will be a lot of water, we will first set up a
"palette" of suitable colors. Draw a small rectangle and fill it with a medium blue color. Copy the rectangle and move it downwards. Apply a dark blue fill (almost black), and
then a 5-step blend Between the two rectangles. Copy the blend and select the dark blue rectangle of the copy by Ctrl-clicking it. Apply a white fill. Place the palette (= the
two blends) on the side of the paper. It's now easy to select a blue color for our seascape (if you find the color options not to be enough, just increase the blends). Open the Color Editor (Ctrl+e
) and use the Color Picker to select a color by clicking on the palette we just created. Because there will be a lot of water, we will first set up a
"palette" of suitable colors. Draw a small rectangle and fill it with a medium blue color. Copy the rectangle and move it downwards. Apply a dark blue fill (almost black), and
then a 5-step blend Between the two rectangles. Copy the blend and select the dark blue rectangle of the copy by Ctrl-clicking it. Apply a white fill. Place the palette (= the
two blends) on the side of the paper. It's now easy to select a blue color for our seascape (if you find the color options not to be enough, just increase the blends). Open the Color Editor (Ctrl+e
) and use the Color Picker to select a color by clicking on the palette we just created.
NOTE: You can also use the Color Picker (the eyedropper) to sample my
starting and ending colors.
Draw a rectangle about the size of the final image size. It doesn't have to be exact, we probably will change it later anyway - it is more of a guideline.
Klone the rectangle (Ctrl+k) and resize it so the height is about two-thirds of the original. This will be the guides for the sea. Apply a
medium blue fill and remove the outline.
Now we will create the shapes that will become the waves. Klone the bottom rectangle. After that draw a continuous wave-pattern with the Freehand and Brush
tool. Select the waves and the rectangle klone (yes, I know 'Clone' is spelled with a 'C', but to easily remember the keyboard-shortcut Ctrl+k I say klone with a 'K') and Slice Shapes (Ctrl+4
) (or Arrange > Combine Shapes > Slice Shapes). This will result is two objects. Give the first wave-object a dark blue fill, and the other a light
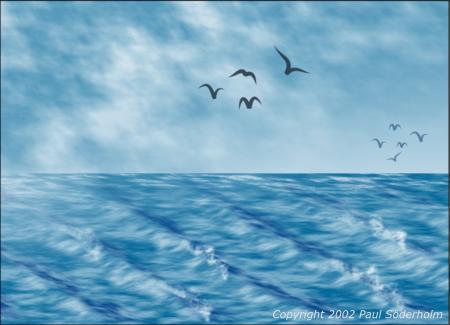
blue fill. If we have done everything the way we should, we now have a stripe effect that could have been used on a 60s record-cover!
This is what your drawing should look like at this point. If you haven't yet named and saved your work, do it now.
|