You've spent a fair amount of time creating your
isometric masterpiece and now your client calls and tells you their widget has a design change and, of course, that advertisement at the printer needs to be updated before the end of the day. You won't have enough time
to do redraw, so what can you do?Remember our friend "The R"? How would you change its depth from 64 to 80 pixels? We certainly don't want to go through all those steps of the previous
example and make a new "extruded" R.
 Fig 35 "Unhide" your construction
axis or, if you deleted it, draw a two-point line segment between two corresponding points of the R's. You may have go to an Outline (wire fame) view quality.
 Fig 36 Using the Shape Editor Tool, select the end-point. The Infobar indicates a Line Length of 64 px.
 Fig 37 Swipe (highlight) the 64 in the Infobar and type 80. The axis magically grows to 80 pixels long
while maintaining the same angle.
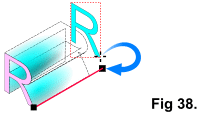
 Fig 38 Using the Selector Tool, grab
the rear "R" and move it away from the other objects. Then, with Snap To Objects enabled, grab it by its bottom-right corner and move it until the cursor is over the end-point of
the axis and the "R" snaps to the point.
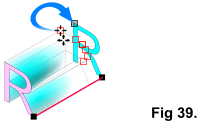
 Fig 39 With the
Shape Editor Tool, select the appropriate points of an "extrude" object. Next click one of the selected point and drag it (the other selected points will follow along) until it snaps to the
corresponding point on the rear "R".
 Fig 40 Repeat this process for the
remaining "extrude" objects.

