Move the resulting cylinder "silhouette"
behind the front ellipse by selecting the silhouette, and pressing (Ctrl + Shift + B) as many times as necessary. In a simple drawing you could press (Crtl + B).
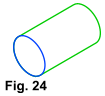 Fig. 24 If you want to retain the axis, but "hide"
it for future use, move it to a designated layer and then make that layer "invisible" (F10, and click on the eyeball icon for that layer) or give the axis a line width of None.
Fig. 24 If you want to retain the axis, but "hide"
it for future use, move it to a designated layer and then make that layer "invisible" (F10, and click on the eyeball icon for that layer) or give the axis a line width of None.
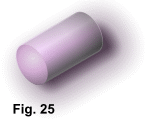 Fig. 25 Finally, color the cylinder faces. They could be as basic as white fills with
black outlines (useful for assembly instructions) or more elaborate with multi-colored gradient fills combined with transparencies to imitate a 3-D rendering with reflected light and shadows. The
points come in handy as snapping points for linear fills.
Fig. 25 Finally, color the cylinder faces. They could be as basic as white fills with
black outlines (useful for assembly instructions) or more elaborate with multi-colored gradient fills combined with transparencies to imitate a 3-D rendering with reflected light and shadows. The
points come in handy as snapping points for linear fills.
Below is an example of how the same principles can be applied to a more complex object. (It's obvious here that an automated extrude function would be nice).

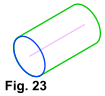 Fig. 23 Move the resulting cylinder "silhouette"
behind the front ellipse by selecting the silhouette, and pressing (Ctrl + Shift + B) as many times as necessary. In a simple drawing you could press (Crtl + B).
Fig. 23 Move the resulting cylinder "silhouette"
behind the front ellipse by selecting the silhouette, and pressing (Ctrl + Shift + B) as many times as necessary. In a simple drawing you could press (Crtl + B). 

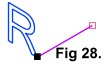
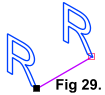
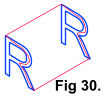 Fig. 30 The shape is "traced" using the points of the R's.
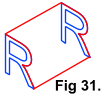 Fig. 31 The R's are used to "shape" the tracing.
 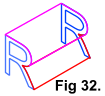 Fig. 32
The tracing is broken at two points , the object is broken apart, and the resulting two shapes are closed.
Fig. 32
The tracing is broken at two points , the object is broken apart, and the resulting two shapes are closed. 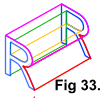 Fig 33 More tracing using the points as snapping points.
 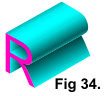 Fig. 34 Apply rendering to each shape.