|
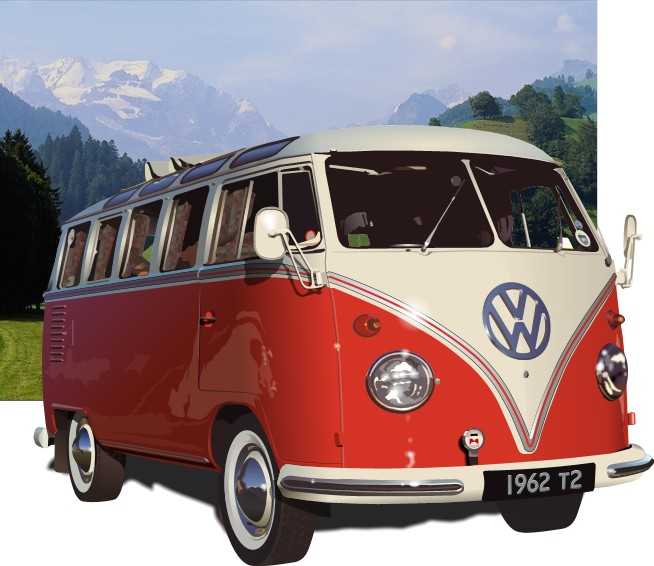
The one area I haven't mentioned is the headlights. Creating realistic chrome is simple compared to this and, as you can see, is something I have not yet quite
mastered (if you disagree, look at the larger image in the
Xara Gallery). I shall therefore leave this technique for another day (i.e. when I know how to master it!).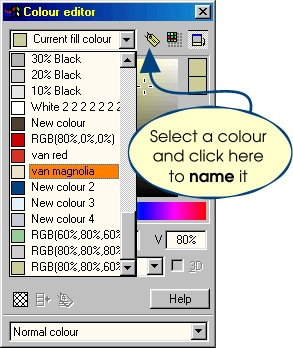 Finally, a quick word about Naming colours and the ease with which this feature allows you to change the look of
your drawing in seconds. When drawing the Red area of the van I gave this colour a name, "van red", and this colour was added to my Colour Gallery. Then when drawing the next layer, the Cream
colour of the van, I named this colour "van magnolia". This meant that every time I needed to draw another cream object (eg. bumpers, mirrors), all I needed to do was draw an outline and
fill it from my custom colour gallery. It also means that if I want to change the colour of the van all I have to do is select 'van magnolia' and/or 'van red' in my Colour Gallery, edit that colour and
automatically every item in my drawing that uses that colour will dynamically change as I edit! Finally, a quick word about Naming colours and the ease with which this feature allows you to change the look of
your drawing in seconds. When drawing the Red area of the van I gave this colour a name, "van red", and this colour was added to my Colour Gallery. Then when drawing the next layer, the Cream
colour of the van, I named this colour "van magnolia". This meant that every time I needed to draw another cream object (eg. bumpers, mirrors), all I needed to do was draw an outline and
fill it from my custom colour gallery. It also means that if I want to change the colour of the van all I have to do is select 'van magnolia' and/or 'van red' in my Colour Gallery, edit that colour and
automatically every item in my drawing that uses that colour will dynamically change as I edit!
|

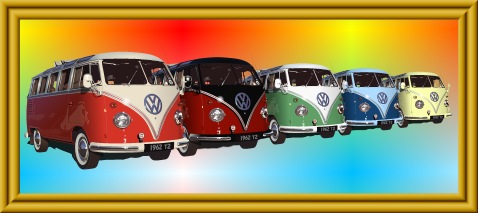 The drawing on the right was achieved in about 5 minutes,
simply by opening a blank document, editing the relevant colours and copying each new van into my blank document. The perspective is slightly off, which you would expect, but the effect is fantastic in relation to the
amount of work required to achieve it! I've had fun doing this tutorial which, I guess, was more about specific techniques than about the entire drawing, but I hope it inspires some of you to try some of these out and
create some great works of Xart!
The drawing on the right was achieved in about 5 minutes,
simply by opening a blank document, editing the relevant colours and copying each new van into my blank document. The perspective is slightly off, which you would expect, but the effect is fantastic in relation to the
amount of work required to achieve it! I've had fun doing this tutorial which, I guess, was more about specific techniques than about the entire drawing, but I hope it inspires some of you to try some of these out and
create some great works of Xart!