Review — Xara and Alien Skin Xenoflex

Your editor (still me I'm afraid), is always on the lookout for plug-in products that will plug into Xara 2. If you spend much time hanging around the i/us site you've probably seen ad banners for Alien Skin's Xenoflex. I hang out there a lot and I see the banner all the time. So, I thought, will this product work with Xara 2? And the answer is yes, more or less. Fortunately more more, than less.

Most Photoshop-compatible plug-in filters were designed to work in pixel-editing applications, like Photoshop. While Xara 2 (and 
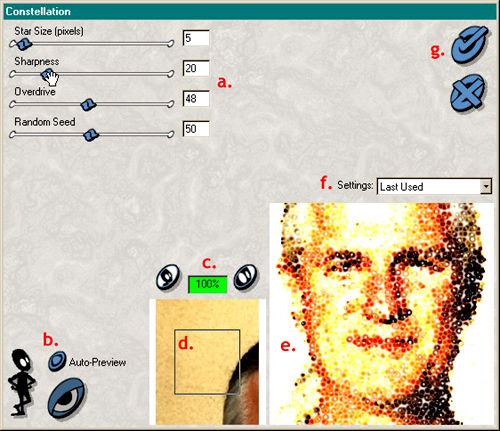
most vector drawing applications) supports Photoshop-compatible plug-in filters, many functions that are designed to be applied to a selected and/or masked area do not work. Of the 16 Xenoflex effects, all but three, Distress, Electrify, and Rounded Rectangle work when applied to 24-bit bitmaps in Xara 2. And each effect has from two to eight or more variations. So we're talking about a lot of filter power here.

Cool! How's It Work?
First you have to install Xenoflex. You can purchase and download it from i/us. You can also win a copy. More on that later. When you install Xenoflex, you're asked if you want it to search for your Photoshop plugin folder and install it there. If you have Photoshop, you can select this option. I created a new folder in my Xara directory called Alien Skin and installed Xenoflex there.

Next, open Page Options in Xara 2 (right click on a blank area of the screen and select Page Options from the pop-up menu then select the Plug-ins tab. Click the Add button and locate the folder where the application is, in my case Alien Skin. Click Add and it's a done deal.

Select a 24-bit bitmap image and select Xenoflex 1.0 from the Plug-ins menu. Select one of the filters from the fly-out list. The screen below shows the Constellation filter dialog

A typical dialog.

a.) Use the adjustments to create unlimited variations of each filter
b.) With Auto Preview enabled, effects update in real time.
c.) You can enlarge or reduce the size of the preview image.
d.) Moving this box changes the section of the image.
e.) The preview
f.) More pre-set variations. You can save your own variations as well.
g.) The check applies the filter, the X exits the dialog.

Who is this guy?