In addition to dragging the fill path control handles, you can also use your computers arrow keys.Select the center control handle (the black box) and move the arrow keys to reposition the fill image inside of the filled object.
When you select either outside control handle (the red squares) the up arrow rotates the fill counter clockwise, the down arrow key rotates the fill clockwise. The left arrow key decreases the size of
the fill while the right arrow key increases the size.
You can use the Shift, Ctrl and Alt keys in conjunction with the arrow keys. Shift affects the operation the most, Ctrl
is half of that amount, and Alt affects the operation by one pixel increments. You can also use combinations of Shift Ctrl and Shift Alt with the arrow keys. Experiment and see what these combinations do.

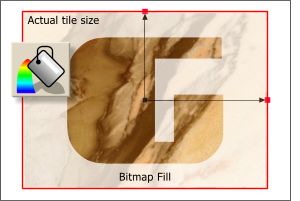 Bitmap fills are initially applied to an object using the full size of the fill image as shown on the left. (I have faded the actual fill behind the filled character to show the full size of the fill image. In
reality you will only see the fill path arrows and a red outline if you move the fill. Bitmap fills can be edited by clicking the filled object with the Fill Tool cursor. You will only see the fill path
arrows when the bitmap has been selected.
Bitmap fills are initially applied to an object using the full size of the fill image as shown on the left. (I have faded the actual fill behind the filled character to show the full size of the fill image. In
reality you will only see the fill path arrows and a red outline if you move the fill. Bitmap fills can be edited by clicking the filled object with the Fill Tool cursor. You will only see the fill path
arrows when the bitmap has been selected.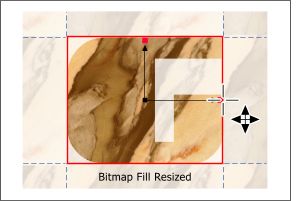 You can resize Bitmap fills by selecting
the object with the Fill Tool and then dragging on the control handles. Dragging the center handle (the black box) repositions the fill inside of the filled object. Dragging the outside handles resizes and rotates the fill.
You can resize Bitmap fills by selecting
the object with the Fill Tool and then dragging on the control handles. Dragging the center handle (the black box) repositions the fill inside of the filled object. Dragging the outside handles resizes and rotates the fill.
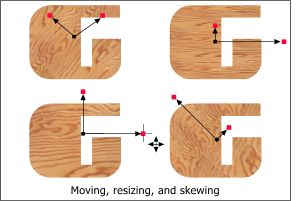 In this example you can see the effects
and the fill path arrows and control handles in various positions.
In this example you can see the effects
and the fill path arrows and control handles in various positions.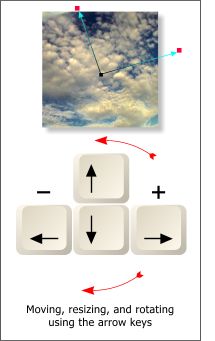 In addition to dragging the fill path control handles, you can also use your computers arrow keys.
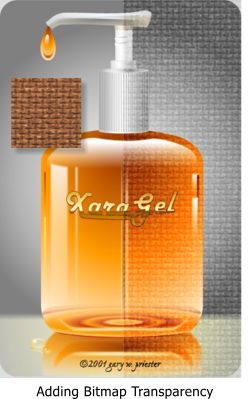 The Trans
(transparency) button in the Fill Gallery applies the selected bitmap fill transparently over the selected object or image (in this case an image I created and posted in the Xara conferences). Applying the Masonite
Board 2 texture (Miscellaneous Textures folder) to the bitmap image of the soap bottle produces a paint on canvass effect.
The Trans
(transparency) button in the Fill Gallery applies the selected bitmap fill transparently over the selected object or image (in this case an image I created and posted in the Xara conferences). Applying the Masonite
Board 2 texture (Miscellaneous Textures folder) to the bitmap image of the soap bottle produces a paint on canvass effect.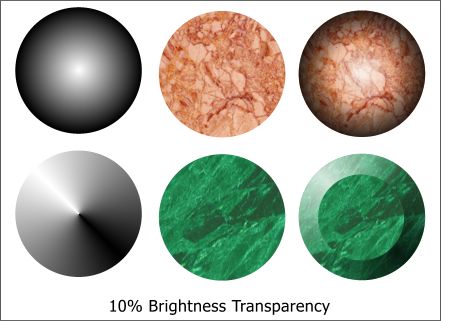 Using two different fills, (from the
Marble folder) along with a Circular and Conical Fill, and Xara X's new Brightness transparency (20%) creates some cool 3D effects.
Using two different fills, (from the
Marble folder) along with a Circular and Conical Fill, and Xara X's new Brightness transparency (20%) creates some cool 3D effects.