|
I recently needed to create a slide show for a client’s website. I ended up purchasing a program called Flash Slide Show Maker Professional on the recommendation of
Steve Ledger who always knows the best resources. But I thought it might be fun to create my own transition effects. I’ll share the experience with you.
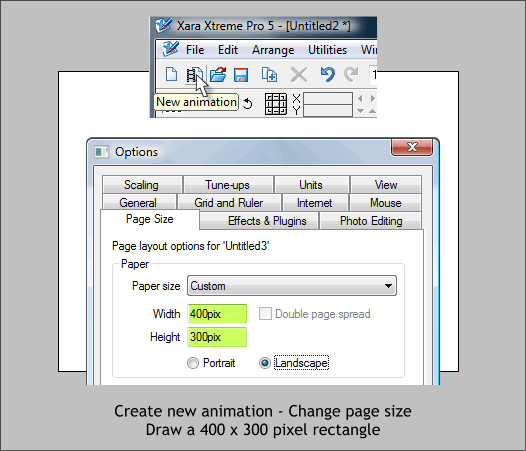
Click the New Animation icon on the Infobar or select File > New > Animation.
Right click on the page and select Page Options... Change the Page Size to Custom and change the dimensions to 400pix by 300pix. Press OK to close the dialog.
Draw a rectangle the same size as the page.
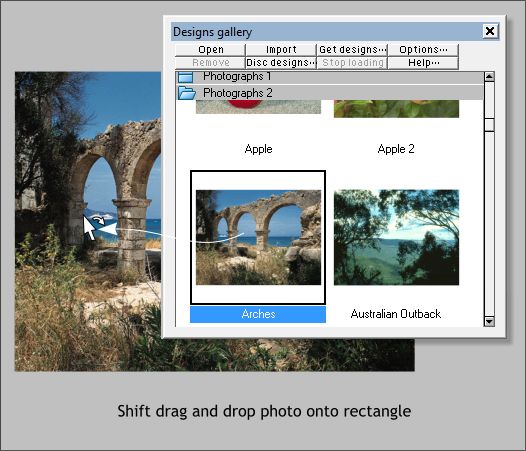
Open the former Clipart Gallery, now the Designs Gallery (Shift F10).
From the Photographs 2 folder, hold down the Shift key and drag the Arches image and drop it onto the rectangle.
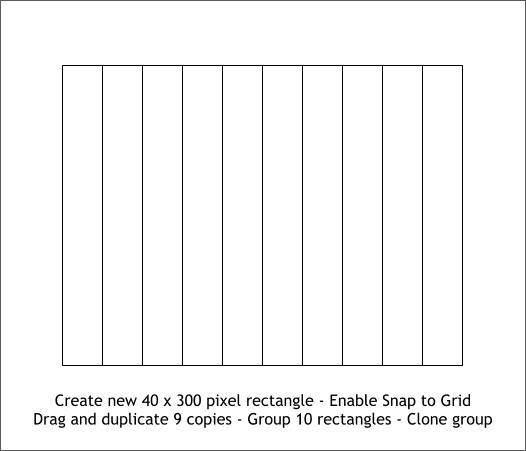
Enable Snap to Grid (Window menu). Select the Rectangle Tool and draw a 40 pixel by 300 pixel rectangle. Drag the rectangle with the right mouse
button and release the right mouse button to drop a duplicate. Repeat this until you have ten rectangles as shown above. Center the ten rectangles on the page.
Select the ten rectangles by holding down the Shift key and clicking on each rectangle until the Status line and the bottom of the page reads Selected 10 rectangles. Group the ten rectangles (
Arrange > Group or Ctrl g).
Clone the group (Ctrl k). Clone creates a copy in the exact same place.
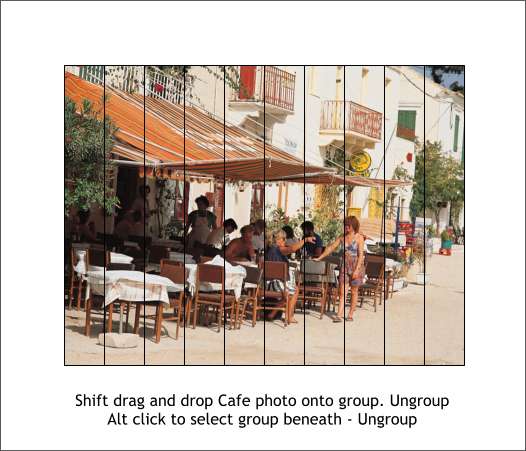
From the Designs Gallery > Photographs 2 folder, hold down the Shift key and drag and drop the Cafe photo (shown above) onto the grouped rectangles.
Select the group and ungroup it (Ctrl u). You now have ten individual photos. Xtreme’s ability to do this always amazes me.
Hold down the Alt key and click on any of the photos twice. The Status Bar should read 1 Group. Arrange > Ungroup or press Ctrl u. Clicking on an object with the Alt
key held down drills down an object at a time. In this case you ungrouped the rectangles underneath the ungrouped photos.
From here on out things get a bit repetitious. If you do not like repetition you may well want to move on to the next tutorial.

Switch to Outline view by moving the Set View Quality slider all the way to the left.
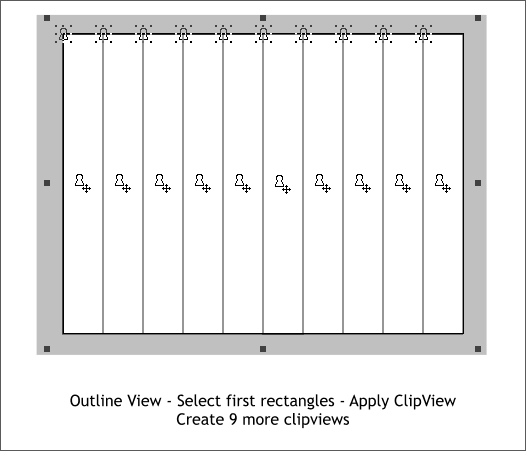
Drag a selection rectangle around the first rectangle with the Selector Tool (the arrow pointer). The Status Bar should indicate 2 Rectangles Selected. Use the keyboard shortcut Q to
Apply ClipView. This masks the photo inside the rectangle that is beneath it.
Two keyhole icons appear, one top left and the other in the center. You click the top icon to edit the “container” (the rectangle that is masking the photo)
and you click the center keyhole icon to edit the “content”, the photo.
Repeat this step and apply clip views to the other nine rectangles as shown above).
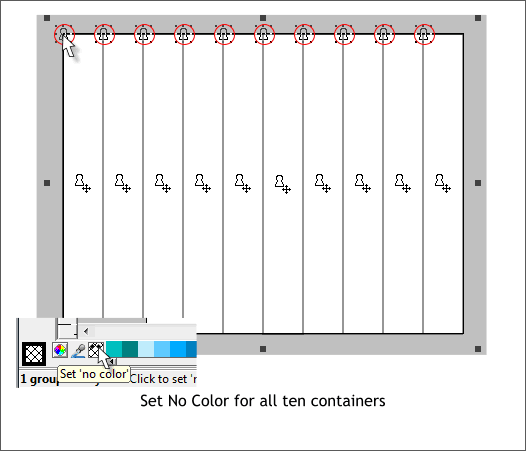
One by one, click on the top left keyhole icon to select the “container”. To the left of the screen palette of colors, left click and right click on the cross
hatched box to set the fill and outline color to none. If you see a pop up menu when you right click, select Clear Fill Color then right click again and select Clear Outline Color
. Repeat this process for the other nine rectangles. The reason for this is we want the rectangles behind the photos to have no fill and no outline colors.
Switch back to Very High Quality view mode by moving the Set View Quality slider all the way to the right.
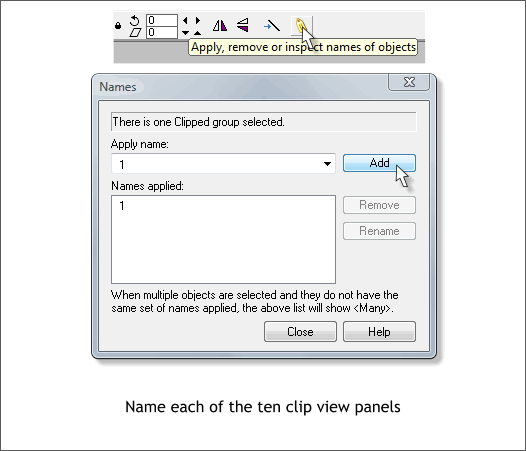
Select the first clip view rectangle, then click the Names yellow tag icon. Name the first rectangle 1 and press Add. Name the second rectangle 2, and third 3
, etc. I told you this was repetitious.
Press the Copy Frame icon on the Infobar (shown above top left).

Disable Lock Aspect Ratio by clicking the small black padlock icon so that it is in the raised position. If it is already in the raised position, then do not click it.
Select the first rectangle. Click the top left keyhole icon (edit container). Change the Width % setting on the Infobar to 10 and press Enter. If you did
this correctly, the first rectangle will now be a slim vertical rectangle. Can you guess the next nine steps are? If you said, Repeat the last step and reduce
the width of the next nine rectangles, you are right on the money.
NOTE: By reducing the width of the container and not the width of the photo, we have not modified the proportion of the photo. We have only made the mask, thinner.
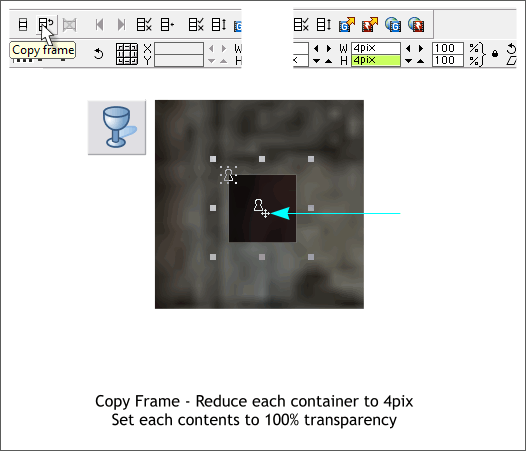
Press the Copy Frame icon to create frame 3.
Select the top left keyhole icon for the first slim rectangle and reduce the H setting on the Infobar to 4pix. Press Enter to apply the change. Repeat this for the other nine slim rectangles.
Drag a rectangle around the the first small square with the Zoom Tool (Z).
Click the center keyhole icon (the contents) and switch to the Transparency Tool (F6). Move the Transparency slider on the Infobar all the way to the right to 100%
(totally transparent). Repeat for the next nine squares.
TIP: If you have a wheel mouse, click on the page, hold down the Shift key and roll the mouse wheel to move the screen from side to side. This
does work with all wheel mice, but if it does it is a great way to navigate the page horizontally.
If you have gotten this far, congratulations. You have more patience than I do!
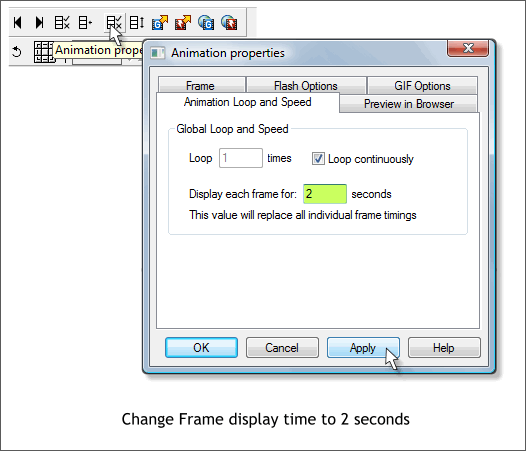
Click the Animation Properties icon (shown above Top left). In the Animation Loop and Speed tabbed section, check Loop Continuously and change the Display time to 2 seconds. Press
Apply, then OK.
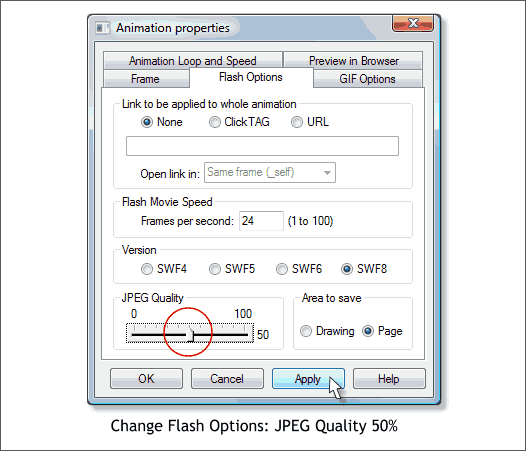
One of the shortcomings of this process is file size. Just these two frames create a pretty large file size. To keep the file size manageable, open the Flash Options tabbed section and set the
JPEG Quality to 50. Because the two images are in constant transition, you can get away with more compression and slightly lower image quality. Press Apply then press OK.
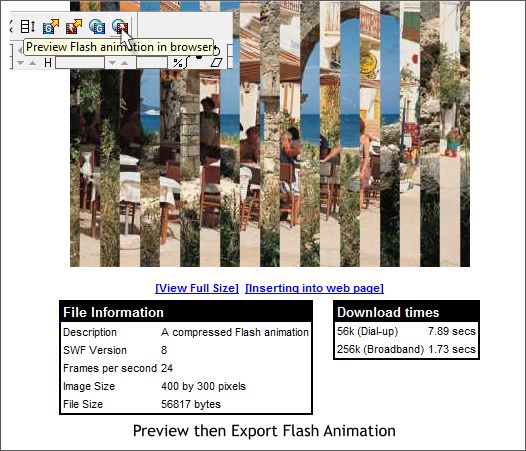
To see the fruits of your labor, provided you are not wrapped up in a straight jacket babbling incoherently after all the tedious repetitions, click the Preview Flash Animation in Browser icon. Your default web browser will open and the
transition will play endlessly until you are bored senseless and scream at the top of your lungs, I can’t take this any more. I’m going mad! Or you fall off into a troubled sleep.
I made one change to my final animation. I copied the first frame and placed it right after the first frame. This keeps the first image on the screen a bit longer before the transition starts.
Obviously this is a very short slide show. But using this very labor intensive method you can add more slides and invent some transitions of your own
(fading two photos is the simplest). If you do invent some new transitions I would love to see them.
|