|
The Web Designer manual explains in some detail how to create Named Repeating Objects. A repeating object is one that appears on many pages, such as a navigation button or a banner, or even a block of text
such as a copyright line. If you change a repeating object, change the color or text style, or even position on the page, for example, you can automatically apply the change to every occurrence of that object on
your web site.
In the first release of Web Designer, each repeating object had to have a name applied with yellow tag New Name icon. Since the first release, Xara has simplified this process virtually eliminating the need to
give each repeating object a name. It’s easy. It’s fun. And it’s productive.

We will create a simple 5 page site. Determine your page size (you can change it later on a page by page basis). Press the Insert Duplicate of the Current Page icon 4 times to add four new pages.
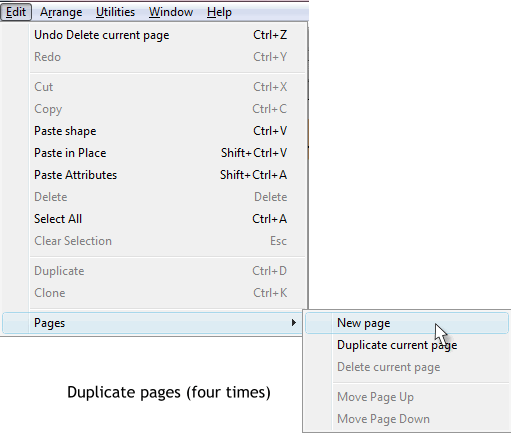
Or, you can select Edit > Pages > New Page. But this is a lot of bother. Especially when you first start to build your website. For you who are curious,
and are wondering why there was nothing on the page, be patient and your editor will explain in due course.
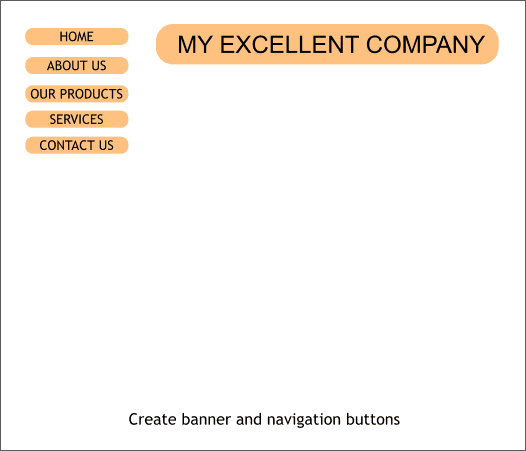
Create a banner and some simple buttons such as your editor’s humble efforts shown above. Remember to group the type with each button and banner.
Arrange the banner and buttons on the page in an attractive and utilitarian manner.
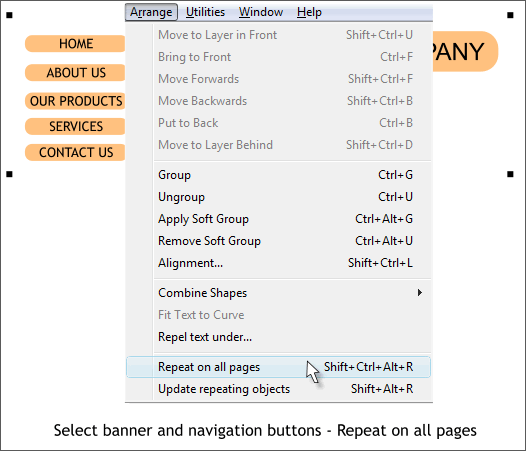
Select the banner and the buttons. From the bottom of the Arrange menu, select Repeat on All Pages. This does two things. It copies and pastes the
banner and button in the exact same place on each page, and more importantly, it automatically makes the buttons and banner Repeating Objects!
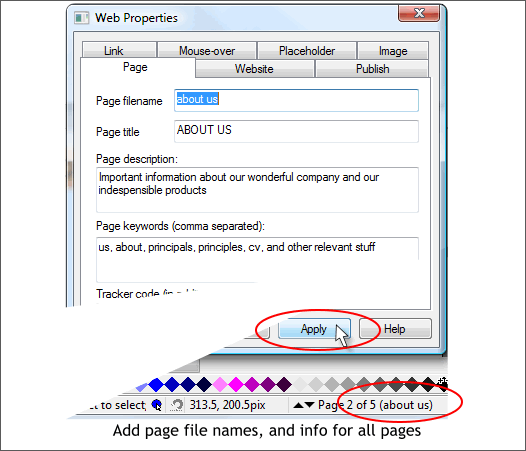
In the Web Properties, Page tabbed section, give each page the same name as the button and in the order the buttons are stacked, except for the home page. Leave the home page Page File
named index. You can change the Page Title if you want.
Page Description and Page Keywords are important when you are building an actual website as these help the search engines identify content on your
site. But for this exercise, we just need to worry about the Page Filename and the Page Title. We will link the buttons to the page names. Page Title is
also important for search engines and can actually contain more descriptive and longer if necessary text.
NOTE: The Page Filename text remains in lowercase. This is intentional and you cannot change the case.
As each page is named, the name of the page will appear on the status line to the right corner of the page, next to the up and down arrow navigation buttons. And in case you have not noticed, you can press
these buttons to navigate your Web Designer pages.
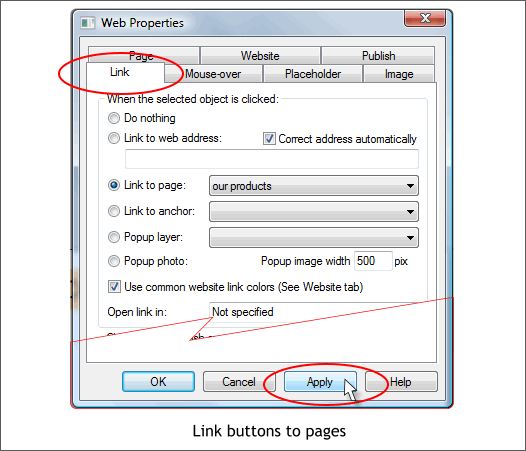
One by one, link each button to the appropriate page. Select the button, then select the page name from the Link to Page drop down list. And for heaven’s sake, REMEMBER TO PRESS APPLY!
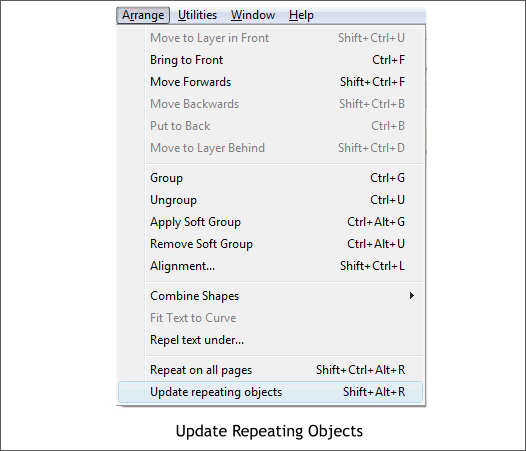
Once you have linked all the buttons, select Update Repeating Objects from the Arrange menu. And just like that, with one click, all the buttons on your
website, whether you have two pages or two hundred pages, are automatically updated!
But wait. There’s more!
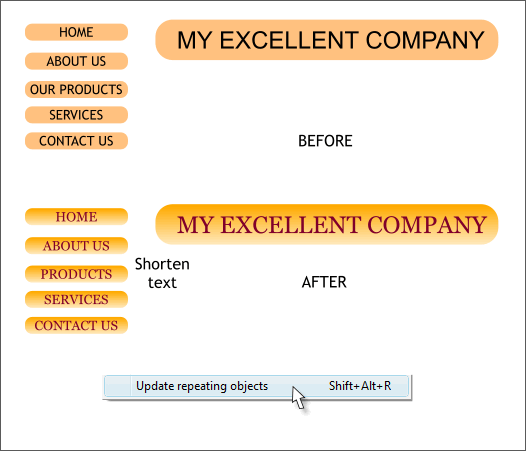
OK. Here’s the best part. Let’s say you don’t like the color of the buttons, or the type. Maybe the font was not the best choice. Maybe you are not happy
with the order of the buttons, or you need to edit the text. Not a problem. Make all the changes you want. Then select Update Repeating Objects from the Arrange
menu. Go and check. We’ll wait for you.
One additional thing. If you create a repeating object or objects at the bottom of the page, let’s say a Next Page and a Previous Page button, and you place
these two buttons, 125 pixels up from the bottom of the page. Even if you have some pages that are longer and some that are shorter, when you use the Repeat on All Pages
command to add these to all the other pages of your website, Web Designer places the objects, buttons in this case, the same distance from the bottom of the page. Is that cool? (It is!)
However. If you manually change the length of a page, you will have to reposition the objects manually.
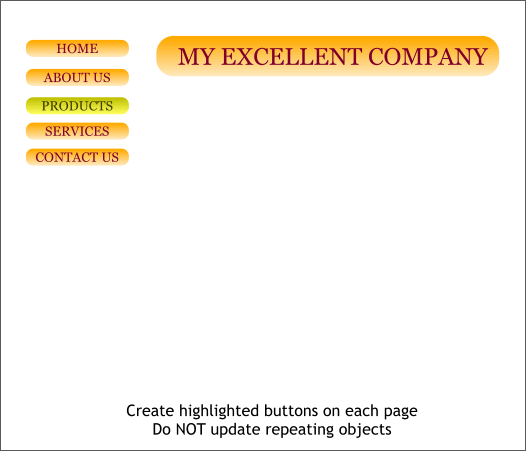
Here’s a free TIP. Create a highlighted version of each button, as shown above. Highlighted buttons help identify which page your visitor is on.
Simply replace the appropriate button on each page, but DO NOT make these repeating objects. They are just linked buttons. They can have rollover effects and they can be soft grouped.
And that’s it. There is so much more to cover but this will get you started.
Your feedback is always important to my mental well being. Use the Send e-mail link below to send me your comments, questions, and suggestions. And if you have not already been there, be sure to visit the Xara Web Designer Forum on TalkGraphics.com.
Gary W. Priester
Your Editor
Send e-mail
|