|
|
|
I have always wanted to create a double helix brush (as in DNA) but somehow I have never had much luck. I tried again, and again, and again, and finally came up with something I think is pretty close.
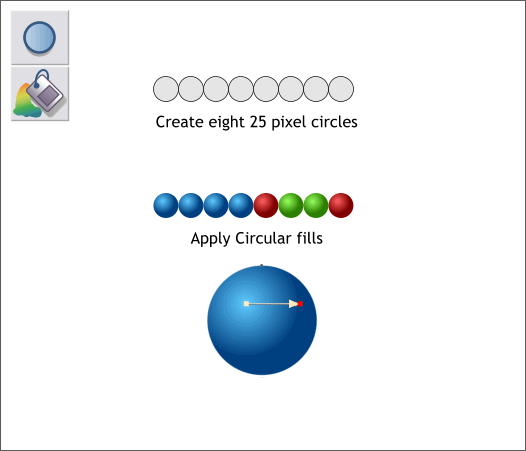
Create eight 25 pixel circles and arrange them side to side as shown. With the Fill Tool (F5), apply a Circular fill using a light and a dark blue and move the center of the fill up and to the left as shown. Copy the fill (Ctrl c). Select the other seven circles and from the Edit menu, select Paste Attributes or press Shift Ctrl v. Modify the fill colors for the second four circles as shown above. NOTE FOR THE EASILY CONFUSED: The large blue circle is only to illustrate the fill and fill position. You do not need it for this tutorial.
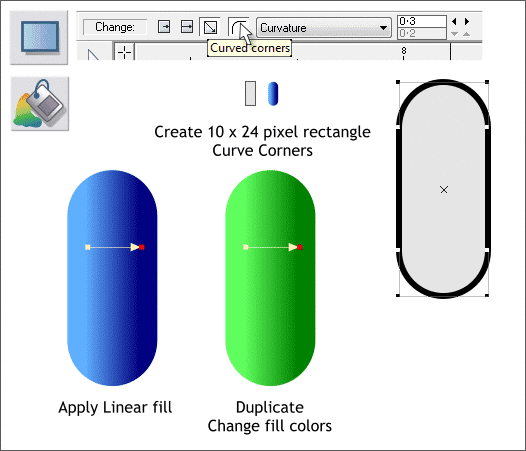
Create a very small rectangle 10 x 24 pixels. Click on any of the corners with the Rectangle Tool to apply curved corners and drag any of the inside control points with the Rectangle Tool cursor to make the ends perfectly round as shown in the enlargement on the right. NOTE FOR THE EASILY CONFUSED: See previous note. Apply a 2-color blue Linear fill. Duplicate this shape (Ctrl d) and change the fill to greens. TIP: With Extreme and Xtreme Pro 3.2, you can drag a selection by holding down the RIGHT mouse button and dragging the object. Release the right mouse button to leave a duplicate. (You will know it is the right mouse button if it works!)
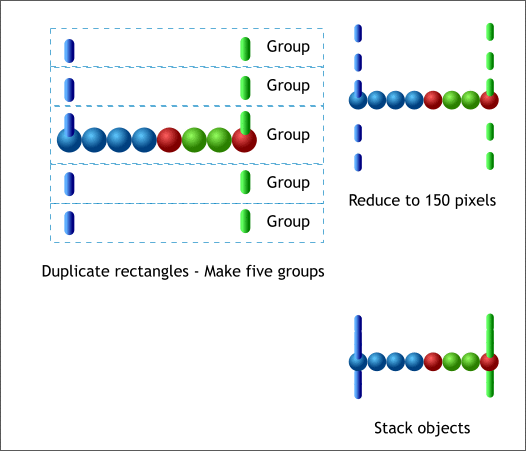
Center one rounded rectangle over the left most circle and the other over the right most circle. Group these two rectangles. Make four clones and arrange them as shown above left. Select the two rectangles directly over the circles and the circles and group them. Select all and reduce the width to 150 pixels. Stack the groups as shown. Select all but the top group and send them to the back (Ctrl b). Shift click on the second group down (to deselect it) and press Ctrl b to send the remaining groups to the back. Continue this step, deselecting the next group down and sending the rest of the selected groups to the back until all groups have been sent to the back. What we have done is to stack the groups in order with the top group in the front and the bottom group in the back and all the other groups in descending order.
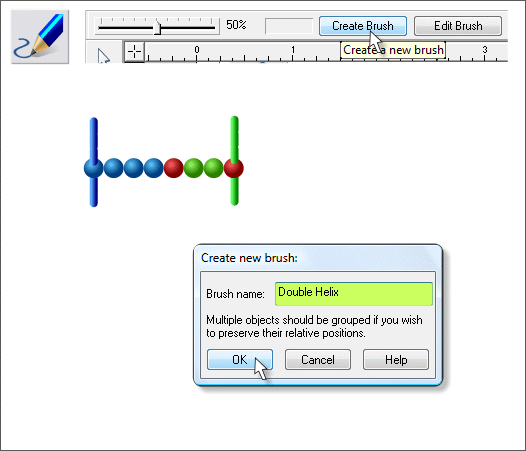
Select all the groups then switch to the Freehand and Brush Tool (F3). Click the Create Brush button on the Infobar. Name your new brush Double Helix and press OK.
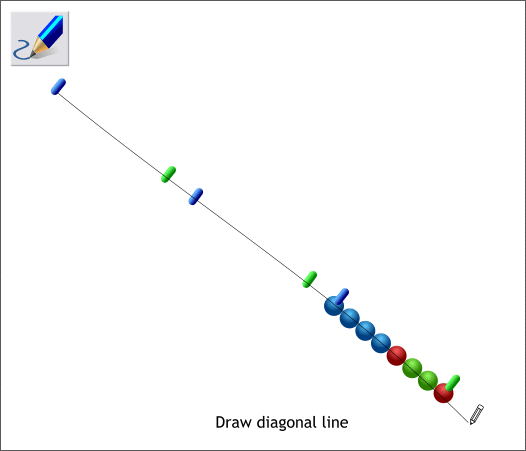
Draw a diagonal line with the Freehand and Brush Tool.
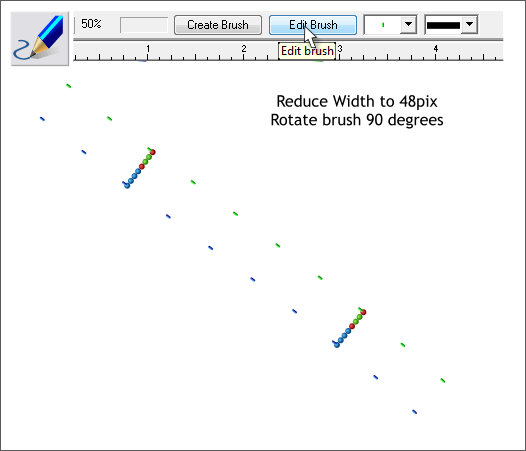
Reduce the width of the brush to 48 pixels by selecting 48pix from the Width drop down list on the Infobar. With the Freehand and Brush Tool and the line still selected, press the Edit Brush button. In the Rotation tabbed section, change the Rotation: slider setting to 90 degrees. This rotates the brush objects to be parallel to the line.
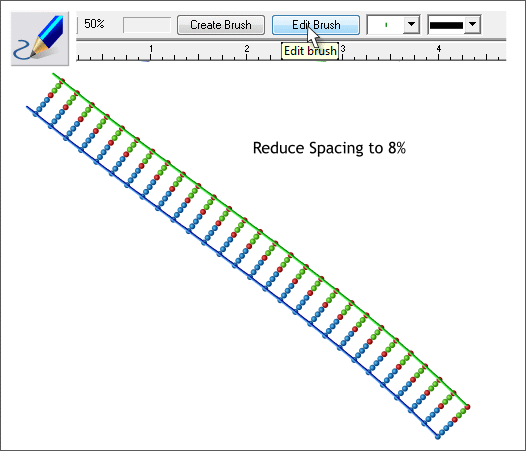
In the Spacing tabbed section, reduce the Spacing: slider setting to 8%. And now, here's the twist. (Did I really say that?)
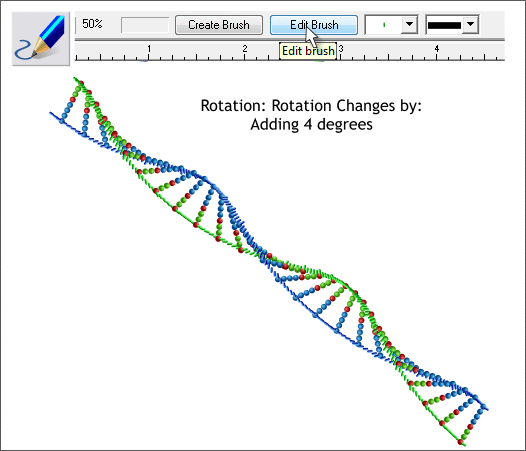
Return to the Rotation tabbed section. In the Rotation Changes By: > Adding text entry box, key in 4 and press Enter to apply the change. Et Viola! Looks like a double helix to me.
Another Serving Suggestion. And as they used to say at the end of the Warner Brothers Cartoons, That's All Folks! Your feedback is mandatory. Well OK not mandatory but very greatly appreciated. Send me you comments, questions, complaints, and suggestions via the e-mail link below. Your feedback is always welcome. Gary W. Priester |
|||||||
|
|||||||
|
|
|||||||
