|
|
|
Another inquiring mind in the Xara Xtreme Conference recently asked how to apply text to a cylinder. And while the new member received a very thorough explanation, I will cover it here anyway since I am always looking for things to cover. To tell you what we are going to do, before we do what we are gong to do, first we'll create a blend, then we'll create some graphics, then use a Mold Tool "Envelope" to curve the graphics to fit the cylinder.
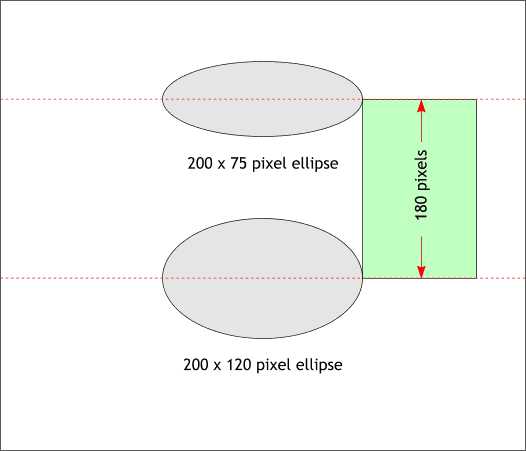
Create two ellipses to the sizes shown and space the centers about 180 pixels apart. I have used the green rectangle as a spacing guide.
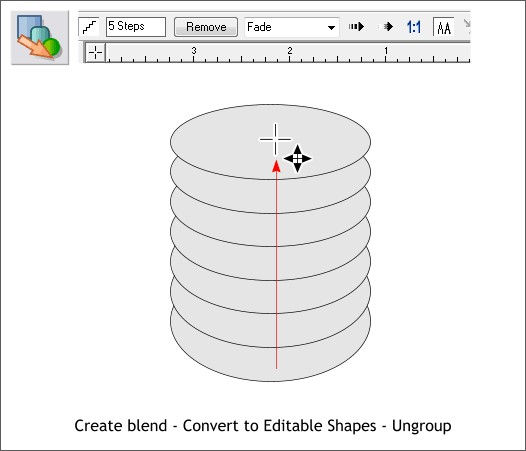
Select the top ellipse and bring it to the front (Ctrl f). Select the Blend Tool (F7). Click on the bottom ellipse and drag to the top ellipse to create a blend. Don't release the left mouse button until the blend has been created. From the Arrange menu, select Convert to Editable Shapes then Arrange > Ungroup.
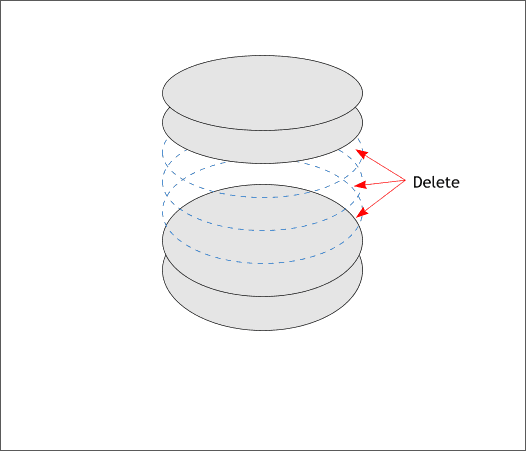
Delete the three middle ellipses shown above in blue dashed outline.
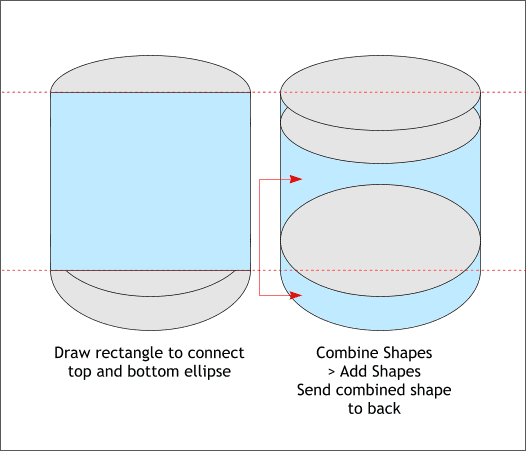
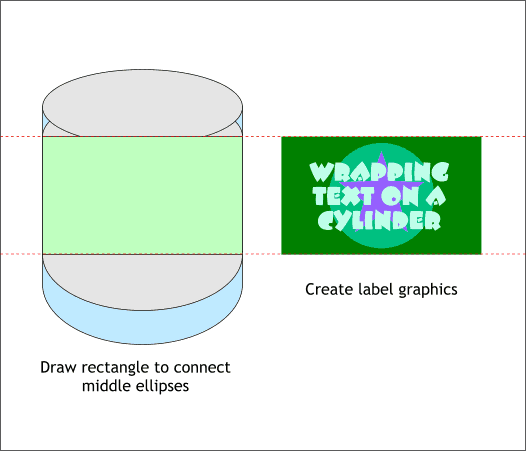
Drag guidelines from the upper screen ruler (press Ctrl L to display rulers) through the center of the top and bottom ellipse. Draw a rectangle the same width as the ellipses and the height of the two guidelines. Select the rectangle and the bottom most ellipse. Arrange > Combine Shapes > Add Shapes (or press Ctrl 1). Send the combined shape, shown on the right in pale blue, and send it to the back (Ctrl b).
Drag the guidelines so they pass through the middle of the two middle ellipses as shown above. Create a rectangle the width of the ellipses and the height of the two guidelines. On this rectangle, create some graphics such as those shown above or something of your own invention.
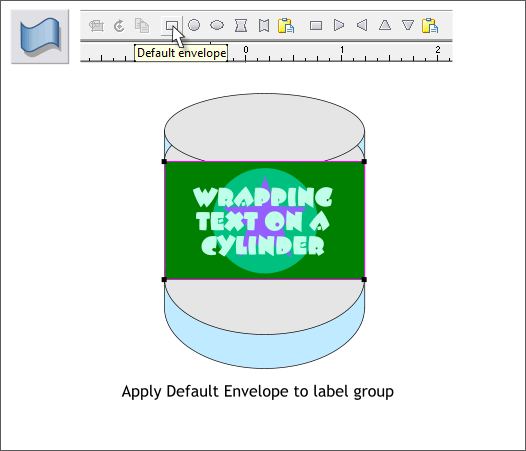
Select all the objects in your label including the rectangle. (Hold down the Shift key and click to select multiple objects) Switch to the Mold Tool (Shift F6). Click the Default Envelope icon on the Infobar (shown above).
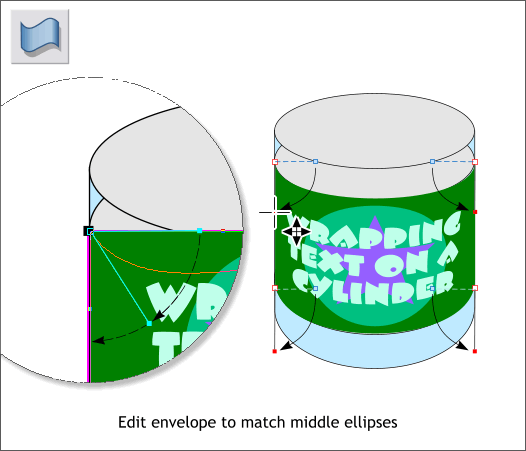
One by one, click on each corner with the Mold Tool cursor, then drag the red control handle from the top and bottom inside to the left and right sides as shown above. Move the red handle up and down along the outside edge until the curve of the enveloped label matches the curve of the two center ellipses. This may take a bit of adjusting on each side until you get the curve just right.
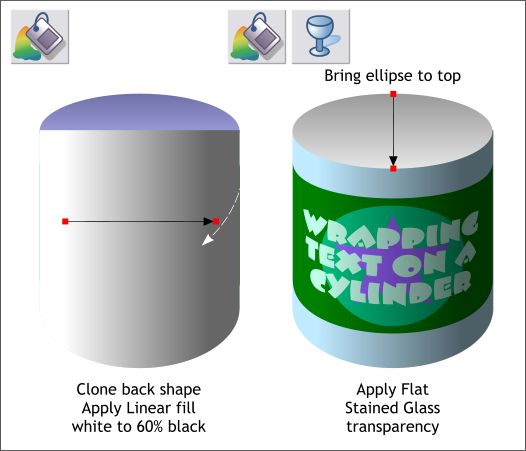
Delete the two middle ellipses. Clone the back shape (the combined rectangle and ellipse) (Ctrl k). Using the Fill Tool (F5) apply a Linear fill white to 60% Black. The easiest way to do this is to click the Fill Tool cursor on the cloned shape, hold down the Ctrl key (to constrain the direction) and drag to the right. The fill should start and end inside the shape as shown. Switch to the Transparency Tool (F6). From the drop down list of Transparency Types on the Infobar, select Stained Glass. Apply a white to 20% Black Linear fill to the top ellipse.
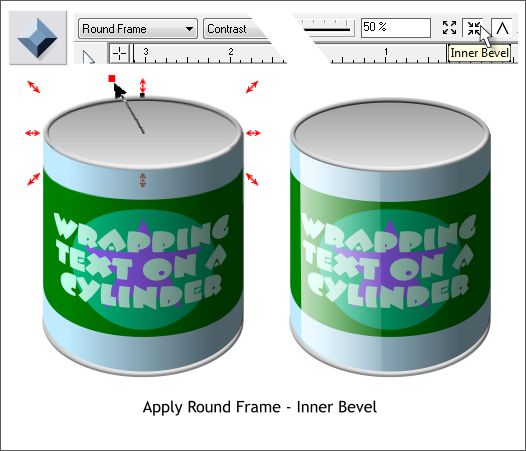
Select the Bevel Tool (Ctrl F3) and click the top ellipse to select it. Drag any of the red arrow control handles a very short distance towards the center. From the drop down list of Bevel Types on the Infobar, select Round Frame. Clone the beveled ellipse. Drag the clone to the bottom of the shape and send it to the back (Ctrl b). I added a white rectangular highlight and applied a Linear, Mix transparency.
|
||||||
|
|


