|
|
|
Color Feedback
Color editing in Xara is done in the Color Editor. Press Ctrl e or press the Click to Edit Current Color icon to the left of the screen palette to open the Color Editor . (Left click edits the fill color, right click edits the outline color).
While we are here, the cross hatched box to the left of the screen palette is used to set the fill or outline to none. Left click to set the fill to none and right click to set the outline color to none.
Xara makes extensive use of Tool Tips, those captions that appear whenever you let the cursor rest over of object on the screen. All of the named colors as well as the palette of web safe colors have corresponding tool tips such as Orange Yellow that appears in the Named Colors section.
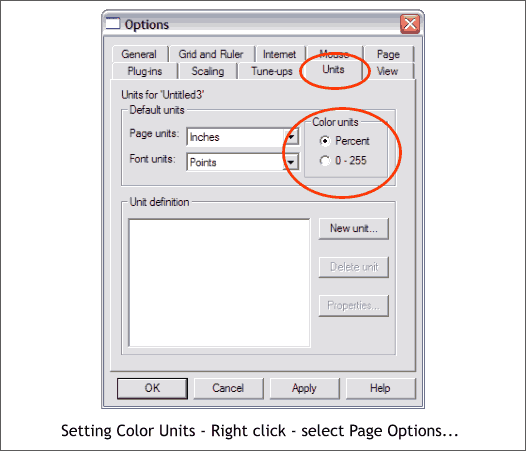
Xara can define color in Percent or in increments of 1-255. To switch between 0-255 colors for RGB or HSV color editing, and Percent for CMYK editing, open the Page Options dialog. In the Units tabbed section, define your Page Units and Color Units. In the screen shown above, the Page Units have been set to Inches and the Color Units to Percent . For web graphics use Pixels for Page Units and 0-255 for your Color Units.
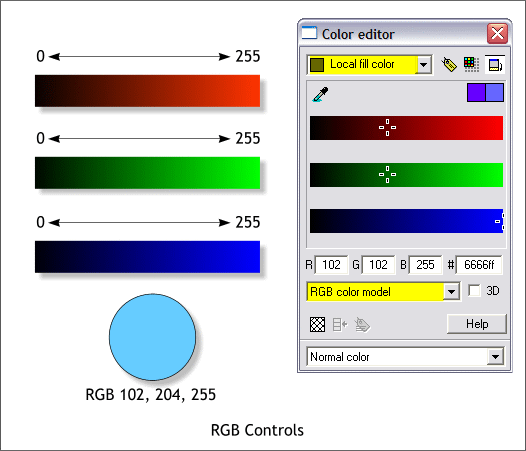
Most of the Xara Xone tutorials use the RGB color palette. Colors may be edited in the RGB Color Model function of the Color Editor (Ctrl e). RGB colors are usually displayed in 0-255 (265 colors) mode (see next image). Each slider has 255 individual options. The hexadecimal number is shown on the right (in this case 6666ff). You can adjust the sliders or enter RGB values in the text entry boxes. The higher the number, the brighter the colors. White is RGB 255, 255, 255 while Black is RGB 0, 0, 0.
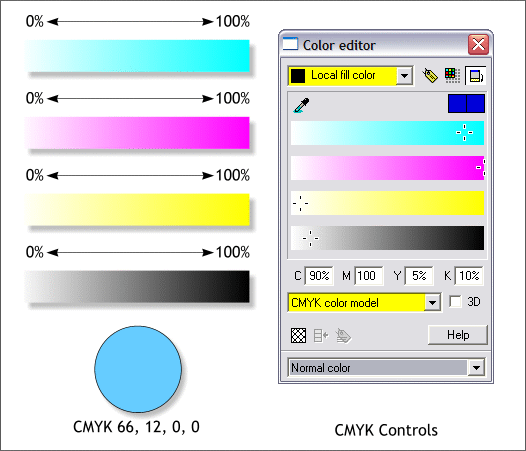
If you are preparing a document for commercial printing, you should specify your colors in Percent and use the CMYK Color Model. On the first page I mentioned that Subtractive Color produces white when all 4 colors are set to 0% or no color. Each of the 4 CMYK colors can have a value of 0-100%. 0% equals no color (white), while 100% equals 100% color. If you are using a swatch book that has specific color values, you can enter these values in the text entry box.
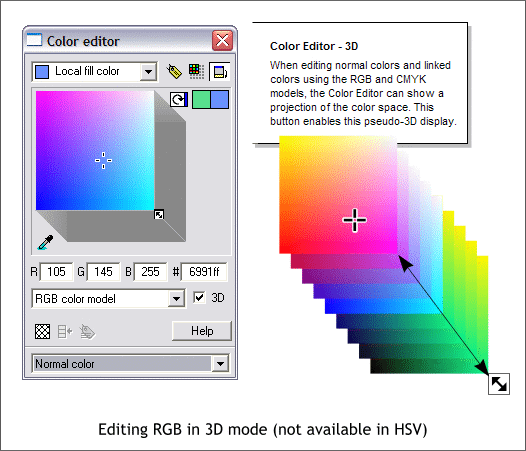
If you really like doing things that hard way, you can edit CMYK, or RGB in the 3D mode shown above. Check the 3D check box. (3D is not available in HSV edit mode) Drag the little box on the lower right with the diagonal double arrow to navigate the simulated color space. Drag the + to modify the color.
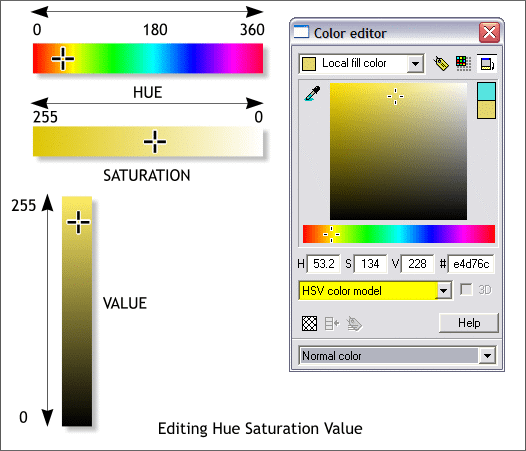
The most intuitive way to edit color is HSV, Hue, Saturation, and Value. We have covered all three variables earlier in this Workbook. To modify the Hue component in a color, either drag the + slider or enter a specific value (0-360) in the H text entry box. in the large square preview window, drag the + to the left and right to modify the Saturation setting and drag up and down to modify the Value setting. You can also enter specific values in the S and/or V text entry boxes.
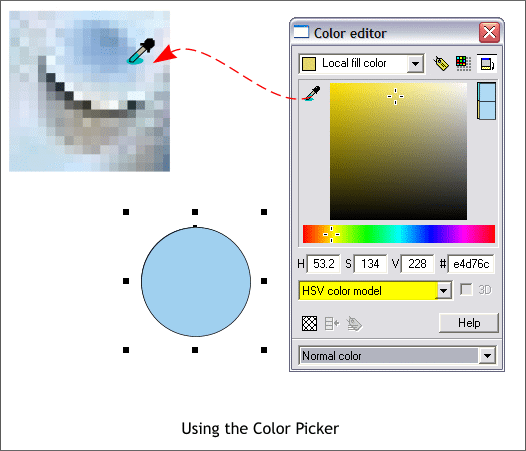
Another way to edit color is to use the Color Picker. Drag the eyedropper icon from the Color Editor to sample any color, even colors from a bitmap as shown above (greatly magnified). You can use the Color Picker in any of the Color Models including 3D. NOTE: If you are sampling color from a bitmap image, the color may vary from pixel to pixel. Once you have a color that is close to what you want, you can also edit it further if desired.
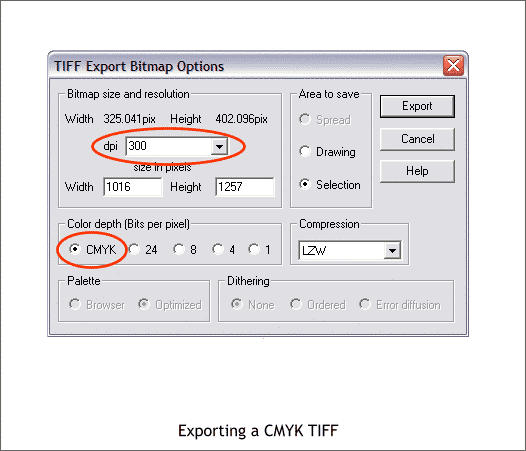
Xara X1 can export a CMYK TIFF (Tagged Image File Format) file which often times is the best way to give a complex image (including text) to a printing company. From the File menu, select Export. From the Save as Type... drop down list, select TIFF. In the TIFF Export Bitmap Options dialog, select your dpi resolution (check with your printing representative to see what resolution they prefer. If the amount is more than 300dpi, you can key in a higher value if necessary). Check CMYK. If you are submitting your image on CD you might wish to set the Compression to None. This creates a much larger file size but preserves the image with all the information in tact. To clarify, the various compression schemes, such as LZW, delete certain bits of information that do not appear in the image. For example, if you reduce the size of the image, not all the original pixels will show, and so, when using a compression scheme, this information is discarded. However, if the printer needs to enlarge the image, it will not be as sharp because the additional pixels were discarded. If the image is not going to be resized or edited, use LZW compression. But if the image may be edited, then best not to use compression. When in doubt, do not use compression. I think I covered just about everything and then some. I know there will questions and comments and corrections (color is after all, a mysterious and confusing subject). If so, please use the form on the next page to send me your feedback. Gary W. Priester
|
||
|
|


