|
|
|
A few months ago I demonstrated how to use Xara Picture Editor to combine the best parts of two different photos into one. Here is another example. One of the websites I design and maintain is for a local builder. He asked to have a history of his current project on his site for visitors to track the progress. I used Xara Picture Editor to combine two photos to get the best of both photos.
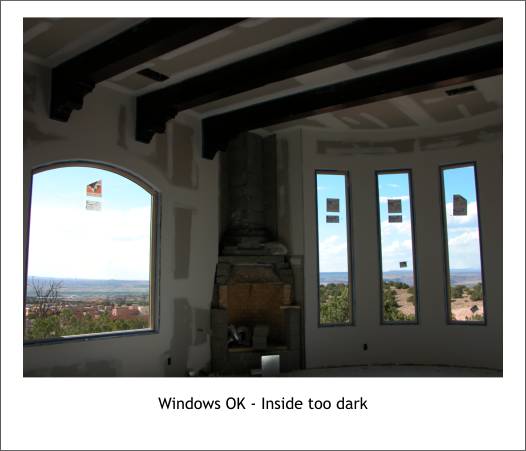
In this photo, my camera exposed for the views. Nice though the views are, the visitors (and my client) want to be able to see the new dry wall that has been installed and taped, and the start of the southwestern Kiva fireplace in the center of the photo.
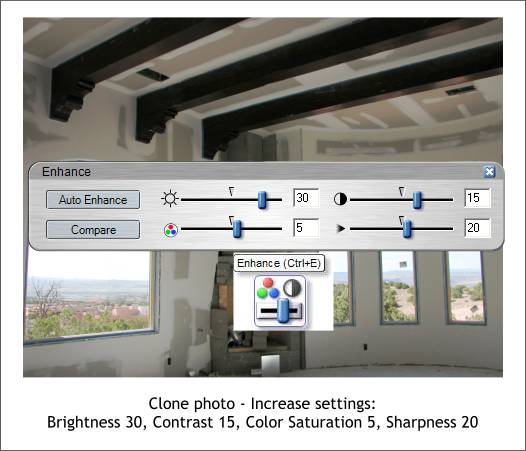
The dark photo was cloned and the clone opened up in XPE where the settings were increased to reveal the interior. As a rule, when I increase the Brightness settings, I increase the Contrast setting by 1/2 the amount. This brings the balance back into the image. A small amount of Color Saturation in this case helped to add back some richness.
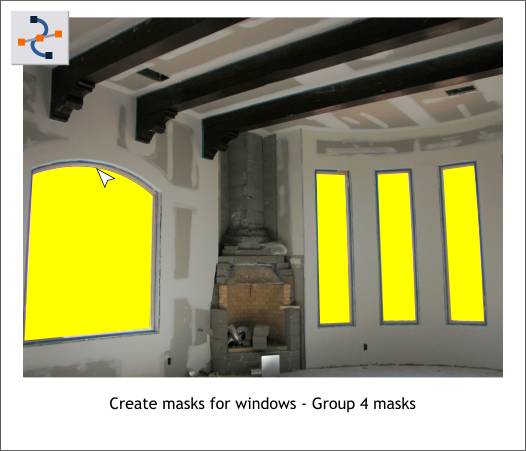
Using the Shape Editor Tool, I clicked four points on each window to create a mask shape for the window. The last control point was clicked on top of the first control point to create a "closed path" which can be filled with a color. (Open paths cannot be filled). The four mask shapes were grouped (Ctrl g).
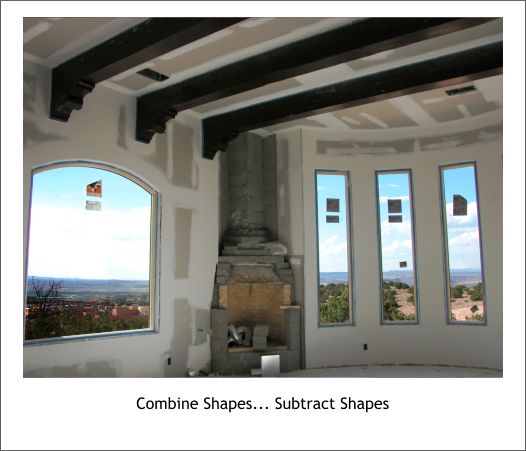
The mask group was selected along with the lightened photo and the mask shapes subtracted from the light photo revealing the desired exposure for the windows (Arrange > Combine Shapes... Subtract Shapes). In the last tutorial, I'll show you how I used XPE to retouch another builder's photo for another project.
|
|
|
|


