 |
 |
| H 1 2 3 4 5 6 |
|
|
|
Here is a quick way to create shimmering or wavy text using Xara's Mould Tool. Create some text using a heavy typeface such as Valken which is on the Xara X disc in the Fonts folder. Using the Pen Tool or the Shape Editor Tool, create a horizontal line that is a bit wider than the text and just a tad higher than the top of the text. Clone the line (Ctrl k ) and move the clone just below the text. Select the Blend Tool, click and drag from the top line to the bottom line (or the bottom to the top if you prefer) to create a blend of the two lines. Change the number of Blend Steps on the Infobar to 4 and press Enter to apply the changes.
Create a rectangle that is just slightly larger than the text. Duplicate (Ctrl d) the blended lines and center them over the rectangle.
Select the blended lines and the text. From the Arrange menu, select Combine Shapes... Subtract Shapes. With the text still selected, from the Arrange menu select Ungroup, then again from the Arrange menu, select Break Shapes. Marquee select the top row of the text shapes and Arrange > Join Shapes. Repeat this and one-by-one join the other four rows. Select the lines and rectangle and Combine Shapes... Subtract Shapes, then Break Shapes. (I have colored every other shape to make it easier to see them).
Select the Mould Tool then click on the first rectangle to select it. On the Mould Tool Infobar, click the first rectangle icon (Default Envelope). Drag the bottom of the shape out to the left. Drag the right bottom side of envelope towards the left. Add guidelines to mark the width of the text and the extended area of the envelope.
Repeat the last step and apply and edit Default Envelopes to the other rectangles so that they go out and in, out and in, etc.
Select the first enveloped rectangle with the Mould Tool. Click the Copy Mould Shape icon on the Infobar. Select the top joined row of the text and press the Paste Envelope icon on the Infobar. Can you guess what's next? If you said copy the next rectangle and paste the envelope to the second row of the text shapes, etc. you are correct. Continue this until you have copied and pasted the shapes from the rectangles to the sliced type sections.
Apply a two color fill to the top type section using the two colors shown. Repeat this for the next row down but reverse the colors. Continue to apply this fill alternating until all the text is filled. TIP: After you have applied the top two fills, you can copy one fill (Ctrl c) and select the next alternating shape and Paste Attributes (Ctrl Shift a) or Edit > Paste Attributes.
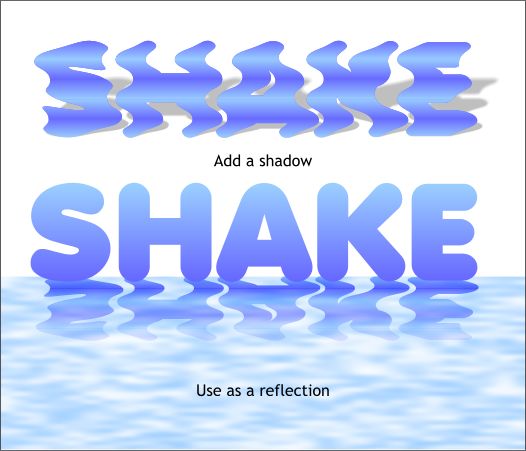
Here are a few ideas of how you can use this wobbly type. The second idea makes more sense. I vertically flopped the shimmering text, reduced the height some, and placed it under the text to make a reflection. I grouped all the slices then applies a Linear transparency to fade the text into the surface of the water. The water is a simple two color Fractal Plasma fill with the horizontal fill path arrow extended the length of the rectangle. And that wraps up Workbook #13. Suggestions for tutorials, comments, can be (and should be) sent from the feedback form on the next page. Gary W. Priester
|
|
|
|
|
|
|