|
|
|
|
|
||
 |
|||
|
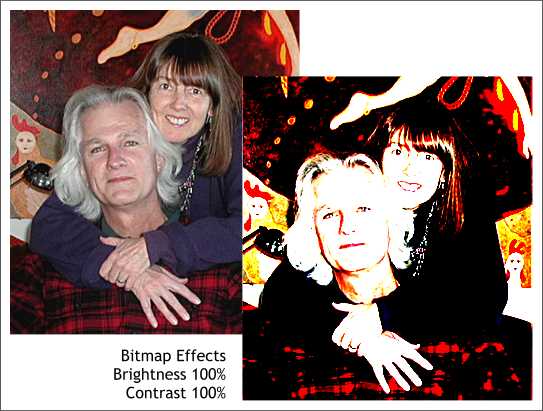
I recently had a request for a tutorial on how to create an Andy Warhol-like Pop Art portrait. Warhol's Pop Art serigraphs were created from photographs in which the contrast threshold was increased to the point where everything was either black or white, of at the most a handful of values in between. Bright colors were substituted for the black and white. The same process is even easier in Xara and there are no strong fumes from the silk screening inks to smell up the house.
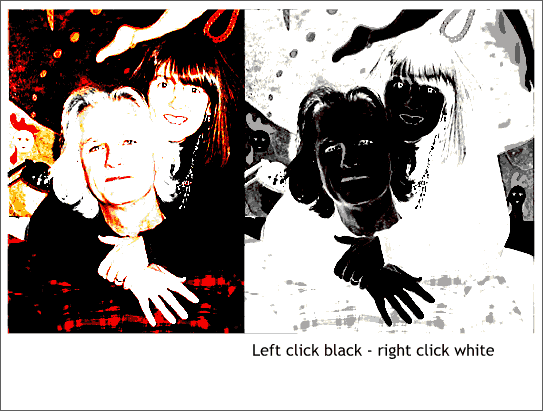
The photo shown here is of the author and his long-suffering wife taken last Christmas. The photo was imported into Xara and while selected, in the Utilities > Bitmap Effects and Plug-ins > Bitmap Effects > Brightness and Contrast, both Brightness and Contrast settings were increased to 100% creating the posterized image on the right. Note how this simple process makes the missus and me look years younger.
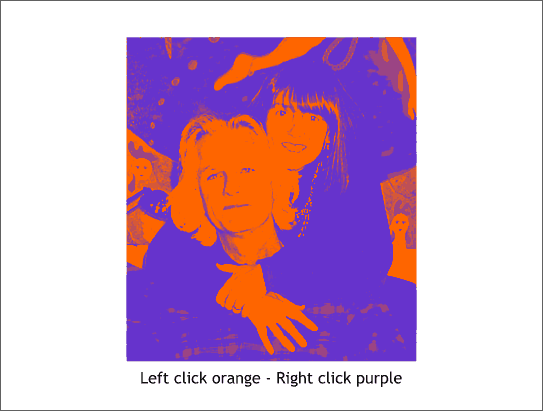
Making a Pop Art portrait from the modified photo was as easy as clicking two bright colors on the on screen palette. Left clicking determines the light color (normally white) while right clicking determines the dark color (normally black). The great thing about this unique capability of Xara is it is really easy to try out different color combinations.
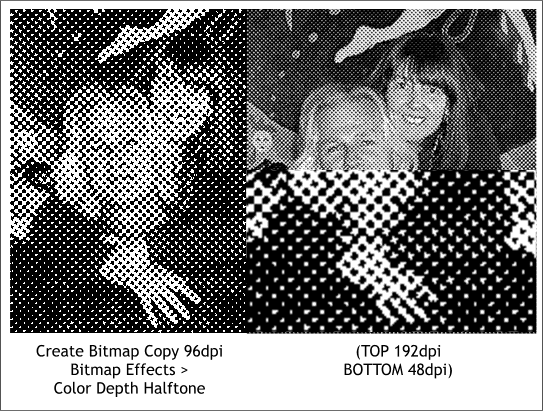
Another Pop Art technique is the use of very large halftone dots which is another thing Xara does quite well. The original photo was selected and then in Bitmap Effects > Color Depth, the To Mono (Halftone) option was selected producing the newspaper photo look on the left. The resolution of the image determines the size of the halftone dots. The image on the left was 96dpi while the image top right is 192dpi (2x screen resolution of 96dpi) while the image bottom right is 48dpi (one half screen resolution). Halftones are a way of simulating continuous tone photos using only black or white. The size of the dots determines the impression of lighter and darker tones which is more obvious on the top right.
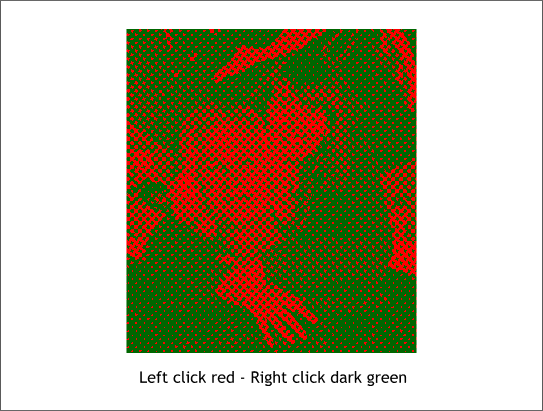
Once again, clicking the left and right buttons on colors creates a Pop Art effect.
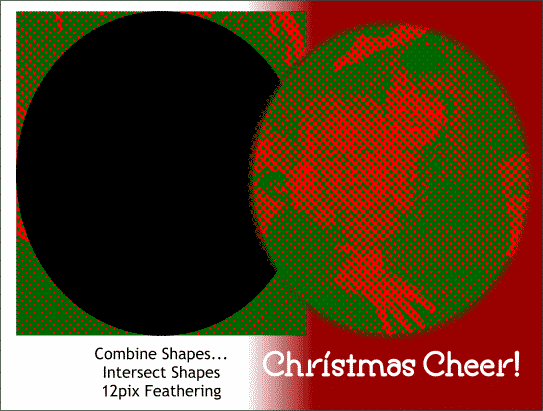
To vignette the image above and use it for a Christmas Card, an ellipse was centered over the photo, both objects selected and Arrange > Combine Shapes... Intersect Shapes used to trim the photo to the shape of the ellipse. 12pix of feathering was added with the Change Size of Feather Region slider on the top right side of the Infobar to soften the edges.
Here is another technique I discovered while I was having fun in the Bitmap Effects menu. I changed the photo reversing the two colors (black and white) to create a photo negative effect.
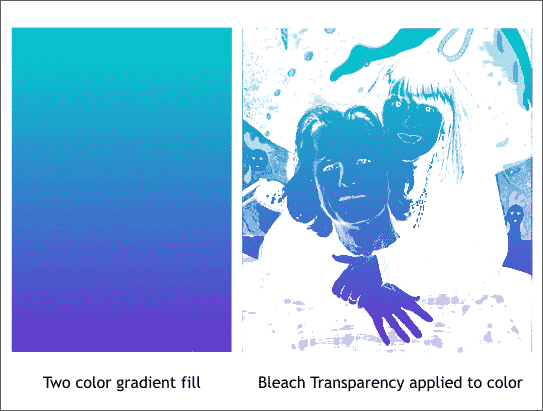
A 2-color Linear fill was created to the same size as the photo and then a Flat, Bleach transparency applied to the gradient fill. Bleach applies itself to only the dark parts of the photo treating any white or light colored area as non-transparent.
|
|