|
Here’s a link for the complete template. It has five pages and it will give you an idea of how you can
create your own template. Click here for the actual WEB file which is about 2.6MB.
You can customize my template, or better still, start from scratch and create your own. As the old saying goes, “Give a man a fish, and he’ll have food for a day. But, give a
man a template, and he will be able to create a website.” It loses something in the translation I’m afraid.

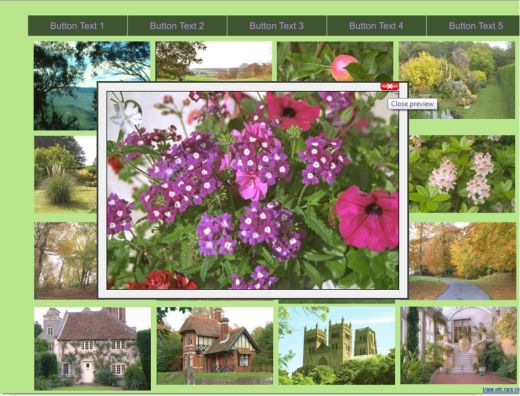
On the last page of my template, there is a photo gallery. When you or your visitor clicks on any of the thumbnail photos, a window with a larger photo
opens (as shown above). In most website software, creating this photo gallery would be time consuming, not to mention mentally challenging. Web Designer makes it about as easy as can be.

Here’s how it works. Bring your photo into Web Designer, resize the photo to the size you want it to appear in your visitor’s browser. Right click on the photo and select
Optimize Photo. In the Optimize Photo dialog, click Optimize. This reduces the resolution to 96dpi, Windows screen resolution. The image will appear 1:1
or the same size as you see it on the screen at 100% Zoom factor.
Resize the photo to it’s thumbnail size as shown above. Repeat this step for each photo you want to include in your gallery.
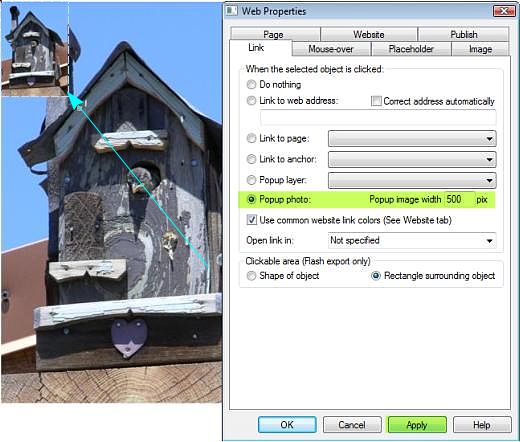
Open the Website Properties dialog (Shift + Ctrl - W). In the Link tab, check Popup Photo: and click Apply
. The default setting is 500pix width. If your photo is larger, a the window for the larger photo will have scroll bars. You can change the Popup Image Width if you want a larger size with no scroll bars.
The Affiliate Program
One final note. Xara has an Affiliate Program. The first time you opened Web Designer you might have seen a screen that gave you the opportunity to earn
money (20% of each sale you generate actually), for any sales of Web Designer referred to by you. Or optionally, you can donate any sales
commissions to one of several deserving charities. Like many of us, you were probably so eager to get started with Web Designer that you skipped over this dialog.
The program is free. If you decide to become an Affiliate (you can get all the details in the Help menu, just click Affiliate Program), you will be assigned a
unique tracking link to the Xara.com website. If someone purchases Web Designer, or any other Xara product, via your link, you earn a 20% commission
, minus tax, etc., or your commission will be donated to one of the charities you select from the list.
All you have to do is add a link, a text link is fine using your affiliate URL. For example, “Website designed in Xara Web Designer.” Easy way to make a
few bucks or to help out a worthy cause.
I hope this tutorial was helpful and that I was able to impart a little knowledge and a few tips and tricks along the way.
I would appreciate your feedback. You can use the link below to e-mail me your comments.
Bill Taylor
Guest Tutor
|